background image

4

It is advisable to plan all aspects of installation in advance of work
beginning, preferably with the house/flat building schematics if
available. Great care should be taken to ensure that all building
regulations are followed. When deciding upon a ceiling placement,
care should be taken to avoid joists, load bearing beams etc

Before cutting ceiling loudspeaker holes it is suggested that the
area is tested for clearance by making an L-shaped probe from
strong wire (eg a coat hanger), drilling a small hole in the target
area, inserting the probe and slowly turning. Any obstructions will
be immediately obvious, and the target area can be moved to a
more suitable position.

When placing the OS165CC V2.0 speakers, thought should be
given to positions which give the best desired sound coverage
throughout a room, while not interfering with existing or planned
light fittings or joists. Also, locate loudspeakers taking into account
location of furnishings for optimal stereo reproduction.

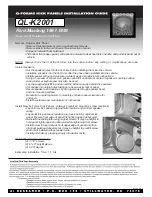
When mounting speakers flush to a ceiling or wall, ensure that
enough depth/clearance is available in the respective cavity. A
clearance of at least 80mm is necessary when mounting an
OSI65CC V2.0.

Remove the round cardboard pad from inside the supplied
template (see below). Use the template to mark the position for the
mounting hole at the selected location. Cut the mounting hole with
a drywall or keyhole saw.

110mm

Min 80mm

Min 10-30mm

INSTALLATION NOTES

OS165CC V2.0

207mm diameter

mounting hole

Use an L-shaped probe
to check available void
space before cutting
loudspeaker holes

Summary of Contents for OS165CC V2.0

Page 1: ...OS165CC V2 0 Ceiling Speakers Installation Guide...

Page 2: ...cal specifications 14 Limited warranty 15 CONTENTS This package should contain the following 2 x OS165CC V2 0 speakers 1 x Installation Guide 1 x cutting template 1 x painting mask If any of the above...

Page 3: ...ch the room s decor Please take the time to read this guide fully as it contains important information and should be retained for future reference 3 INTRODUCTION OS165CC V2 0 Your speakers are an exam...

Page 4: ...ng the OS165CC V2 0 speakers thought should be given to positions which give the best desired sound coverage throughout a room while not interfering with existing or planned light fittings or joists A...

Page 5: ...sk provided when painting the speaker surround to avoid getting paint getting on the speaker cone 3 Spray painting the grille will prevent blocking the grille holes with paint If you do not wish to no...

Page 6: ...of speaker cable at each end 3 Using a wire stripper remove about 10mm of insulation from both ends of each conductor and then twist the strands of each conductor Fig 1 CONNECTING THE OS165CC V2 0 10...

Page 7: ...h red dog leg foot to the LEFT into it s holding slot and then insert the speaker into the mounting hole 3 Using a cross head screwdriver slowly turn each fixing screw clockwise This will move the mou...

Page 8: ...nd registered trademarks are the property of their respective owners Copyright Opus Technologies Ltd 2005 This document contains proprietary information protected by copyright All rights are reserved...

Page 9: ...o confirm that you have an unaltered serial number and or you purchased from a Opus Technologies authorised dealer This Warranty does not cover cosmetic damage or damage due to acts of God accident mi...

Page 10: ...Opus is committed to providing the highest levels of service and support For full details of this product visit the Opus website www opus technologies co uk Part No AP18928 1...

Reviews: