10
5 OPERATING
Destroying disks
1. Place the handle (1) in the fully open position horizontally to the back of the equip-
ment.
2. Slide out the work table (2).
3. Depending on the type of disks being destroyed, install the correct tool to the
Equipment for instance tool (6) for 3.5 “and 2.5” HDD drives, (7) for SSD drives
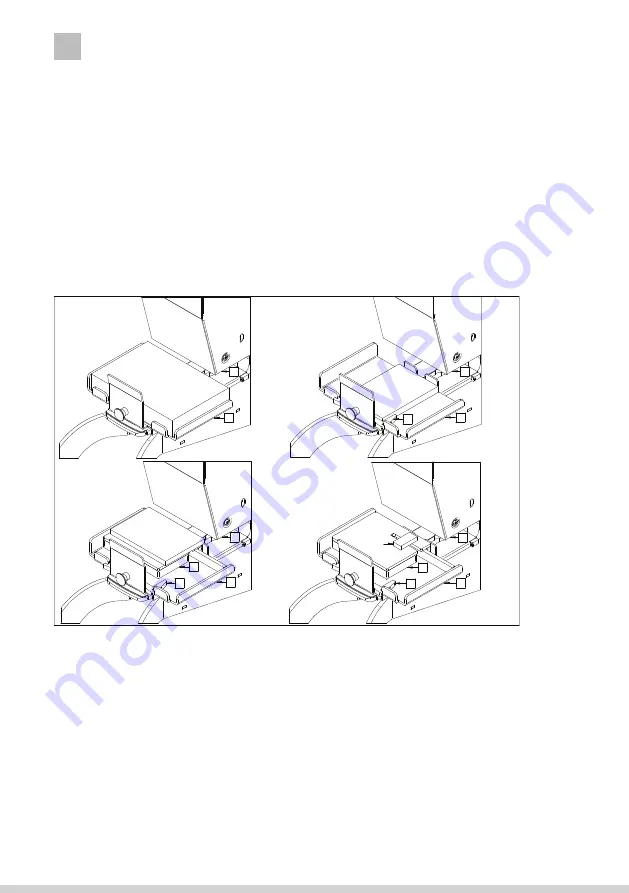
and pendrives. 4. Insert the disk drive a. Place the 3.5 “HDD directly on the work
table (2). b. For 2.5” HDD, install the adapter (4) as shown in the diagrams below,
and then place the disk in the middle between the tabs of the adapter. The disk in
the casing is located on the opposite side of the connector, so the disk
should be placed with the connector slot towards the operator.
c. Use the adapter (4) and (3) for the SSD and pendrive. The discs should be placed
across to the slot.
The diagrams below show the correct position of the disks
5. Slide in the work table (2).
6. Pull the handle (1) down until it pierces the disc drive and stops. If the disc is not pierced/
cut completely, repeat the process again.
7. Put the handle (1) to the fully open position with the handle horizontally at the back,
then remove the damaged disk.
Destroying phones and tablets (without batteries)
1. Place the handle (1) in the fully open position horizontally to the back of the equip ment.
2. Remove the work table (2) from the main body.
3. Place the phone or tablet directly on the main body of the equipment.
4. Pull the handle (1) down until it pierces the phone or tablet and stops. If the phone /
tablet is not pierced completely, repeat the process again.
5. Place the handle (1) in the fully open position horizontally to the back of the equip ment,
then remove the damaged phone / tablet.
27.07.2020
HDD 3,5"
HDD 2,5"
4
4
4
SSD
pendrive
3
3
2
2
2
2
6
6
7
7
Summary of Contents for dataPREDATOR
Page 6: ......


