background image

90

English

Appendices

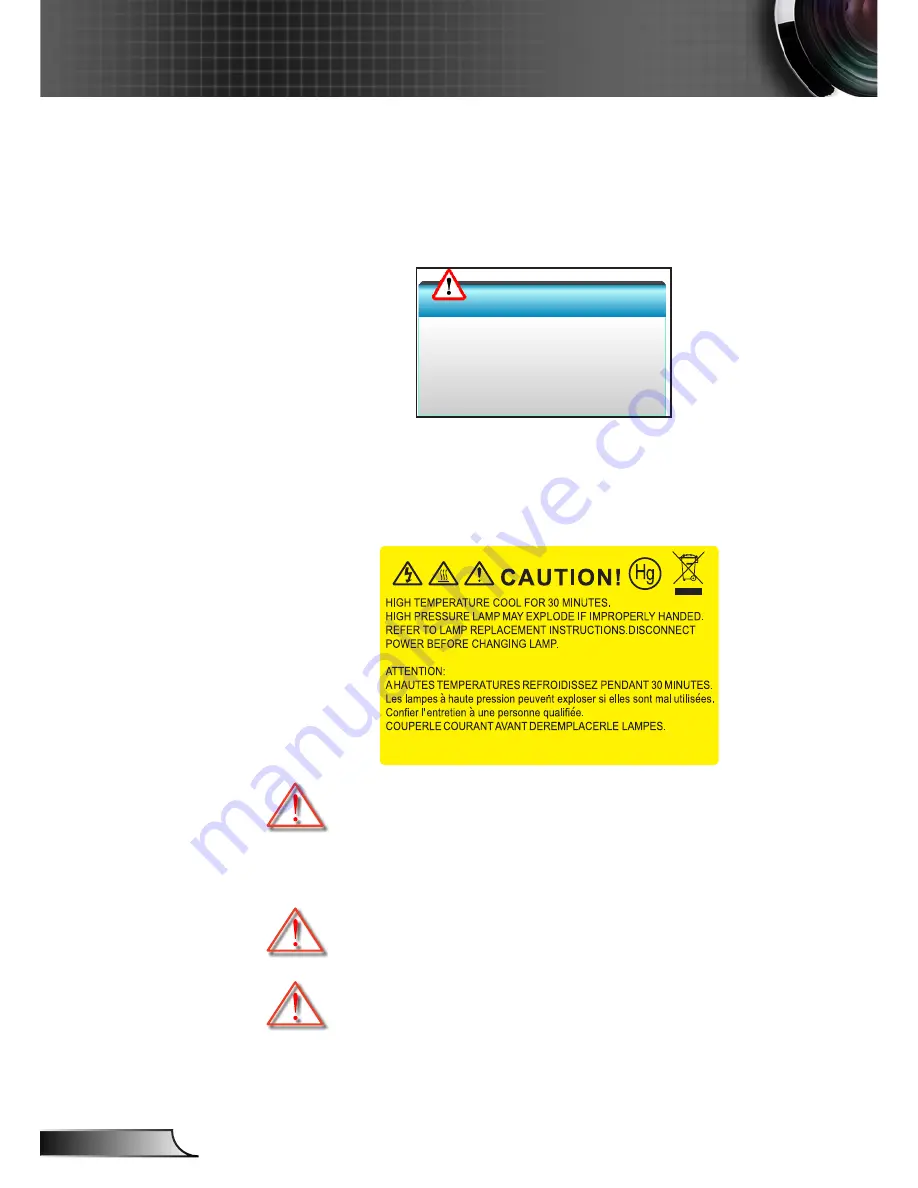
The projector automatically detects the lamp life. When the 
lamp life is nearing the end of use, you will receive a warning 
message.

When you see this message, please contact your local reseller or 
service center to change the lamp as soon as possible. Make sure 
the projector has been cooled down for at least 30 minutes before 
changing the lamp.

  Warning: If ceiling mounted, please use caution when open-

ing the lamp access panel. It is recommended to wear safety 
glasses if changing the bulb when ceiling mounted. “Caution 
must be used to prevent any loose parts from falling out of 
projector.”

  Warning: Lamp compartment is hot! Allow it to cool down 

before changing lamp!

  Warning: To reduce the risk of personal injury, do not drop 

the lamp module or touch the lamp bulb. The bulb may shat-
ter and cause injury if it is dropped.

Replacing the Lamp

Lamp Warning

Lamp life exceeded.

Summary of Contents for EH320UST

Page 1: ...Remote Control 24 On screen Display Menus 27 How to operate 27 Menu Tree 28 IMAGE 35 IMAGE Advanced 38 DISPLAY 43 DISPLAY 3D 48 SETUP 50 SETUP Audio Settings 53 SETUP Security 55 SETUP Network 57 SETU...

Page 2: ...rojector on a crowded coffee table sofa bed etc Do not put the projector in an enclosure such as a book case or a cabinet that restricts air flow 2 Do not use the projector near water or moisture To r...

Page 3: ...may cause electric shock Warning When replacing the lamp please allow the unit to cool down Follow instructions as described on pages 90 91 Warning This projector will detect the life of the lamp itse...

Page 4: ...used for a long period of time Do not Block the slots and openings on the unit provided for ventilation Use abrasive cleaners waxes or solvents to clean the unit Use under the following conditions In...

Page 5: ...e the lamp power use room blinds to reduce ambient light levels Eye Safety Warnings Product Features 1080p 1920x1080 XGA 1024x768 WXGA 1280x800 Native resolution HD compatible 720p and 1080p supported...

Page 6: ...Overview Standard Accessories Freeze Power Switch L R Keystone Volume Page 1 2 Menu 3 3D 4 HDMI 5 VGA 6 Video 7 User1 8 User2 9 User3 Source 0 Resync Page Laser Enter Projector Power Cord Remote CD Us...

Page 7: ...erview Main Unit Do not block projector in out air vents Lamp Cover 1 Control Panel 2 Focus Switch 3 IR Receiver 4 Input Output Connections 5 Lens 6 Power Socket 7 Speaker 8 IR Camera Only for 9 inter...

Page 8: ...8 English Introduction Control Panel 1 3 5 Power 1 Source 2 Lamp Indicator 3 Temperature Temp Indicator 4 IR Receiver 5 2 4 16 17 15 14...

Page 9: ...emote Mouse 8 function VGA Out VGA2 In Connector 9 VGA1 In YPbPr Connector PC Analog Signal Component 10 Video Input HDTV YPbPr Composite Video Input Connector 11 HDMI2 Input Connector 12 HDMI1 Input...

Page 10: ...te 17 Mouse right click 18 Four directional 19 select keys Page 20 Volume 21 3D menu on off 22 VGA 23 Video 24 User 3 25 Numeric keypad 26 0 9 Re sync 27 Some keys may have no function for models whic...

Page 11: ...ns may have different accessories Optional accessory 1 RS 232C cable 2 Remote Mouse USB cable 3 VGA1 In YPbPr cable 4 HDMI cable 5 Audio 2 In cable 6 Power cord 7 Audio Out cable 8 Audio In microphone...

Page 12: ...ssories Optional accessory E62405SP R 5 1 2 Audio output 3D glasses 3 4 6 DVD player Set top box HDTV receiver 1 3 RCA Component cable 2 HDMI cable 3 Audio2 In cable 4 Audio In cable 5 Power cord 6 Au...

Page 13: ...d that y y 3D output is enabled Insert the 3D Blu ray disc into the player press Play y y 3D TV e g SKY 3D DirecTV Contact your TV service provider to enable any 3D channels on y y your channel packag...

Page 14: ...4 English Installation 3D Broadcast 3D Blu ray Disc 3D Console Games SKY HD cable satellite box 3D Blu ray Player PlayStation 3 3D DLP Link Glasses Full 3D 1080p DLP Projector 3D RF Glasses 3D Emitter...

Page 15: ...not appear in 3D please check 3D 5 device set up correctly to send out 3D image or not Or SBS Mode should turn on when input signal is 2D 1080i side by side and repeat previous steps 1 4 It may be ne...

Page 16: ...st time you use the projector you will be asked to select the preferred language and power saving mode 3 Turn on and connect the source that you want to display on the screen computer notebook video p...

Page 17: ...er and will shut down 2 The cooling fans continue to operate for about 10 seconds for cooling cycle and the On Standby LED will flash Blue When the On Standby LED lights solid Red the projector has en...

Page 18: ...lit red and if On Standby indicator flashes red TEMP LED indicator is lit red and if On Standby indicator flashes red This indicates the projector has overheated Under normal conditions the projector...

Page 19: ...d with elevator feet for adjusting the image height 1 Locate the adjustable foot you wish to modify on the underside of the projector 2 Rotate the adjustable ring clockwise to raise the projector or c...

Page 20: ...es WXGA The projector will focus at distances from 1 59 to 2 15 feet 0 49 to 0 66 meters counted from the center of lens Standard throw series 1080p The projector will focus at distance from 1 46 to 1...

Page 21: ...the lens to the bottom of the projector c Distance between the wall projection surface to the back of the projector d Image Diagonal g Distance between the center of the lens and wall projection surfa...

Page 22: ...tween the wall projection surface and the front of the projec tor m Distance from top of projector to mounting hole m inch m inch m feet m 0 172 0 0631 0 232 85 72 1 1 83 45 0 1 14 1 59 0 49 0 5419 0...

Page 23: ...trol Panel POWER Refer to the Power On Off the Projector section on pages 16 17 SOURCE Press to select an input signal Lamp LED Indicate the projector s lamp status Temp LED Indicate the projector s t...

Page 24: ...keys Use to select items or make adjustments to your selection Enter Confirm your item selection Page Press to page down Laser Use as laser pointer Page Press to page up Keystone Press to adjust imag...

Page 25: ...number 6 User1 7 User2 8 User3 9 User defined keys Use as numeric keypad numbers 7 8 and 9 accordingly Source Press to select an input signal Brightness mode 0 Press to automatically adjust the pictu...

Page 26: ...and new batteries Mixing old and new batteries can shorten the life of new batteries or cause chemical leakage in old batteries Remove batteries as soon as they are worn out Chemicals that leak from b...

Page 27: ...ile making a selection on a particular page press or Enter key to enter sub menu 3 Use keys to select the desired item in the sub menu and then press or Enter key to view further settings Adjust the s...

Page 28: ...ction 0 10 BrilliantColor 1 10 Gamma Film Graphic 1 8 2 0 2 2 2 6 Blackboard DICOM SIM 3D All gamma could be selected for all display modes Color Temp Standard Cool Cold Color Space Not HDMI Input Aut...

Page 29: ...e for CMS settings Exit Exit Reset Yes No To reset current source with current display mode for image settings DISPLAY Format 4 3 Auto 16 9 16 10 WXGA LBX Native Auto Default is Auto Zoom 5 25 Edge Ma...

Page 30: ...tsch Fran ais Italiano Espa ol Portugu s Polski Nederlands Svenska Norsk Dansk Suomi Magyar e tina T rk e Farsi Romanian Slovakian English Projection Front Desktop Front Ceiling Rear Desktop Front Cei...

Page 31: ...Exit Signal RGB Frequency 5 5 Depends on signal Phase 0 63 H Position 5 5 V Position 5 5 Automatic Enable Disable Exit Signal Video White Level 50 50 Black Level 50 50 Exit Projector ID 00 99 Auto Set...

Page 32: ...On Off On Extron On Off On PJ Link On Off On AMX Device Discovery On Off On Telnet On Off On Exit OPTIONS Input Source HDMI 1 HDMI 2 VGA 1 VGA 2 Video When no signal input user still could do selecti...

Page 33: ...Settings Zoom Freeze HDMI2 User 2 HDMI2 VGA2 Test Pattern LAN Brightness Contrast Sleep Timer Color Matching Color Temp Gamma Source Lock Projection Lamp Settings Zoom Freeze VGA2 User 3 HDMI2 VGA2 Te...

Page 34: ...Single Item in the Menu Value or Default Notes OPTIONS Reset Current All The definition of Current To reset all OSD settings to be default for current source and current timing The definition of All T...

Page 35: ...ettings Blackboard This mode should be selected to achieve optimum color settings when projecting onto a blackboard green DICOM SIM This mode can project a monochrome medical image such as an X ray ra...

Page 36: ...ss Adjust the brightness of the image Press the to darken image Press the to lighten the image Brightness Contrast The contrast controls the degree of difference between the light est and darkest part...

Page 37: ...y saturated color Press the to decrease the amount of saturation in the im age Press the to increase the amount of saturation in the im age Color Tint Adjust the color balance of red and green Press t...

Page 38: ...ial setup and fine tuning is completed utilize the Gamma Adjustment steps to optimize your image output Film for home theater Graphics for PC Photo source Blackboard This mode should be selected to ac...

Page 39: ...ge Press the to less enhance the image Brilliant Color RGB Gain Bias This settings allows to configure the brightness gain and contrast bias of an image Press the to decrease a chosen color gain and b...

Page 40: ...hite Reset Exit Yellow Magenta Cyan Red Press the or to select Hue Saturation and Gain Colors Then press the or to decrease or increase the value respectively Red Hue Saturation Gain Exit Cyan Press t...

Page 41: ...and Gain Colors Then press the or to decrease or increase the value respectively Magenta Hue Saturation Gain Exit Blue Press the or to select Hue Saturation and Gain Colors Then press the or to decre...

Page 42: ...ngs for color adjustments Color Space Press the or to select an appropriate color matrix type from the following Non HDMI Input Auto RGB or YUV HDMI Input Auto RGB 0 255 RGB 16 235 or YUV Color Space...

Page 43: ...ling AUTO Automatically selects the appropriate display format Source 480i p 576i p 1080i p 720p 4 3 Scale to 1024 x 768 16 9 Scale to 1024 x 576 Native No scaling will be made the resolution is depen...

Page 44: ...9 display For this type of content you can use LBX mode to fill the image on the 16 9 display If you use an external anamorphic lens this LBX mode also 2 allows you to watch a 2 35 1 content include...

Page 45: ...ut sources like widescreen laptops LBX This format is for non 16x9 letterbox source and for us ers who use external 16x9 lens to display 2 35 1 aspect ratio using full resolution Native This format di...

Page 46: ...rease the edge mask in image Press the to increase the edge mask in image Edge Mask Image Shift Press the into the next menu as below and then press the or or or to select item Image Shift Image Shift...

Page 47: ...47 English User Controls V Keystone Press the or to adjust image distortion vertically and make a squarer image V Keystone Exit Choose Exit to exit the menu...

Page 48: ...3D Mode DLP Link DLP Link Select DLP Link to use optimized settings for DLP Link 3D Glasses refer to page 15 VESA 3D Select VESA 3D to use optimized setting for VESA 3D Glasses refer to page 15 3D 2D...

Page 49: ...atically SBS Display 3D signal in Side by Side format Top and Bottom Display 3D signal in Top and Bottom format Frame Sequential Display 3D signal in Frame Sequential format 3D Sync Invert Press the o...

Page 50: ...50 English User Controls SETUP Exit English SETUP Language Projection Menu Location Audio Settings Sceen Type Security Projector ID Signal RGB Advanced Network Signal Video Advanced Network Exit...

Page 51: ...to be used with a translucent screen Projection Press the or or or key to select the preferred projec tion Projection Exit Front Projection This is the default selection The image is projected straigh...

Page 52: ...choose the screen type from16 10 or 16 9 Projector ID ID definition can be set up by menu range 0 99 and allow user control an individual projector by RS232 Press the to decrease the projector ID num...

Page 53: ...eaker Off On Mute Choose the On to turn mute on Choose the Off to turn mute off Mute Off On Volume Press the to decrease the volume Press the to increase the volume Volume Audio Mic Exit Mute function...

Page 54: ...tor Use this option to reassign any of the Audio Inputs 1 or 2 to the current image source Each Audio input can be assigned to more than one video source Press or to select audio input Audio Input Def...

Page 55: ...thout password verification Security Off On Security Timer Can be select the time Month Day Hour function to set the number of hours the projector can be used Once this time has elapsed you will be re...

Page 56: ...enter to confirm Press Enter to input old password 1 Use number button 2 or on screen numeric keypad to enter cur rent password and then press Enter to confirm Enter new password 4 digits in length us...

Page 57: ...Network LAN Settings Control Settings Exit LAN Settings Loading network configuration Please wait For more information on LAN Settings refer to page 58 59 and 62 69 Control Settings For more informat...

Page 58: ...CP Off On On Projector will obtain an IP address automatically from your network Off To assign IP Subnet Mask Gateway and DNS configuration manually Exiting OSD will automatically apply the entered va...

Page 59: ...ask Display subnet mask number Gateway Gateway Display the default gateway of the network connected to the projector DNS DNS Display DNS number Apply Press and then choose Yes to apply the selection A...

Page 60: ...s active Off The Crestron function is inactive Extron Extron Off On Use this function to select the network function port 2023 On The Extron function is active Off The Extron function is inactive PJ L...

Page 61: ...ction to select the network function port 1023 On The AMX Discovery function is active Off The AMX Discovery function is inactive Telnet Telnet Off On Use this function to select the network function...

Page 62: ...PJLink Crestron is a registered trademark of Crestron Electronics Inc of the United States Extron is a registered trademark of Extron Electronics Inc of the United States AMX is a registered trademark...

Page 63: ...various types of exter nal devices which can be connected to the LAN RJ45 port and remote control the project as well as the supported commands for these external devices please contact the Support S...

Page 64: ...64 English User Controls Right click on the Local Area Connection and select Property 3 In the Properties window select the General tab and select 4 Internet Protocol TCP IP Click Properties 5...

Page 65: ...er getting into LAN Settings input the following connection 9 parameters DHCP Off IP Address 10 10 10 10 Subnet Mask 255 255 255 255 Gateway 0 0 0 0 DNS 0 0 0 0 Press Enter to confirm settings 10 Open...

Page 66: ...66 English User Controls Press Enter 13 The projector is setup for remote management The LAN RJ45 function displays as follows Information Page Main Page...

Page 67: ...67 English User Controls Tool Page Contact IT Helpdesk RS232 by Telnet Function There is alternative RS232 command control way in projector so called RS232 by TELNET for LAN RJ45 interface...

Page 68: ...at Windows Firewall setting is set disabled in case of TELNET function filtering out by PC laptop Start All Programs Accessories Command Prompt 1 Input the command format as follows 2 telnet ttt xxx y...

Page 69: ...et utility directly after TELNET connection ready 5 Limitation 1 for Telnet Control there is less than 50 bytes for successive network payload for Telnet Control application Limitation 2 for Telnet Co...

Page 70: ...ignal timing of the display with the graphic card If the image appears to be unstable or flickers use this function to correct it Press the to decrease the phase value Press the to increase the phase...

Page 71: ...the image appears to flicker vertically Press the to decrease the frequency Press the to increase the frequency H Position Horizontal Position H Position Press the to move the image left Press the to...

Page 72: ...crease the white level Press the to increase the white level Black Level Black Level Adjust the overall black level of the projected image by applying a offset to the input image Press the to decrease...

Page 73: ...startup screen Optoma Optoma logo is displayed on startup screen User User defined background is shown on startup screen Logo Capture Logo Capture Do you want to capture the image Logo Capture Process...

Page 74: ...losed Captioning Off Closed Captioning is a text version of the program sound or other information displayed on the screen If the input signal contains closed captions you can turn on the feature and...

Page 75: ...The projector will only search current input connection Off The projector will search for other signals if the current input signal is lost Source Lock Off On High Altitude When On is selected the fa...

Page 76: ...ad lock function is On the Keypad will be locked however the projector can be operated by the remote control By selecting Off you will be able to unlock the Keypad Keypad Lock Off On Test Pattern Disp...

Page 77: ...l is available Background Color White VGA2 Switch When the VGA2 Switch feature is In then VGA2 port functions as input port If the VGA2 Switch is Out then the port functions as output port for VGA1 VG...

Page 78: ...ose Yes to return the display parameters on this menu to the factory default settings All Choose Yes to return the display parameters on all menus to the factory default settings Reset No Yes Reset Pr...

Page 79: ...life Dynamic Choose Dynamic to dim the lamp power which will be based on brightness level of the content and adjust lamp power consumption between 100 and 30 dynamically The lamp life will be extended...

Page 80: ...o exit the menu Lamp Behavior in different mode and function Brightness Mode Bright Eco Dynamic Eco White Pattern 100 80 100 80 Dimming range N A N A 100 30 80 30 Black Pattern 100 80 30 Sleep mode 30...

Page 81: ...On Signal Power On Choose On to activate Signal Power mode The projector will automatically power on when a signal is detected without pressing the key on the projector Control Panel or on the remote...

Page 82: ...atically power off when the countdown has finished in minutes Sleep Timer min Press the to decrease the timer interval Press the to increase the timer interval Quick Resume On If the projector is acci...

Page 83: ...e next menu and then press the or to select HDMI2 VGA2 Test Pattern LAN Brightness Contrast Sleep Timer Color Matching Color Temp Gamma Source Lock Projec tion Lamp Settings Zoom Freeze USER 3 The def...

Page 84: ...0 hours Filter reminder 1000 hr Press the to decrease the time period Press the to increase the time period Filter Reset Reset the dust filter counter after replacing or cleaning the dust filer Filter...

Page 85: ...e is out of focus Make sure the projection screen is between the required dis tance from the projector refer to pages 19 22 The image is stretched when displaying 16 9 DVD title When you play anamorph...

Page 86: ...ust the pro jection direction Blurry double image Press 3D Format button and switch to Off to avoid normal 2D image is blurry double image Two images side by side format Press 3D Format button and swi...

Page 87: ...projector will not turn on until the lamp module has been replaced To replace the lamp follow the procedures in the Replacing the Lamp section Remote Control Problems If the remote control does not wo...

Page 88: ...andby state Input power cord Red Power on Warm ing Flashing Blue Lamp lighting Blue Power off Cooling Flashing Blue Red cooling fan has turned off Quick Resume 100 secs Flashing Blue Error Over temp F...

Page 89: ...Please 2 Make sure the environment temperature is under 45 degree C If the problem persists in spite of the above Please contact local service centre for repair Fan failed Warning FAN LOCKED The Proj...

Page 90: ...re changing the lamp Warning If ceiling mounted please use caution when open ing the lamp access panel It is recommended to wear safety glasses if changing the bulb when ceiling mounted Caution must b...

Page 91: ...screws on the lamp module 3 7 Lift up the lamp handle 4 and remove the lamp module slowly and carefully 5 To replace the lamp module reverse the previous steps 10 Turn on the projector and reset the...

Page 92: ...llowing to clean the air filter 1 1 2 2 Air Filter Cleaning Procedure 1 Switch off the power to the projector by pressing the button on the remote control or on the Control Panel of the projector 2 Di...

Page 93: ...Hz 1680 x 1050 60Hz 1280 x 720 60Hz 1280 x 720 120Hz 1600 x 1200 60Hz 1080P 1280 x 720 60Hz 1280 x 800 60Hz 1280 x1024 60Hz 1400 x 1050 60Hz 1600 x 1200 60Hz 1440 x 900 60Hz Native timing XGA 1024 x 7...

Page 94: ...1920 x 1080i 50 Hz Side by Side Half 1920 x 1080i 60 Hz Side by Side Half 1920 x 1080p 24 Hz Top and Bottom 1920 x 1080p 24 Hz Frame packing HDMI 1 3 1920 x 1080i 50Hz Side by Side Half While 3D Forma...

Page 95: ...ish Appendices RS232 Pin Assignments RS232 Commands and Protocol Function List RS232 shell is grounded Pin no Spec from projector side 1 N A 2 RXD 3 TXD 4 N A 5 GND 6 N A 7 N A 8 N A 9 N A 1 2 3 4 5 6...

Page 96: ...30 34 20 31 0D Freeze XX04 0 7E 30 30 30 34 20 30 0D Unfreeze 0 2 for backward compatible XX05 1 7E 30 30 30 35 20 31 0D Zoom Plus XX06 1 7E 30 30 30 36 20 31 0D Zoom Minus XX12 1 7E 30 30 31 32 20 3...

Page 97: ...30 50 a 35 30 XX344 n 7E 58 58 33 34 34 20 a 0D Magenta Gain n 50 a 2D 35 30 50 a 35 30 XX345 n 7E 58 58 33 34 35 20 a 0D White R n 50 a 2D 35 30 50 a 35 30 XX346 n 7E 58 58 33 34 36 20 a 0D White G n...

Page 98: ...age Shift n 100 a 2D 31 30 30 100 a 31 30 30 XX66 n 7E 30 30 36 36 20 a 0D V Keystone n 40 a 2D 34 30 40 a 34 30 XX230 1 7E 30 30 32 33 30 20 31 0D 3D Mode DLP Link XX230 3 7E 30 30 32 33 30 20 33 0D...

Page 99: ...dd 00 bb 30 30 30 bb 33 30 hh 00 cc 30 30 24 cc 32 34 XX78 1 7E 30 30 37 38 20 31 0D Security Settings On XX78 0 nnnn 7E 30 30 37 38 20 30 20 a 0D Off 0 2 for backward compatible nnnn 0000 a 7E 30 30...

Page 100: ...Display Mode Lock Off 0 2 for backward compatible XX348 1 7E 30 30 33 34 38 20 31 0D On XX195 0 7E 30 30 31 39 35 20 30 0D Test Pattern None XX195 1 7E 30 30 31 39 35 20 31 0D Grid White XX195 3 7E 30...

Page 101: ...Reset Yes SEND to emulate Remote XX140 10 7E 30 30 31 34 30 20 31 30 0D Up XX140 11 7E 30 30 31 34 30 20 31 31 0D Left XX140 12 7E 30 30 31 34 30 20 31 32 0D Enter for projection MENU XX140 13 7E 30 3...

Page 102: ...etting XX128 1 7E 30 30 31 32 38 20 31 0D Color Temperature Oka a 0 Standard a 1 Cool a 2 Cold XX129 1 7E 30 30 31 32 39 20 31 0D Projection Mode OKn n 0 1 2 3 Front Desktop Rear Desktop Front Ceiling...

Page 103: ...number Okaaaaaaaaaa aaaaaaa a serial number string XX354 1 7E 30 30 33 35 34 20 31 0D Closed Captioning Oka a 0 1 2 off cc1 cc2 XX355 1 7E 30 30 33 35 35 20 31 0D AV Mute Oka a 0 1 Off On XX356 1 7E...

Page 104: ...following specifications Screw type M4 3 Maximum screw length 11mm Minimum screw length 8mm Warning 1 If you buy a ceiling mount from another company please be sure to use the correct screw size Screw...

Page 105: ...94538 USA 510 897 8601 www optomausa com services optoma com Europe 42 Caxton Way The Watford Business Park Watford Hertfordshire WD18 8QZ UK 44 0 1923 691 800 www optoma eu 44 0 1923 691 888 Service...

Page 106: ...eoul 135 815 KOREA 82 2 34430005 Japan 3 25 18 info os worldwide com 0120 380 495 www os worldwide com Taiwan 12F No 213 Sec 3 Beixin Rd 886 2 8911 8600 Xindian Dist New Taipei City 231 886 2 8911 655...

Page 107: ...cate the receiving antenna Increase the separation between the device and receiver Connect the device into an outlet on a circuit different from that to which the receiver is connected Consult the dea...

Page 108: ...ding amendments y y Low Voltage Directive 2006 95 EC y y R TTE Directive 1999 5 EC if product has RF function y y Do not throw this electronic device into the trash when discarding To minimize polluti...

Reviews: