


414
Figure 5-12
1: Fisheye: Click to adjust fisheye installation mode and display mode. See Figure
5-13. Please note this function is for some series only.
2: Digital zoom: Click this button and then left drag the mouse in the zone to zoom in.
right click mouse system restores original status.
3: Local record. When you click local record button, the system begins recording and
this button becomes highlighted. You can go to system folder RecordDownload to
view the recorded file.
4: Snapshot picture. You can snapshot important video. All images are memorized in
system client folder PictureDownload (default).
5: Audio :Turn on or off audio.(It has no relationship with system audio setup )
6: Close video.
5.4.1
Fisheye de-warp
Fisheye de-warp interface is shown as in Figure 5-13.
Figure 5-13
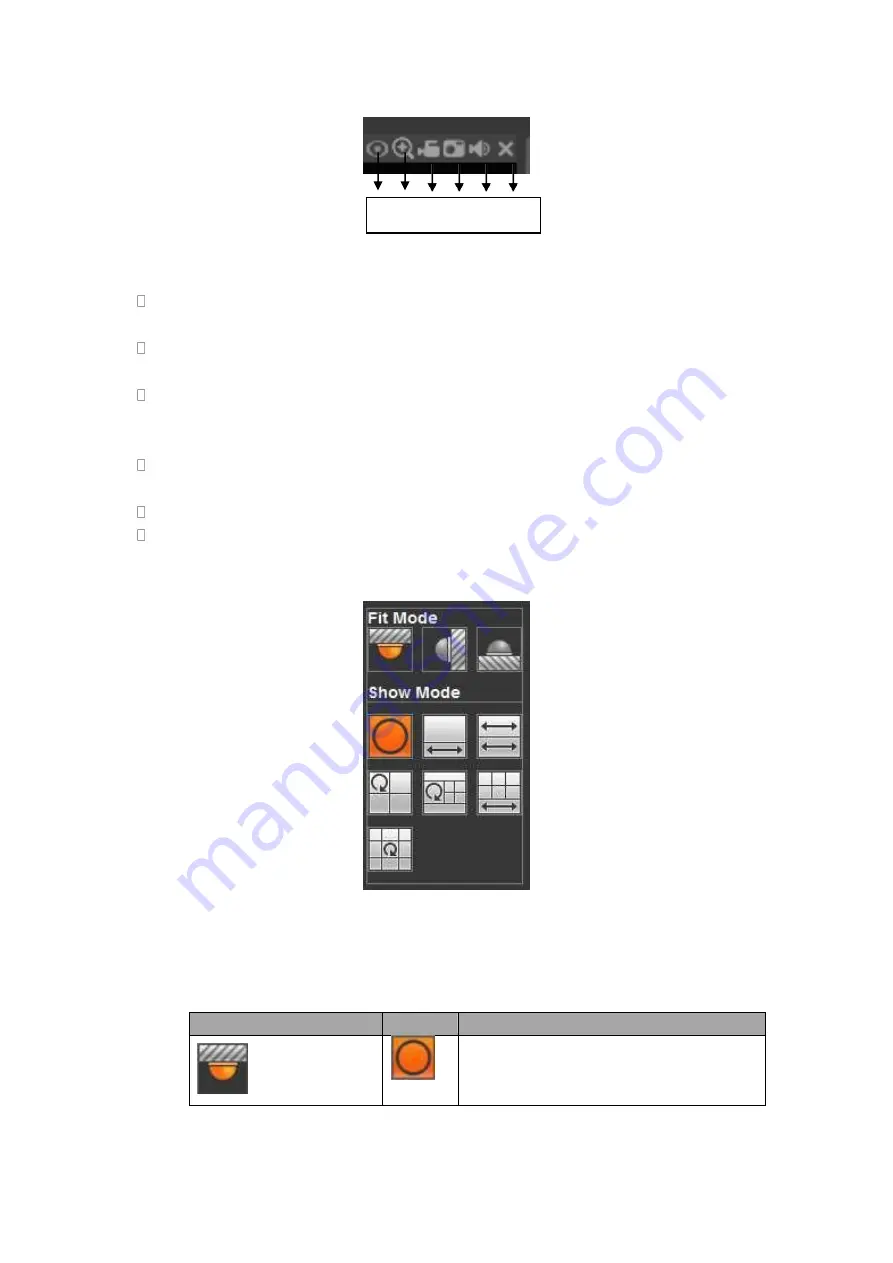
There are three installation modes: ceiling mount/wall mount/ground mount. The
different installations modes have different de-warp modes.
Please refer to the following sheet for detailed information.
Installation modes
Icon
Note
(
Ceiling mount
)
360°panorama original view
1 2 3 4
5
6
Summary of Contents for HDVR161080-Q4
Page 1: ......
Page 123: ...308 Figure 4 73 Figure 4 74 ...
Page 132: ...317 restore original status Figure 4 85 Figure 4 86 4 11 1 3 6 Upgrade Important ...
Page 156: ...341 Figure 4 109 Figure 4 110 ...
Page 157: ...342 Figure 4 111 Figure 4 112 ...
Page 178: ...363 Figure 4 136 Figure 4 137 ...
Page 179: ...364 Figure 4 138 Figure 4 139 ...
Page 182: ...367 Figure 4 142 Figure 4 143 ...
Page 183: ...368 Figure 4 144 Figure 4 145 ...
Page 191: ...376 Figure 4 157 Figure 4 158 ...
Page 223: ...408 Figure 4 198 ...
Page 261: ...446 Figure 5 58 Figure 5 59 ...
Page 275: ...460 Figure 5 75 Figure 5 76 ...
Page 280: ...465 Figure 5 83 Figure 5 84 Please refer to the following sheet for detailed information ...


