background image

4

CONTENTS

Preparation  ........................................................................................................... 5

Connecting Power  ........................................................................................... 5

Using Batteries .......................................................................................... 5
Using AC Power ........................................................................................ 6
Using Vehicle Battery Power ..................................................................... 6

Using the Sheet Music Stand  .......................................................................... 7

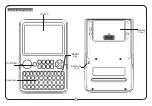
Control Locations  ................................................................................................ 8

Operation  .............................................................................................................. 9

Basic Operation  ............................................................................................... 9
Playing the Demonstration Tune  ..................................................................... 9
Using the Preset Sounds  ............................................................................... 10

Selecting/Playing a Preset Sound ........................................................... 10
Playing KEYBOARD SPLIT Sounds  .......................................................  11
Playing Drum/Bass Split Sounds  ............................................................  11

Using the Preset Auto-Rhythms  ....................................................................  11

Selecting/Playing an Auto-Rhythm  ......................................................... 12
Using FILL-IN  .......................................................................................... 12

Using Auto Accompaniment  .......................................................................... 13

Easy Random Fingering  ......................................................................... 13
Standard Fingering  ................................................................................. 15

Adjusting the Polyphony/Texture  ................................................................... 16

Troubleshooting  ................................................................................................. 18

Care and Maintenance  ....................................................................................... 19

Specifications ..................................................................................................... 20

42-4035.fm  Page 4  Thursday, August 12, 1999  8:05 AM

Summary of Contents for Concertmate 42-4035

Page 1: ...Cat No 42 4035 OWNER S MANUAL Concertmate 690 Please read before using this equipment Portable Electronic Keyboard 42 4035 fm Page 1 Thursday August 12 1999 8 05 AM ...

Page 2: ...create or play almost any type of music Poly Texture Key lets you adjust the Concertmate 690 s polyphony harmony and sound texture 100 Different Sounds let you set your Concertmate 690 to sound like anything from a banjo to an insect when you press a key 100 Preset Auto Rhythms give you a steady beat for almost any style of music from rock to waltz Auto Accompaniment lets you au tomatically play a...

Page 3: ...le pro tection against radio and TV interfer ence in a residential area However your Concertmate 690 might cause TV or radio interference even when it is operating properly To eliminate inter ference you can try one or more of the following corrective measures Increase the distance between the Concertmate 690 and the radio or TV Use outlets on different electrical circuits for the Concertmate 690 ...

Page 4: ...the Preset Sounds 10 Selecting Playing a Preset Sound 10 Playing KEYBOARD SPLIT Sounds 11 Playing Drum Bass Split Sounds 11 Using the Preset Auto Rhythms 11 Selecting Playing an Auto Rhythm 12 Using FILL IN 12 Using Auto Accompaniment 13 Easy Random Fingering 13 Standard Fingering 15 Adjusting the Polyphony Texture 16 Troubleshooting 18 Care and Maintenance 19 Specifications 20 42 4035 fm Page 4 T...

Page 5: ...t types of batteries stan dard alkaline or rechargeable or rechargeable batteries of differ ent capacities 1 Set MODE to POWER OFF 2 Press the tab on the battery com partment cover in the direction of the arrow then pull up to remove the cover 3 Put the batteries into the compart ment as indicated by the polarity symbols and marked beside the compartment 4 Replace the cover Notes If you do not pla...

Page 6: ...the AC adapter s barrel plug into the DC 9V jack on the rear of the Concertmate 690 3 Plug the adapter into a standard AC outlet Using Vehicle Battery Power You can power your Concertmate 690 from your vehicle s cigarette lighter socket using a DC adapter such as Cat No 270 1562 Cautions You must use a DC adapter that supplies 9 volts of DC power and delivers at least 500 milliamps Its center tip ...

Page 7: ...h to 9 volts 4 Insert the adapter s barrel plug into the Concertmate 690 s DC 9V jack 5 Plug the other end of the adapter into the vehicle s cigarette lighter socket USING THE SHEET MUSIC STAND To easily view sheet music while play ing your Concertmate 690 insert the supplied sheet music stand into the holes on the top rear panel 42 4035 fm Page 7 Thursday August 12 1999 8 05 AM ...

Page 8: ...RHYTHMS List 100 SOUNDS List MODE Selector VOLUME Control FILL IN Button START STOP Button TEMPO Buttons SOUND RHYTHM SELECT Buttons SOUND POLY TEXTURE Button DEMO Button RHYTHM Button 42 4035 fm Page 8 Thursday August 12 1999 8 05 AM ...

Page 9: ...nt sound see Using the Preset Sounds on Page 10 4 Adjust VOLUME to the desired set ting Slide it toward MAX to in crease the volume or toward MIN to decrease the volume 5 To turn off the Concertmate 690 set MODE to POWER OFF The MODE indicator turns off PLAYING THE DEMONSTRATION TUNE Your Concertmate 690 can play a pre programmed demonstration tune that showcases its many sounds To play the demons...

Page 10: ...the two digit number on the SOUND RHYTHM SELECT keypad For ex ample to select OBOE No 47 press 4 then 7 100 SOUNDS List 5 Play the keyboard to hear the se lected sound 6 Adjust VOLUME to the desired level 7 To select a different sound repeat Step 4 Or if the second digit of the current sound is the same as the first digit of the new sound simply enter the second digit of the new sound on the SOUND...

Page 11: ...e keyboard and a piano sound on the right To play a KEYBOARD SPLIT sound follow the steps in Selecting Playing a Preset Sound on Page 10 and select any sound from Nos 90 99 KEYBOARD SPLIT Sounds Playing Drum Bass Split Sounds The preset sounds SLAP BASS No 29 ELEC BASS No 30 WOOD BASS No 31 SNARE BASS No 32 and SYNTH BASS No 69 let you play drum sounds on the key board s lowest octave and bass sou...

Page 12: ... SELECT Keypad 9 To select a different rhythm re peat Step 4 Or if the second digit of the current rhythm is the same as the first digit of the new rhythm simply enter the second digit of the new rhythm on the SOUND RHYTHM SELECT keypad 10 To stop an auto rhythm press START STOP again Using FILL IN The Concertmate 690 lets you insert a variation into any of its 100 preset auto rhythms While an aut...

Page 13: ...m to se lect the chord Use the rest of the keys to play the melody Accompaniment Keys Raised Key Labels Easy Random Fingering The easy random fingering method lets beginning keyboard players easily select and play a chord The number of accompaniment keys you press determines the type of chord played The following chart shows the type of chord that plays when you press one two three or four accom p...

Page 14: ...the desired interval begin the ac companiment by pressing the ac companiment key s 5 Adjust TEMPO and VOLUME to the desired levels 6 To change chords without inter rupting the rhythm simply press the auto accompaniment key s required to form the new chord 7 To stop auto accompaniment and auto rhythm press START STOP Note After you press the auto accompaniment key s the key board plays until you pr...

Page 15: ...M7 chord omit the finger positions shown in parentheses on the keys The diagram above shows only one possible finger position for each chord It is possible to play a chord using several different finger positions For example the following three finger positions produce the same C chord Major M Major Flat Minor m Dominant Suspended 4th 7sus4 Minor 7th m7 Major 9th 9 Major 7th M7 Minor Half Diminish...

Page 16: ... rhythm simply press the auto accompaniment keys re quired to form the new chord 7 To stop auto accompaniment and auto rhythm press START STOP Note After you press the auto ac companiment keys the Concert mate 690 plays until you press other keys to play a different chord or until you press START STOP ADJUSTING THE POLYPHONY TEXTURE The Concertmate 690 lets you adjust the polyphony and texture of ...

Page 17: ... between the high and low level po lyphony texture settings at low MIN volume with certain sound selections If this oc curs adjust VOLUME slightly toward MAX and try again Selected Feature Number of Notes You Can Play At High Level Polyphony Texture At Low Level Polyphony Texture Preset Sound Only 8 4 Auto Rhythm 6 3 Auto Accompaniment 2 1 42 4035 fm Page 17 Thursday August 12 1999 8 05 AM ...

Page 18: ...he power supply Are batteries installed correctly Are batteries fresh Is the adapter connected properly No accompaniment when accompaniment keys are pressed MODE is set to FINGERED and you pressed less than three keys for a chord Press at least three accom paniment keys Occasional interfer ence Refrigerators washing machines and similar electric appliances are causing interference Use an AC outlet...

Page 19: ...Handle the Concertmate 690 gently and carefully Dropping it can damage circuit boards and cases and can cause the Concertmate 690 to work improperly Keep the Concertmate 690 away from dust and dirt which can cause premature wear of parts Wipe the Concertmate 690 with a damp cloth occasionally to keep it looking new Do not use harsh chemicals cleaning solvents or strong detergents to clean your Con...

Page 20: ...l AC Adapter Cat No 273 1656 DC 6 AA Alkaline Batteries Battery Life About 6 Hours Cat No 23 552 Vehicle Battery With Optional DC Adapter Cat No 270 1562 Power Consumption 6 0 W Dimensions HWD 311 16 349 16 127 8 Inches 9 4 87 7 32 7 cm Weight Without Batteries 6 lbs 11 oz 3 05 kg Included Accessory Sheet Music Stand Specifications are typical individual units might vary Specifications are subject...

Page 21: ...21 NOTES 42 4035 fm Page 21 Thursday August 12 1999 8 05 AM ...

Page 22: ...22 42 4035 fm Page 22 Thursday August 12 1999 8 05 AM ...

Page 23: ...23 42 4035 fm Page 23 Thursday August 12 1999 8 05 AM ...

Page 24: ...arranty period take the product and the RadioShack sales receipt as proof of purchase date to any RadioShack store RadioShack will at its option un less otherwise provided by law a correct the defect by product repair without charge for parts and labor b replace the product with one of the same or similar design or c refund the purchase price All replaced parts and products and products on which a...

Reviews: