background image

81

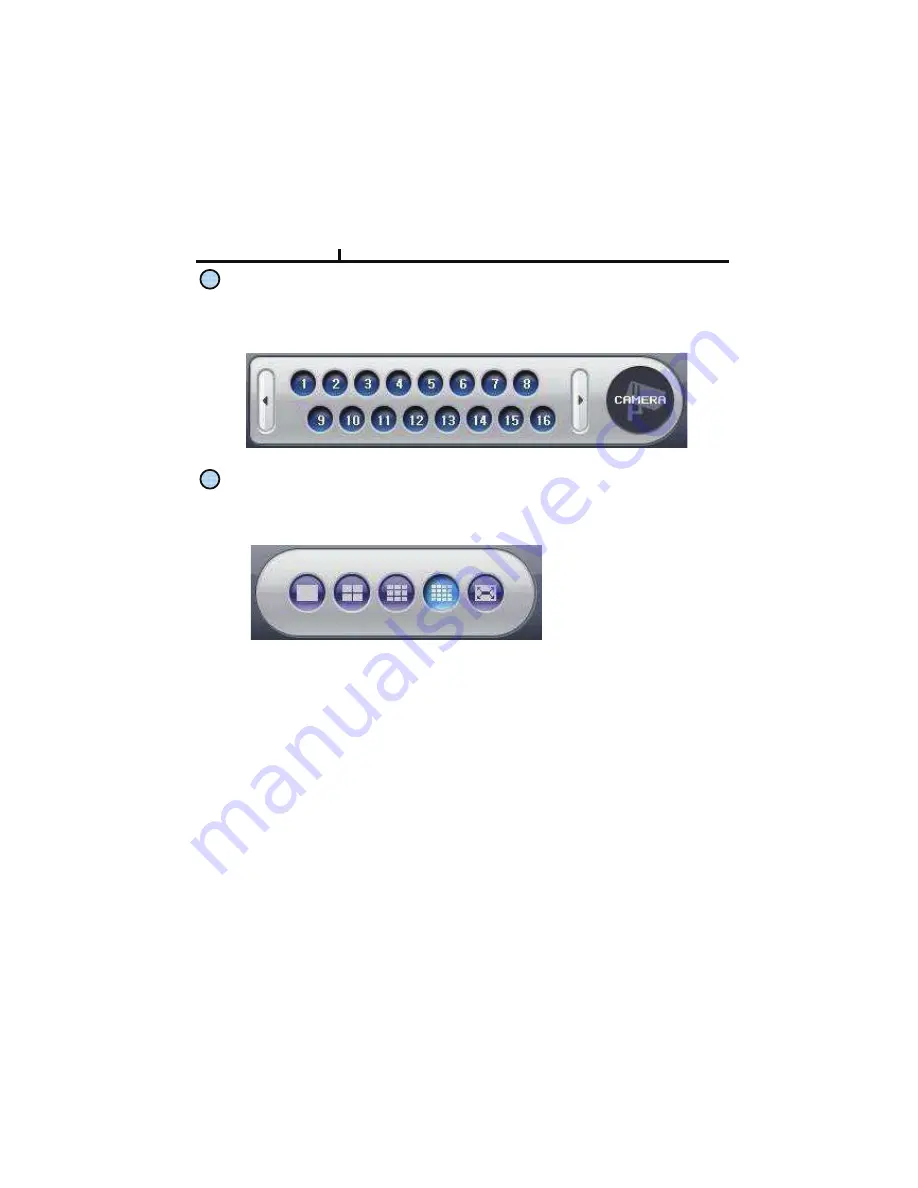
Channel Button

Moves to the channel selected and it has the same function as double click the left mouse 
button on the selected channel.

Layout Modify Button

Screen Division Button : Selects desirable screen division. 
Whole Screen : All buttons are hidden and the screen displays full.


Left double click of mouse returns to the previous screen from whole screen.

Chapter VI 

Summary of Contents for LX-1600

Page 1: ......

Page 2: ...not open the cover of the product at your convenience or do not insert inductive stick into the ventilation hole Especially SMPS is open so only professional technicians are allowed to work on Failur...

Page 3: ...he box at the clean and even place And read operation manual thoroughly before you install Check the items supplied with your DVR system Refer to the picture above and contact your dealer if you find...

Page 4: ...it login 23 Menu Display 24 Menu Spot PTZ Alarm 25 Menu Status 26 Menu Record Camera Color OSD 27 Menu Backup 28 Menu Mute Logout 29 Chapter IV Setup System 31 System Information 32 System Date Time 3...

Page 5: ...u Remote setup Sensor link 74 Menu Remote setup Video loss 75 Menu Remote setup Video loss link 76 Menu Remote setup System 77 Menu Remote setup Disk error S M A R T 78 Menu Remote setup Disk error S...

Page 6: ...6 Chapter I System Overview...

Page 7: ...LVSOD UDPH 176 ISV ISV ISV 3 ISV ISV ISV 5HFRUG UDPH 176 ISV ISV ISV 3 ISV ISV ISV 3OD EDFN UDPH 176 ISV ISV ISV 3 ISV ISV ISV 26 PEHGGHG LQX 1HWZRUN DVH7 86 86 URQW 5HDU FK 0D 6 7 K 0D RQVROH 56 37...

Page 8: ...upported Event Panic Schedule record optimized record mode supported Diversified search by Time Calendar Event supported Diversified backup by USB2 0 and DVD RW supported Convenient backup by AVI Mini...

Page 9: ...9 Chapter II H W Description...

Page 10: ...10 1 Front View 2 Side View 3 Top View Chapter II System appearance...

Page 11: ...t Network Port USB Port RS232 Port VGA Port FAN NT PAL switch Audio In Out RS485 Power switch 1 4CH Rear Panel 2 9CH Rear Panel Power switch Video Output Video Input 9CH Audio In Out Power Input DC12V...

Page 12: ...DVR rear panel Chapter II 3 16CH Rear Panel Power switch Video Output Video Input 9CH Audio In Out Power Input DC12V NT PAL switch VGA Port Spot Output USB Port Network Port RS232 Port Alarm In Out RS...

Page 13: ...e to BNC connector via cable CVBS SPOT OUT It connects normal CCTV CRT monitor VGA It connects PC monitor or LCD monitor not supporting DVI 3 Audio Connection 4 Network Connection It connects audio so...

Page 14: ...RS485 Through Half duplex serial communication remote controlling is available using control system as external device control keyboard In addition it is available to control PTZ Pan Tilt Zoom camera...

Page 15: ...ch 8 NTSC PAL Shift Switch NTSC PAL Shift Switch 9 Power Connection The factory reset switch located at the left side of NTSC PAL switch is used to return to factory default setup values When you need...

Page 16: ...umber Button It is used for Changing to 1CH screen direct input in set up Operating Button It is used for operating function as Setup Backup etc in DVR ESC Button It is used for exit from menu mode wi...

Page 17: ...is off E It enables to communicate the same ID DVR F LED is ON every time data is transferred Remote controller Description Optional Chapter II ICON HOT KEY LATEST SEARCH TO LIVE FIRST SEARCH LAST SE...

Page 18: ...D System ODD CD RW DVD RW Device IDE Connector IDE Connector HDD x 1 HDD 1 PRIMARY MASTER JF1 SYSTEM SECONDARY SLAVE JF 4 HDD x 2 HDD 1 PRIMARY MASTER JF 1 SYSTEM HDD 2 PRIMARY SLAVE JF 1 ODD MAIN BOA...

Page 19: ...DD Position System ODD CD RW DVD RW Device HDD x 1 HDD 1 SATA 1 SYSTEM SATA 4 HDD x 2 HDD 1 SATA 1 SYSTEM HDD 2 SATA 2 1 ODD CD RW DVD RW devices should be installed as SATA 4 2 HDD for system needs t...

Page 20: ...he rear power button It takes about 2minutes to boot It may take more when network cable isn t connected System Shutdown Select SETUP SYSTEM SYSTEM SHUTDOWN to shutdown system at login status Press OK...

Page 21: ...21 Chapter III Monitoring Screen...

Page 22: ...n Left Up Camera Name P Pan tilt A Audio Right Up Record mode Blue Normal Red Event Motion status Central Video Loss Hidden Camera Status Bar DVR status Indication Backup HDD usage Current Time SEQUEN...

Page 23: ...u key of remote controller in monitoring status then ETC select group EDIT 2 When box of orange color shows up on No 1 CH by using key of up down left right move to desired channel to switch 3 Enter c...

Page 24: ...only Select Zoom Press zoom button and locate the box to magnify using direction keys Move Zoom It can be moved using direction key after press Enter Zoom screen may provide low quality or be shaken...

Page 25: ...ing and moving functions are supported Each function can be different from each PTZ protocol ALARM Control Alarm output function SPOT 1 spot monitors are supported and sequence fix mode can be selecte...

Page 26: ...current recording status EVENT Displays current event information motion alarm DISK Displays current Disk information NETWORK Displays current network information Also displays current connected clien...

Page 27: ...emergency situation Press SETUP RECORD EVENT RECORD FPS QUALITY SETUP Select to enter into SETUP menu CAMERA COLOR Changes camera screen color OSD Changes OSD On Screen Display s position SEARCH Sele...

Page 28: ...8 BACKUP Select to backup recorded data 1 Backup Device Search 2 Select data to backup 3 Calculate data size 4 Warning when data size is over 5 Make Image after pressing OK 6 Burning to CD Chapter III...

Page 29: ...29 MUTE Sound off LOGOUT Press SETUP SYSTEM USER Chapter III...

Page 30: ...30 Chapter IV SETUP...

Page 31: ...31 SYSTEM Set up various system related items INFORMATION DATE TIME DISK USER LOG LOGOUT SYSTEM SHUTDOWN SETUP SCREEN Chapter IV...

Page 32: ...rsion info With UPGRADE button you can upgrade the newest S W version INFORMATION Contact manufacturer or distributors for more Upgraded version CONFIGURATION IMPORT You can read setup values saved in...

Page 33: ...SYN Synchronize time with internet time server Set the GMT on the DATE TIME list and Adjust TIME SYNC HOLIDAY In the schedule record setup it automatically converts normal date to holiday schedule It...

Page 34: ...ll connected HDD disks When you select info column of connected DISK separately You can format DISK one by one One of DISKS should be a system disk for recording system logs other TEMP file issuing pu...

Page 35: ...Delete account with this button USER ADD Possible to add user account according to authority CONFIRM LOGIN When YES selected LOGIN needs to be confirmed every time to enter into setup system menu AUT...

Page 36: ...all log info UP DOWN button Move to next previous log info page by page Move to first part of LOG info Move to Last part of LOG info LOGOUT LOGOUT function when exiting set up SYSTEM SHUTDOWN SYSTEM e...

Page 37: ...37 NETWORK Set up various NETWORK items LAN DDNS E MAIL CALLBACK NETWORK Chapter IV...

Page 38: ...Need to be set manually MAX CONNECTION Shows maximum numbers of Connectable users Up to 4 DHCP TYPE Select during automatic DHCP IP User set DNS only under the situation of DHCP server operating mode...

Page 39: ...Recommended to use EZDDNS Server rather than DYNDNS as DYNDNS is not optimized The system In order to use DDNS service Account HOSTNAME should be registered in the server first HOSTNAME User name of I...

Page 40: ...ansmission ALL event information is sent to admin s E mails SMTP SERVER Write the MAIL sending SMTP server name AUTH ENABLE Check when you need account authority ID PASSWORD Input account password Cha...

Page 41: ...ALLBACK ENABLE Check to use CALLBACK function All event or specific information are sent to Agent Program which is installed on P C CALLBACK ADD Register IP address of P C for callback function Chapte...

Page 42: ...42 DEVICE DEVICE These are item lists for the control of CAMERA ALARM CAMERA ALARM DISPLAY MAIN MONITOR SPOT MONITOR MISCELLANEOUS Chapter IV...

Page 43: ...NABLE Check if you want to use PTZ function PTZ PROTOCOL Select PTZ PROTOCOL Various of protocol information including PELCO D are implemented If you can not find one please contact manufacturer PTZ A...

Page 44: ...hanges connected ALARM names ALARM TYPE Select specific ALARM TYPE NORMAL OPEN NORMAL CLOSE MAIN MONITOR Set up SEQUENCE EVENT POPUP of main monitor SEQUENCE Set up the screen switching times EVENT PO...

Page 45: ...he EVENT STATUS INFORMATION Shows various status of OSD SPOT MONITOR Set up functions of SPOT MONITOR SPOT NUMBER Select SPOT output numbers SPOT SEQUENCE ENABLE Select SPOT switching channel FIXED CA...

Page 46: ...trol of remote controller key related functions REMOTE CONTROLLER ID Designate remote control ID It is useful when many DVRs installed at the same place KEY TONE ENABLE Select button volume on the fro...

Page 47: ...47 RECORD These are control lists of recording related functions RECORD POLICY RECORD RECORD Chapter IV...

Page 48: ...e per each camera RESOLUTION Set up resolution 360 240 CIF 720 240 HALF D1 720 480 D1 RECORD MODE Set up record type NORMAL EVENT is focused record mode NORMAL EVENT RECORD FPS Set up how many frames...

Page 49: ...49 EVENT EVENT This is for the control of all event items such as MOTION SENSOR MOTION SENSOR VIDEO LOSS SYSTEM Chapter IV...

Page 50: ...g up list for how to act after EVENT POPUP CAMERA DWELL Set popup channel time ALARM BUZZER DWELL Set alarm buzzer time E MAIL Select EVENT info to be sent by e mail CALLBACK Select EVENT info to be s...

Page 51: ...ecting camera Pre post record ACTION Setting up list for how to act after EVENT POPUP CAMERA DWELL Set popup channel time ALARM BUZZER DWELL Set alarm buzzer time E MAIL Select EVENT info to be sent b...

Page 52: ...n or not Chapter IV ACTION Setting up list for how to act after EVENT POPUP CAMERA DWELL Set popup channel time ALARM BUZZER DWELL Set alarm buzzer time E MAIL Select EVENT info to be sent by e mail C...

Page 53: ...n HDD is full of record S M A R T Enables the system to prevent possible malfunction of HDD by interfacing between system and HDD Chapter IV If you found BAD HDD mark in the S M A R T function please...

Page 54: ...54 Chapter V SEARCH...

Page 55: ...Display Status Playback Icon Pause Playback Multiple Playback 1 2 1 2 3 3 SEARCH It randomly shows the first searched record file when it goes to SEARCH MODE This type is the same as on event search s...

Page 56: ...Select screen division mode 1 4 spirit CALENDAR SEARCH Select date hour minutes seconds in turn on calendar search When you click MINUTE you can find specific record status as right below SEARCH MENU...

Page 57: ...tart end time MOTION SENSOR VIDEO LOSS Selectable per each camera Chapter V It may not be the same channel image as shown on EVENT LIST because it shows the first display image recorded at that time z...

Page 58: ...ting time during back up It is useful to set a bookmark as starting time while search the data Chapter V PLAYBACK USER INERFACE Playback buttons appears when locate the mouse pointer at the bottom of...

Page 59: ...the data of internal DISK BACKUP DEVICE Search backup device Select when you play the backup data If there are various back up devices you can select a specific one DEVICE Search internal or external...

Page 60: ...60 Chapter VI Client program...

Page 61: ...n memory 512M recommend 3 WINDOWS O S WIN 2000 XP Vista 32bit 4 32MB VGA card supports RGB ATI series recommend 5 At least 10Mbps network speed Max 100Mbps support Environment conditions for Remote Pr...

Page 62: ...DVR Type the Host name of REAL IP or DDNS 1 Connection information and Button Shows DVR s name IP address and connection status DVR connection button DVR Connection Window Add Modify Delete Enter IP...

Page 63: ...ssigned with REAL IP Or DDNS service ID Hostname of Dynamic Domain Name Server Service Port Set this the same as the service port assigned to DVR What is service port Function to make the virtual IP a...

Page 64: ...starts It always shows 1024 x768 when you check Program Setup Window Above setting value will apply after restart of the program Data Save Place Sets ups basic path of AVI file to save AVI Saving time...

Page 65: ...press the Alarm control button Shows the connected DVR HDD status You can check temperature and status at real time Recording Status Shows and check the recording status 4 REMOTE SEARCH Execution and...

Page 66: ...itle Item to revise type the camera name PTZ address Item to assign PAN TILT address per camera Name Item to check PTZ Camera s model name ID Item to select PTZ address per camera Port bit rate Item t...

Page 67: ...HECAAIJ 3G A B CAA Enable 8 A B E AC J KLMN G BG BO F E LMN GC BGCMM AD Title Item to type Alarm s name Type Item to select Alarm s type Normal Open Type of alarm open in general situation Normal Clo...

Page 68: ...ct normal record frame Normal Record Quality Item to select normal record quality Event Record Frame Item to select Event Motion Sensor Video Loss record speed Event Record Quality Item to select Even...

Page 69: ...in operating the relevant camera channel First select the item you need among Normal time Event and Normal time Event Then drag mouse from the wanted position on time line To edit schedule record you...

Page 70: ...licy Item to select record policy Remote Set Up Record Policy Overwrite When HDD capacity is almost consumed It erases old data and record new Single Record To stop recording on 100 of HDD capacity 1...

Page 71: ...GC BGCMM AD Sensitivity Adjusts the sensitivity in motion detection There are 5 steps and as the number increase it gets more sensitive Area Item to select motion area Area is selected when drag the...

Page 72: ...linked when motion Is detected Multiple selection possible Alarm Time Sets Alarm output time Max 30 second Buzzer Time Sets buzzer output time in DVR Max 30 second Mail When motion is detected the log...

Page 73: ...hoose select all Enable Selects to use sensor Removing the check stop using relevant sensor Title Item to select sensor s name Type Item to select sensor type Normal Open Type of Alarm open in general...

Page 74: ...Q O QG M G T FEF LMN L 8 Q O QG M G T FEF LMN L 8 Q O QG M G T FEF LMN L U U U U M 5 M 5 M 5 M 5 Popup Time A B T FEF L Link Alarm A B AC S ALMO R QG M M L R B RD 7EA LFA A B L M F LSA 7EA LFA A B L M...

Page 75: ...75 Remote Set Up Video Loss Camera No 8 A B BC C D EF CAA G BC C HECAAIJ 3G A B CAA Enable Selects to use Video Loss 1 2 3 1 Chapter VI...

Page 76: ...tected on the relevant channel It works when the Popup setting is Yes on DVR Popup Time Selects Popup time Link Alarm Selects Alarm to be linked when video loss Multiple selection possible Alarm Time...

Page 77: ...emote Set Up Disk Full Link Action Popup Camera Not available as of now Popup Time Not available as of now Link Alarm Selects which Alarm to be linked when all installed HDD disks are full Multiple se...

Page 78: ...moment Popup Time Not available at this moment Link Alarm Selects Alarm to be linked when HDD error Multiple selection possible Alarm Time Sets Alarm output time Max 30 second Buzzer Time Sets buzzer...

Page 79: ...election possible AC L AC E FE L 27CV W B MR6 9EXX L 9EXX E FE L 27CV W B MR6 Mail When smart related problem occurs the log is sent to the selected e mail Call Back When problem occurs the log is sen...

Page 80: ...ops audio transmission Sound volume control gauge Right Mouse Click Action When the right button is clicked on Remote Live the following menu below appears and the following functions can be used Whol...

Page 81: ...le click the left mouse button on the selected channel Layout Modify Button Screen Division Button Selects desirable screen division Whole Screen All buttons are hidden and the screen displays full Le...

Page 82: ...tton to move top bottom left right Channel Indication Indicate current channel Speed Control Button Button to control moving speed Image Control Button Button to adjust Zoom Focus Iris Pre set move bu...

Page 83: ...ine Display the selected camera Playback Display SECTION Selects section Section is created when Date Time is changed to former times Former Date Time will be kept in section 0 Newly set Date Time wil...

Page 84: ...rch Select events in detail Select the camera to search Start event search Click below Import button to list events Shows current searched event lists Hotkey Play the searched event Click Stop button...

Page 85: ...y searched without closing The Remote Program The linked list s can t be edited while search Backup play button Playback Button Previous Frame Play previous frames reverse direction Next Frame Play ne...

Page 86: ...rightness adjustment button Adjusts the brightness of playing images Contrast adjustment button Adjust the contrast of playing images Sharpness adjustment button Adjust the sharpness of playing images...

Page 87: ...mage Save Saves the searched images as Image File Save JPEG or BMP Storage Information Select start and end time to backup image Backup Camera Select the camera to backup Including Selects audio and e...

Page 88: ...e bottom of the image Image Format JPG format Definition has a little loss due to loss compression method but archiving size is small BMP format Archiving size is a bit big due to no compression but i...

Page 89: ...ion of Media Player to display time date of playing AVI file AVI Save Window Right Mouse Click Action When the right button is clicked the following menu below appears and the following functions can...

Page 90: ...ute selection Pointer Select the minute Selects year month day and hour minute to search the recorded data Year Month Select Button Button to move previous and next month Recorded Date Blue Shows reco...

Page 91: ...up Playback Backup Playback Button Click to backup playback Select the backup data to play Backup playback can play a data of Image file Windows Media Player can play a data of AVI image files 12 Chap...

Page 92: ...mera Name Recorded Time Date Green border line Display the selected camera Search screen 2 Starting End Move to end of record data Move to starting record data Play Progress Bar PLAYER Chapter VI 1 2...

Page 93: ...Forward Fast Rewind 4 Sound volume Control Button Mute Button Stops audio transmission Sound volume control gauge Audio signal is sent only on one full screen 5 Layout Button Layout button Button to s...

Page 94: ...Button Button to call in the back up file Information Shows program information Program Info Window Select the backup data to play Backup playback can play a data of Image file Windows Media Player c...

Page 95: ...95 Chapter VII APPENDIX...

Page 96: ...s mouse right click PTZ Enter into PTZ control mode ALARM Enter into Alarm control mode SPOT Spot monitor control RECORD Panic Record On Off DISPLAY Display screen division mode SEQUENCE Start end seq...

Page 97: ...PAUSE Move to ending playback Enter from search mode STEP Enter to event search mode Enter from search mode REW Starting to Playback data Enter from search mode FF End to Playback data Enter from sea...

Page 98: ...ification in case there is any failure of performance or function which occurred naturally under normal use of product within one year warranty period after purchasing the product Pay service 1 In cas...

Reviews: