Installation Manual
Wireless Push Button & Receiver
TX-460/RX-460
Preparations
The TX-460 can control the RX-460 receiver over a large distance,
even within buildings. Upon activating the push button by pushing it,
a signal is transmitted. No matter how short or fast the push on the
push button is, the full signal will be transmitted, and the receiver will
always be activated.
The TX-460 has a fixed, private code that cannot be altered. This is
meant to give the push button its own coding within the 433 Mhz
band, so no other system can take over the control. All push buttons
have a unique code.
+
+
+
+
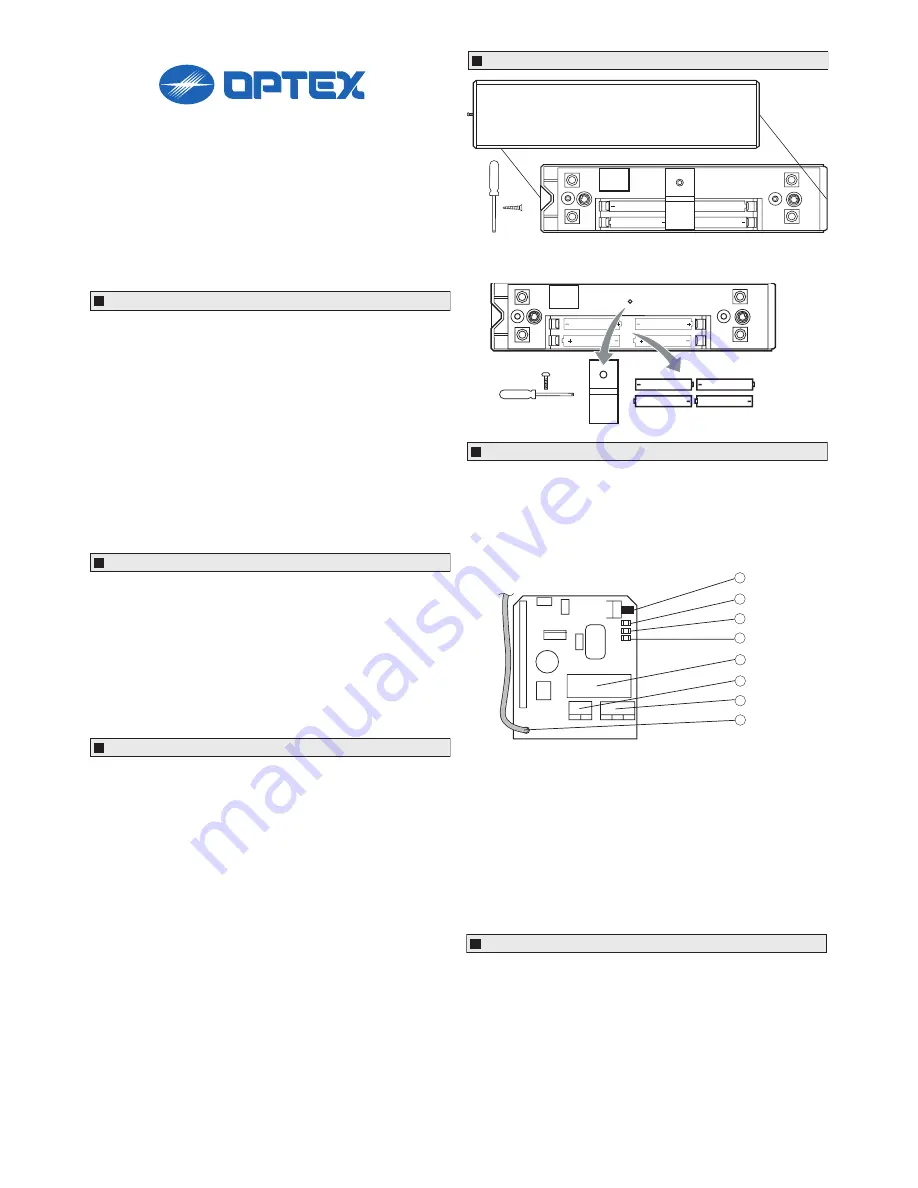
2x
Battery replacement
4 batteries AAA 1,5V
General information
TX-460 transmitter
IMPORTANT!
In order to get the best out of your system it is important you take
the time to read through the instruction before you start to install/
program your equipment.
Frequency modulation
The system works at the frequency 433.92 MHz and uses frequency
modulation.
Self-instruction of code
Each TX-460 transmitter supplied has a fixed, individual code that
cannot be altered. In system TX/RX-460, transmitters and receivers
are co-coded through self-instruction, i.e. the receiver learns the
transmitter’s code.
Assembly and installation
1. Select a suitable location for assembly of the receiver
2. Connect the operating voltage to the receiver.
3. Co-program the transmitter and receiver.
4. Mount the transmitter on a flat surface. Make sure the batteries
are fitted correctly in the transmitter.
5. Connect the required functions to be controlled over the receiver.
TX-460 transmitter
(continued)
Installation
To mount the push button on a surface, make sure that the surface is
as equally flat as possible. A surface which is not equally flat will not
provide a good mounting position for the push button, and will inter-
fere with normal functioning of the button.
Since surfaces where the push button is to be mounted upon differ, no
standard screws or other mounting material is provided. When you
have chosen your screws to install the push button, make sure that
the head of the screw is not bigger than 8 mm, otherwise the push
button will be damaged.
RX-460 receiver
The RX-460 is a self-learning plug-in receiver which can learn up to
ten differtent signals. It consists of 1 relay outpur which can be used
as a Normally Open (NO) or Normally Closed (NC) contact.
The power supply on the receiver should be from 12 to 30 Volts AC or
DC. The supply can be between these values, and it does not matter
how the voltage is connected.
+
+
+
+
1x
1
2
3
4
6
7
8
5
1. Button
Button for self-instruction and/or era
sing.
2. Green LED
LED lights when the receiver receives
a
radio
signal.
3. Yellow LED
LED lights when the receiver has the
correct
operating
voltage.
4. Red LED
LED shows programming status.
5. Relay
Max. load over relay is 8A for resistive
load.
6. Connection terminal
Connection terminal for voltage.
7. Connection terminal
Connection terminal for relay.
8. Antenna
Special wire antenna for optimum
reception.
The RX-460 can learn up to 10 different signals, both groupcodes
(through dipswitches) as unique/private codes. The TX-460 only has
the ability to learn unique/private codes. Up to 10 TX-460 push but-
tons can be programmed on 1 RX-460 receiver. When a combination
with handtransmitters is used on a RX-460, the RX-460 has also the
ability to learn in a dipswitch setting (the groupscoding) of these trans-
mitters.
Push the button two times during the programming procedure to learn
the private coding and push only one time to learn the group coding.
For more information about these settings and possibilities of the
handtransmitters, we recommend you to read the installation manual
of these transmitters.
Learning the transmitter with the receiver


