background image

6

Safety

Perfect Pick HD User Manual - OPEX Corporation

About this manual

The information provided in this chapter is intended to educate you on various 
safety issues regarding the operation and maintenance of the OPEX 
equipment described in this manual.

This chapter provides an explanation of the safety conventions used 
throughout this manual, as well as safety guidelines to be observed when 
working with this equipment.

Safety conventions used in this manual

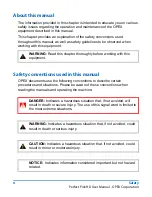
OPEX documents use the following conventions to describe certain 
procedures and situations. Please be aware of these conventions when 
reading the manuals and operating the machine:

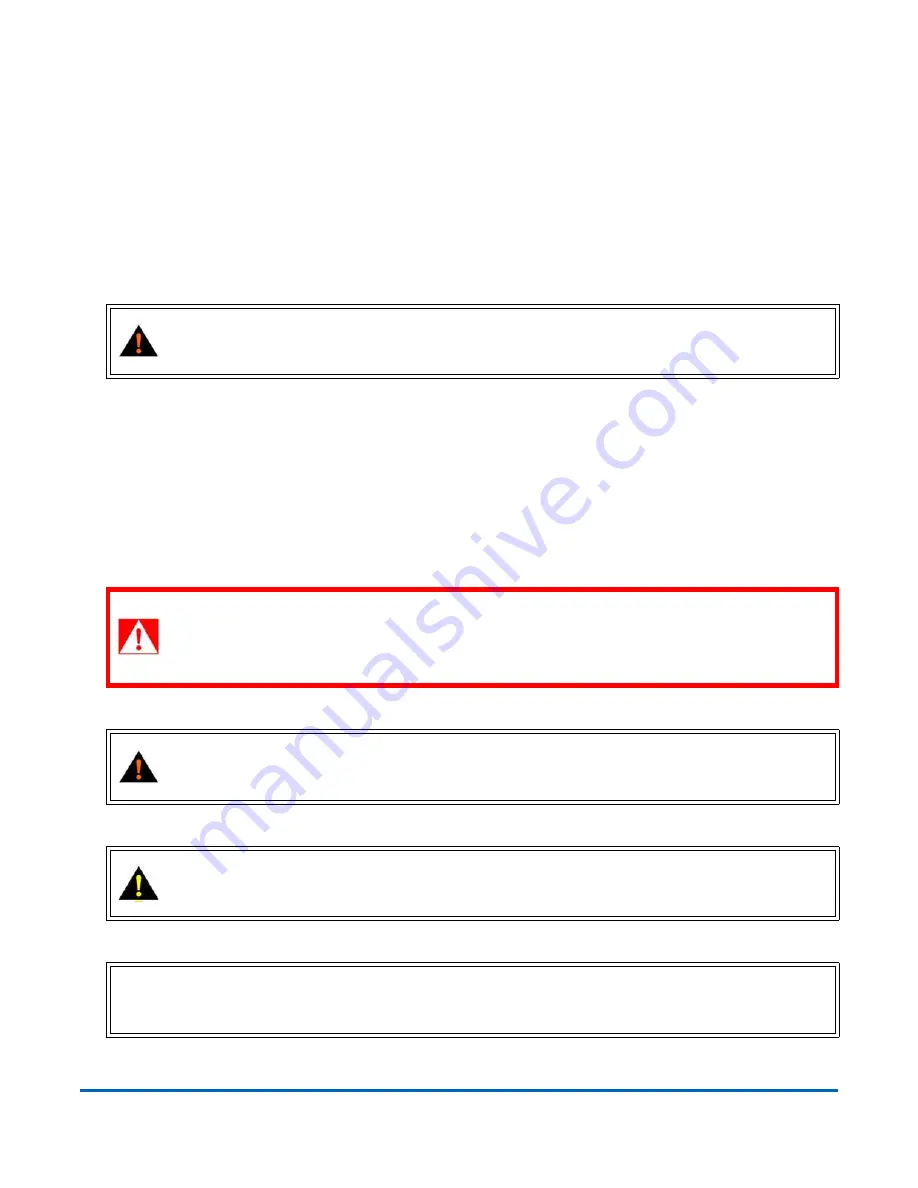
WARNING: 

Read this chapter thoroughly before working with this 

equipment.

DANGER: 

Indicates a hazardous situation that, if not avoided, will 

result in death or severe injury. The use of this signal word is limited to 
the most extreme situations.

WARNING: 

Indicates a hazardous situation that, if not avoided, could 

result in death or serious injury.

CAUTION

CAUTION: 

Indicates a hazardous situation that, if not avoided, could 

result in minor or moderate injury.

NOTICE: 

Indicates information considered important, but not hazard 

related.

Summary of Contents for Perfect Pick HD

Page 1: ...partners and dealers No portion of these materials may be reproduced published or stored in a database or retrieval system other than for its in tended use without the express written consent of OPEX...

Page 2: ...rors inaccuracies or any other issues or concerns with this document please contact the OPEX Technical Writers via email at GroupTechwriters opex com Doc Rev Date Changes click blue text to go to that...

Page 3: ...her Cautions 15 Ultra capacitor Product Information 16 Emergency Stop E Stop buttons 17 Safety interlocks 19 Break away panel interlocks 19 Light curtain 20 Clear to Pick indicators 21 Light Tower 22...

Page 4: ...d Workstation 57 How to park the iBOTs 58 Chapter 4 Specifications Specifications 62 Physical Specifications 62 iBOT Specifications 62 Wireless Transceiver 64 FCC information informations FCC 64 Indus...

Page 5: ...y About this manual 6 Safety conventions used in this manual 6 Safety Guidelines 7 Safety labels 9 Ultra capacitor Product Information 16 Emergency Stop E Stop buttons 17 Safety interlocks 19 Clear to...

Page 6: ...he following conventions to describe certain procedures and situations Please be aware of these conventions when reading the manuals and operating the machine WARNING Read this chapter thoroughly befo...

Page 7: ...ak For information on ultracapacitor safety refer to Ultra capacitor Product Information on page 16 Ne retirez pas le plastique les capots de protection du bas des iBOTs Les couvertures prot gent les...

Page 8: ...e ou une pi ce similaire doivent tre nettoy s faire manivellez la pi ce pendant le nettoyage ou la nettoyer en stationnaire Do not use flammable high pressure canned air to clean dust and debris from...

Page 9: ...TER label shown in Figure 1 is found on both sides of the pick station s Figure 1 Machine Entry label CAUTION CAUTION Follow the safety precautions on all labels to avoid injury when operating the Per...

Page 10: ...achine Figure 2 Main Power Enclosure Warning label The WARNING Arc Flash and front of the Main Power Enclosure WARNING ADVERTENCIA Arc Flash and Shock Hazard Follow all requirements in NFPA 70E for sa...

Page 11: ...igure 3 Figure 3 Do Not Climb Structure NO SE TREPE A LA ESTRUCTURA DO NOT CLIMB STRUCTURE CUIDADO CAUTION The DO NOT CLIMB STRUCTURE label is found where the exterior cover ends If the machine has no...

Page 12: ...lift Figure 4 or forklift requires appropriate certification Do not operate or ride in either of these machines unless you have taken the corresponding training course Only approved OPEX technicians a...

Page 13: ...rfect Pick HD can become jammed and or damaged by foreign objects Also keep hair loose clothing or jewelry away from the moving parts Figure 5 Keep Hands Away Caution label MANTENGA LAS MANOS ALEJADAS...

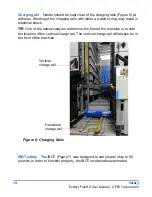
Page 14: ...n electrical shock TIP One of the easiest ways to determine the front of the machine is to note the location of the vertical charge rail The vertical charge rail will always be in the front of the mac...

Page 15: ...UTION 2 There are two of the KEEP AWAY on the top metal surface the Maquinaria automatizada Automated machinery CUIDADO CAUTION 3 The Automated machinery label is side on the slanted surface second la...

Page 16: ...res 85 C 185 F and should be operated only within their defined operating specifications Failure to adhere to operating specifications could result in poor device performance or unsafe operating condi...

Page 17: ...tops An E stop button is located at each pick station Figure 8 If necessary push on the E Stop to stop the machine immediately To restart the machine clear the machine if needed pull the E Stop knob o...

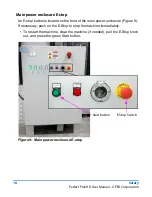
Page 18: ...is located on the front of the main power enclosure Figure 8 If necessary push on the E Stop to stop the machine immediately To restart the machine clear the machine if needed pull the E Stop knob ou...

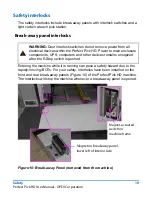
Page 19: ...been installed on the front and rear break away panels Figure 10 of the Perfect Pick HD machine The interlocks will stop the machine whenever a break away panel is opened Figure 10 Break away Panel r...

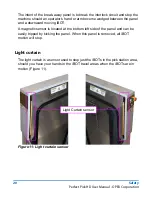
Page 20: ...ard moving iBOT A magnetic sensor is located at the bottom left side of the panel and can be easily tripped by kicking the panel When this panel is removed all iBOT motion will stop Light curtain The...

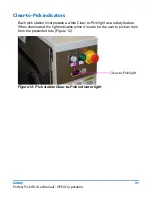
Page 21: ...ators Each pick station incorporates a white Clear to Pick light as a safety feature When illuminated the light indicates when it is safe for the user to pick an item from the presented tote Figure 12...

Page 22: ...From Maintenance mode the machine is restarted which will bring the solid green light on in addition to the flashing blue light Once the technician determines that the machine is operating properly h...

Page 23: ...ted below are some guidelines to help you minimize the risk of physical discomfort and injury while operating the equipment When at the pick station Maintain an upright body posture Occasionally chang...

Page 24: ...24 Safety Perfect Pick HD User Manual OPEX Corporation...

Page 25: ...Perfect Pick HD User Manual Introduction Overview 26 Main Components 27...

Page 26: ...be the software and functionality of the Perfect Pick HD machine Warehouse Management System WMS The Warehouse Management System WMS application supports the day to day operations in a warehouse The W...

Page 27: ...X Corporation Main Components Figure 14 identifies the main components of the Perfect Pick HD Figure 15 shows details of the Pick Station Figure 14 Perfect Pick HD main components iBOT Tote Storage lo...

Page 28: ...Host monitor Host computer located behind door Pick Station controls Clear To Pick light Start button E Stop switch Put Away Complete light Cortex monitor Cortex computer located behind door Workstat...

Page 29: ...tion where they can tilt to make it easier for the operator to access The operator can then easily remove the needed contents product from the tote or restock totes in replenish mode There will always...

Page 30: ...Height System consists of a 3D camera Figure 17 and a dedicated PC As an iBOT takes a tote away from the pick station the over height system analyzes the tote to check for Overflowing contents which...

Page 31: ...notified so they can correct it Figure 17 Over height 3D camera Optional Bin Locator Light this optional feature is used to identify the specific area within the tote where the operator is to pick th...

Page 32: ...32 Introduction Perfect Pick HD User Manual OPEX Corporation...

Page 33: ...Perfect Pick HD User Manual Operation Overview 34 Starting up the system 34 Continuous mode 40 Replenish mode 49 The OPEX Integrated Workstation 57 How to park the iBOTs 58...

Page 34: ...mpty or near empty tote is presented to the operator to be refilled The operator then puts the specified amount of items into the iBOT delivered tote For more on this procedure see Replenish mode on p...

Page 35: ...ct Pick HD User Manual OPEX Corporation 2 The Login screen will appear Figure 20 Select a Username from the drop down list Figure 20 Login screen 3 If required enter the password for the selected User...

Page 36: ...stic tests and view statistical reports on the machine The Host software interface consists of see Figure 22 Menu bar The vertical menu bar provides access to the main system functions Select a catego...

Page 37: ...djust settings and make selections in the main window Figure 22 Host software interface 5 Click the Run button found in the Menu bar The Run screen opens The run screen offers several tabs for viewing...

Page 38: ...operational process One of the most common views is found by clicking the iBOTs tab see Figure 23 Figure 23 Run Screen iBOTs tab 6 On this screen buttons are available for conserving iBOT power and p...

Page 39: ...oration 7 On the top of the screen click START Figure 24 Figure 24 Start button location 8 If you need to run the Perfect Pick HD in Replenish mode go to Replenish mode on page 49 If you plan to run i...

Page 40: ...d places them in order request containers located on the Workstation or a similar conveyor to the right of the operator In normal operations you will primarily use this mode 1 Start up the Perfect Pic...

Page 41: ...rfect Pick HD User Manual OPEX Corporation 2 Log in to the software and select Auto mode Figure 26 Figure 26 Auto Mode 3 Press the green Start button at the Pick Station Figure 27 Figure 27 Start butt...

Page 42: ...Figure 28 Figure 28 Cortex run screen 5 Referring to Figure 29 The run screen shows a description of the item to be picked Item detail a photo of the item how many of the items need to picked Quantity...

Page 43: ...t quadrant Figure 29 Cortex Run screen detail 6 To the right of the Perfect Pick HD is the OPEX Workstation a conveyor with containers for more details on the OPEX Workstation see The OPEX Integrated...

Page 44: ...part There are four available locations which are identified by the light bar see Figure 31 The light bar uses color coded buttons to assist in identifying the correct container In the example in Fig...

Page 45: ...Operation 45 Perfect Pick HD User Manual OPEX Corporation containers would advance and the color coding would also advance to follow the containers Figure 31 Light Bar Labeler Light bar...

Page 46: ...be placed into the first container on the Workstation Figure 32 Place the item in the container Depending on your operation you might also have to bag the items and place a label on the bag the labele...

Page 47: ...ning the tote to the storage section Note In cases like the example in Figure 33 where the same item is needed in more than one container add the item s to the container identified in the monitor firs...

Page 48: ...nting for container message Note Depending on your operation your system may not require a printer Figure 34 Order completed 13 Place the packing list in the container 14 Press the color coded light b...

Page 49: ...mode is used for restocking inventory 1 Start up the Perfect Pick HD system as described in Starting up the system on page 34 When you start up the Perfect Pick HD system it auto matically starts the...

Page 50: ...D User Manual OPEX Corporation 2 Log in to the software and select Auto mode Figure 36 Figure 36 Auto Mode 3 The monitor displays the run screen Figure 37 and the iBOTs will move in preparation for th...

Page 51: ...Corporation 4 Press the green Start button at the Pick Station Figure 38 Figure 38 Start button 5 The job starts and the screen now shows the number of items to be replenished Figure 39 and the locati...

Page 52: ...Run Screen populated 6 Fill the amount requested into the tote in the pick station and then on the monitor press the container that you just used to replenish the item Figure 40 NOTICE When running in...

Page 53: ...it the green Start button on the pick station This parks the iBOTs on the bottom charging rail Zeros This mode is used to adjust the quantity of items in the system or when there is no inventory 1 Per...

Page 54: ...54 Operation Perfect Pick HD User Manual OPEX Corporation Figure 41 Current Make adjustment 3 Use the Up Down Arrow buttons to adjust the quantity in the tote Figure 42 Figure 42 Adjust Quantity...

Page 55: ...Pick HD User Manual OPEX Corporation 4 When the correct quantity is displayed click Confirm 5 The screen adjusts to the newly entered amount If this amount is correct click the container Figure 43 Fig...

Page 56: ...r now displays a printing widow as shown in Figure 44 The number displayed matches the number of the container that was scanned into the system Click Dismiss Figure 44 Printing message 7 Depending on...

Page 57: ...er moves quietly along the conveyors and across the zero height transfers to and from its pick to light location Once the operator completes an order the container is transferred for final shipment an...

Page 58: ...en offers three buttons to park the iBOTs at different locations Park Top Park Vertical or Park Bottom Click the appropriate button For example if all iBOTs are running okay and you need to step away...

Page 59: ...Operation 59 Perfect Pick HD User Manual OPEX Corporation iBOT Power button in Diagnostics makes the iBOTs stop sending constant status updates to the machine to save energy...

Page 60: ...60 Operation Perfect Pick HD User Manual OPEX Corporation...

Page 61: ...Perfect Pick HD User Manual Specifications Specifications 62 Wireless Transceiver 64 Contacting OPEX Service 66...

Page 62: ...deep tote storage Pick Stations Up to 2 available ground and mezzanine levels designed for picking and replenishment iBOTs 10 to 20 Totes Height 8 10 12 and 14 20 32cm 25 4cm 30 48cm and 35 56cm Widt...

Page 63: ...Specifications 63 Perfect Pick HD User Manual OPEX Corporation Figure 47 Tote dividers drawing not to scale long divider 1 position Short dividers up to 3 per tote 5 available positions...

Page 64: ...itional equipment authorization The module should not be marketed and sold in a way that have to be end user accessible replaceable A host product is required to comply with all applicable FCC equipme...

Page 65: ...des fonctions de l quipement ne sont pas associ s avec la partie de module metteur Pour assurer la conformit avec toutes les fonctions non metteur le fabricant h te est responsable d assurer la confo...

Page 66: ...8 4 Cet appareil est conforme aux CNR exempts de licence d Industrie Canada Son fonctionnement est soumis aux deux conditions suivantes 1 Ce dispositif ne peut causer des interf rences et 2 Ce dispos...

Reviews: