

Page 2
Preparing the SD Card
Before inserting the SD card (3) and powering up your receiver for the first time, you should
edit the configuration file and set the correct antenna position, as well as your OpenSky
Network user name. The SD card contains a partition
with the label "boot“, which is
formatted with FAT32. So you can access it with any common operating system. Please refer
to the full guide on the website (
https://opensky-network.org/receiver-kit
) for details on
how to mount the SD card with your operating system.
1.
Use your computer to access the “boot” partition on the SD card
2. Open the file /opensky/config.txt in the opensky directory with your favorite text
editor. The file looks like this:
# Please fill in the following parameters /before/
# you boot the device for the first time. Latitude
# and longitude are in decimal degrees. Altitude is
# in meters. Use your smart phone or Google Maps to
# estimate the location of your antenna with an
# accuracy of about 4 decimal points.
[GPS]
Latitude=0
Longitude=0
Altitude=0
# Enter your OpenSky username here. If you don't have
# an account yet, register on http://opensky-network.org.
# This receiver will be _automatically_ added to your
# profile once you enter your username here.
# Note: remove the '#' character before 'Username’
[IDENT]
#Username = [your username goes here]
Config - OpenSky Network User Name
Also, in order to make sure that your receiver will get assigned to your user account when it
connects to the OpenSky Network for the first time, you have to set your user name at the
bottom of the same file (/opensky/config.txt ). Don't forget to remove the # at the
beginning of the line. After editing the lines they should look like this (replace
yourusername with your own username):
[IDENT]
Username = yourusername
Config - Antenna Position
You can use
) to determine the latitude and
longitude of the antenna. Latitude and longitude values with at least 4 fractional digits
are preferable. So Google Maps definitely provides sufficient accuracy if the correct
location is selected. The online tool
https://www.daftlogic.com/sandbox-google-
uses the Google Maps API to determine the altitude. Use this
to determine the altitude of your antenna in meters. Don't forget to take the height of
the building into account, if you mount your antenna on a roof. Instead of using
different online tools you can also download
(
https://www.google.de/intl/de/earth/
) and use the 3D mode to determine the exact
coordinates of your antenna, already including the height of the building. You can also use
the GPS of your smartphone.
Enabling SSH
SSH can easily be activated by creating a file named ssh
in the root directory of the “boot”
partition on the SD card. Please refer to the full guide on the website (url on Page 1) for
details on how to mount the SD card and create the file with your operating system.
Antenna Positioning
ADS-B and Mode S signal reception is very much influenced by obstacles such as walls,
buildings or terrain. Mounting your antenna at an appropriate location is essential for
achieving good results. Please refer to the full guide on the website (url on Page 1) for
details on how your antenna should be mounted.
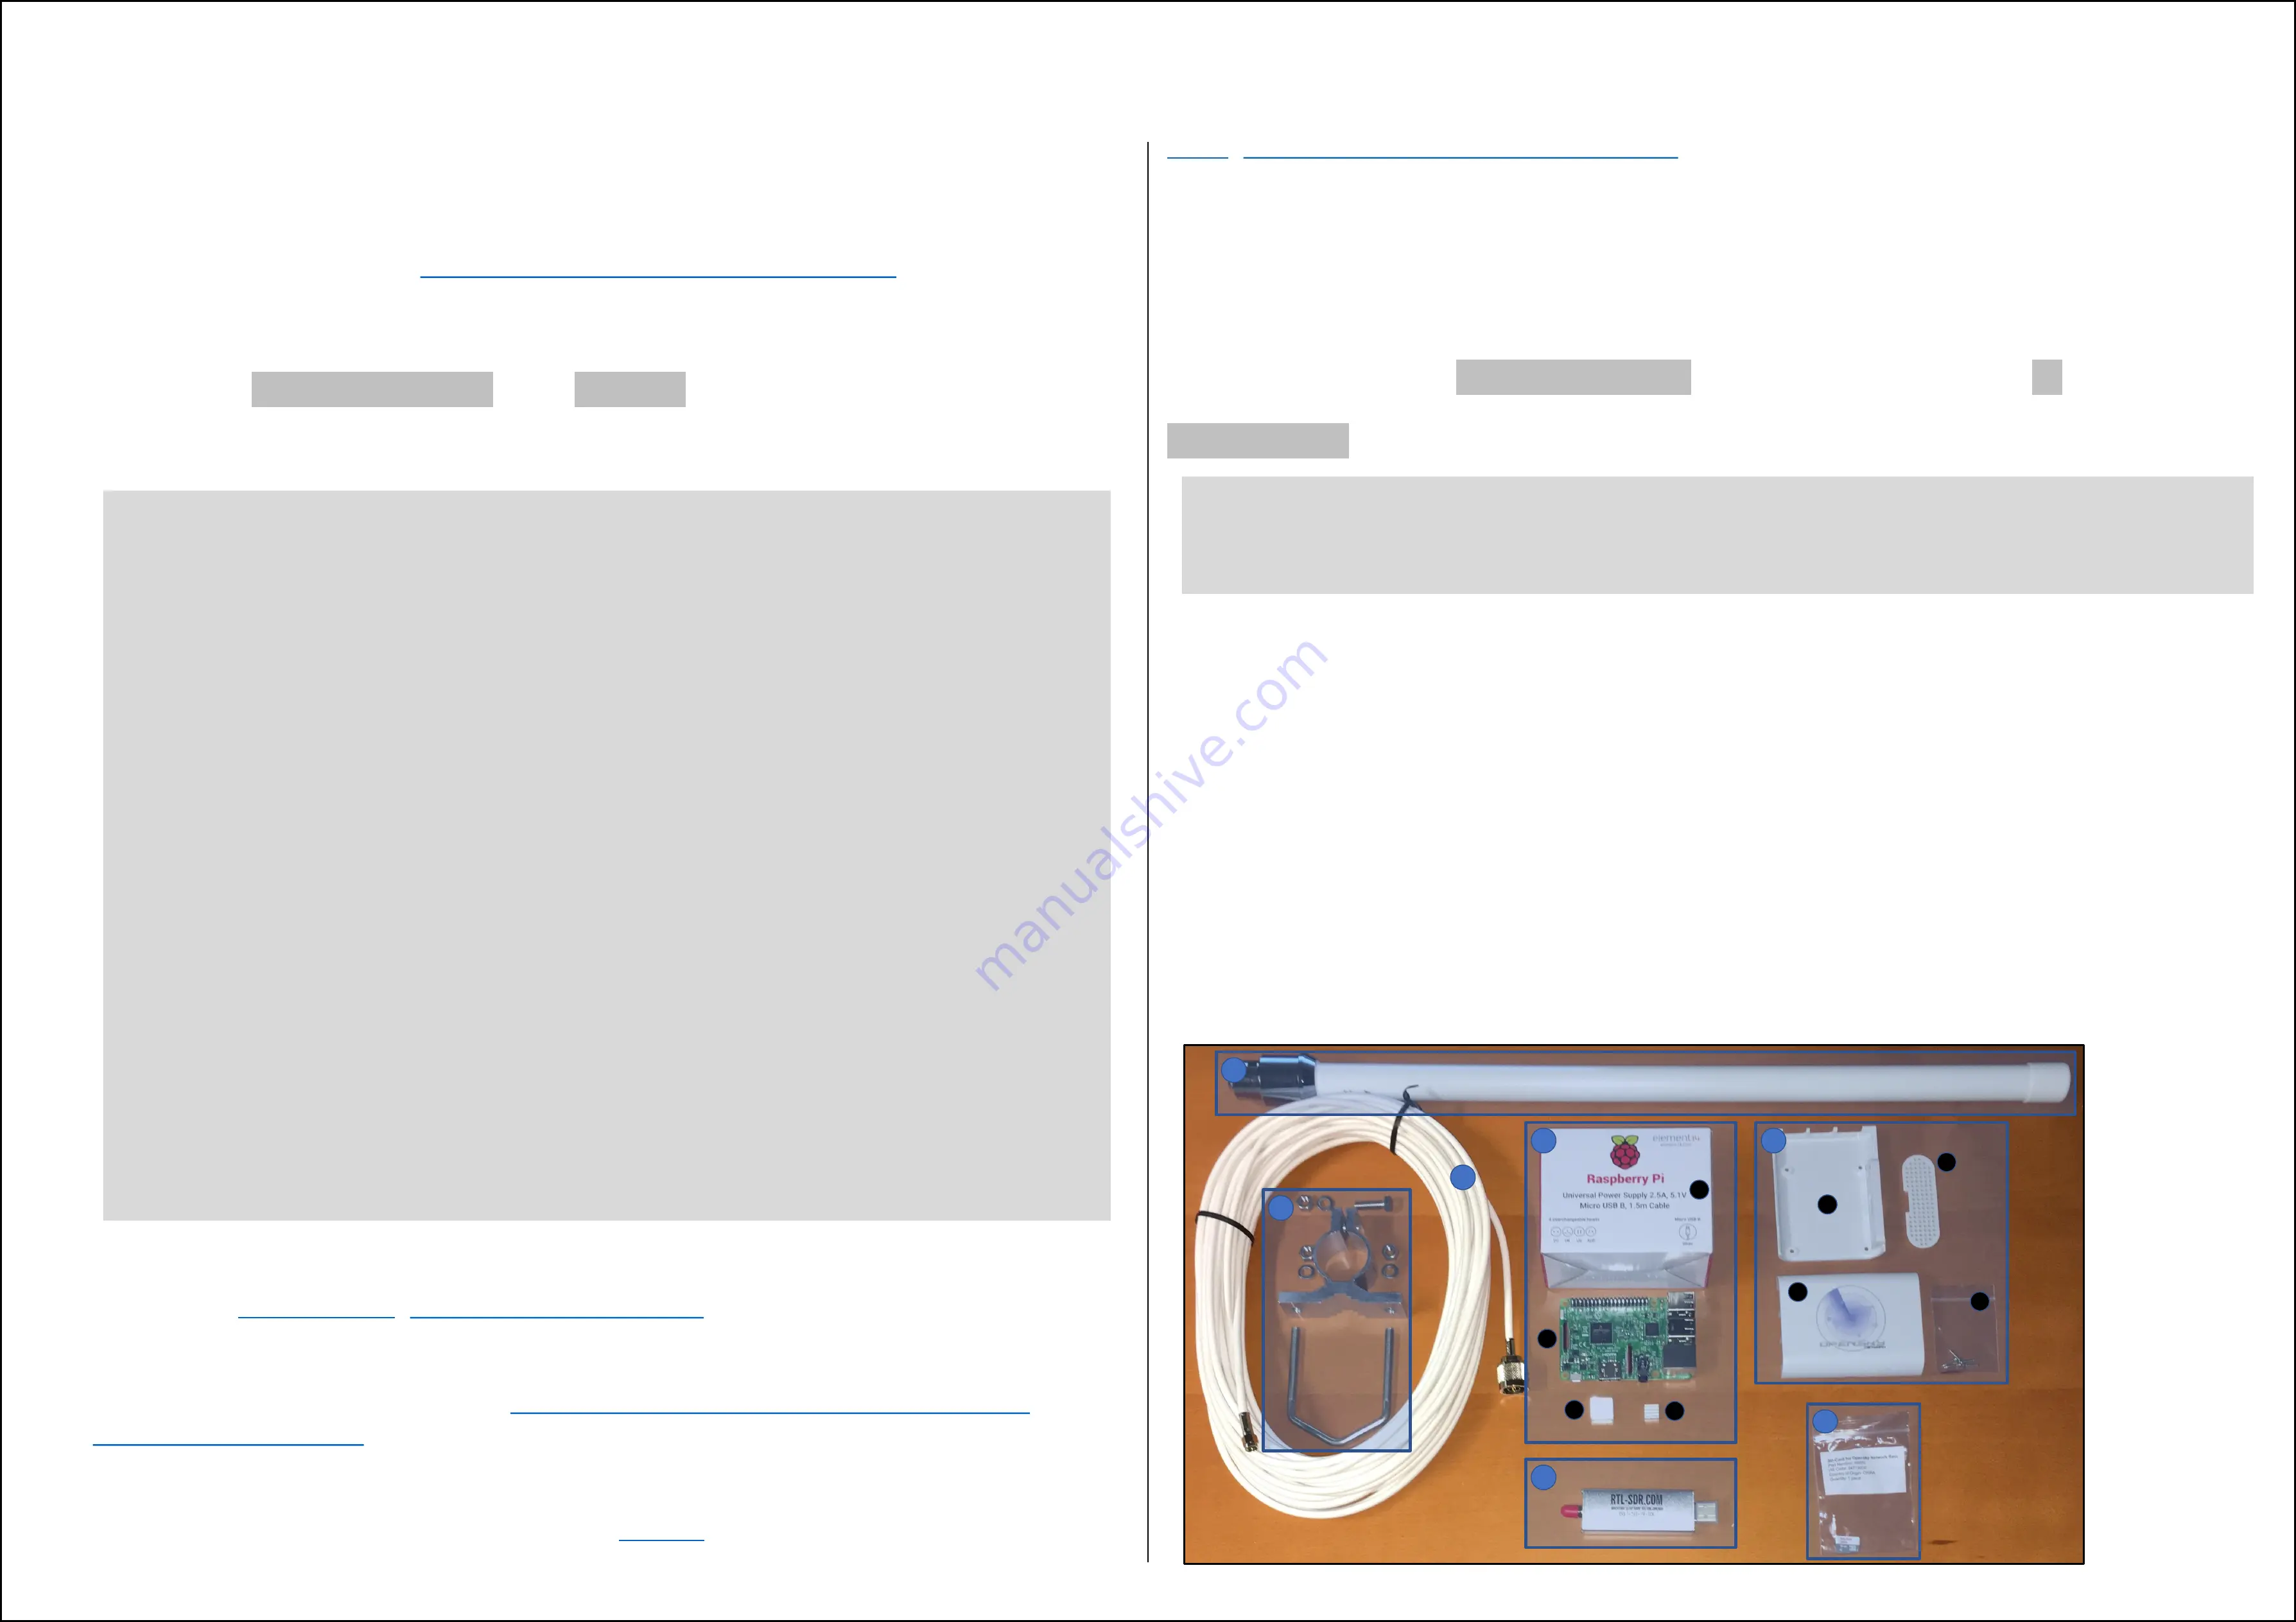
Parts Overview
4
1
2
3
5
6
7
A
B
C
D
E
F
G
H


