

CONTENTS
Selecting multiple cameras and enter-
ing IP address 192.168.51.2 will set
an IP address on all selected cameras,
starting at 192.168.51.2 and increase
per camera.
1.
Open the Network Camera
Manager application.
2.
Select applicable camera(s).
3.
Input starting IP address, Subnet
Mask, Gateway, DNS.
4.
Apply changes.
5.
Wait 60 seconds before refreshing
NCM.
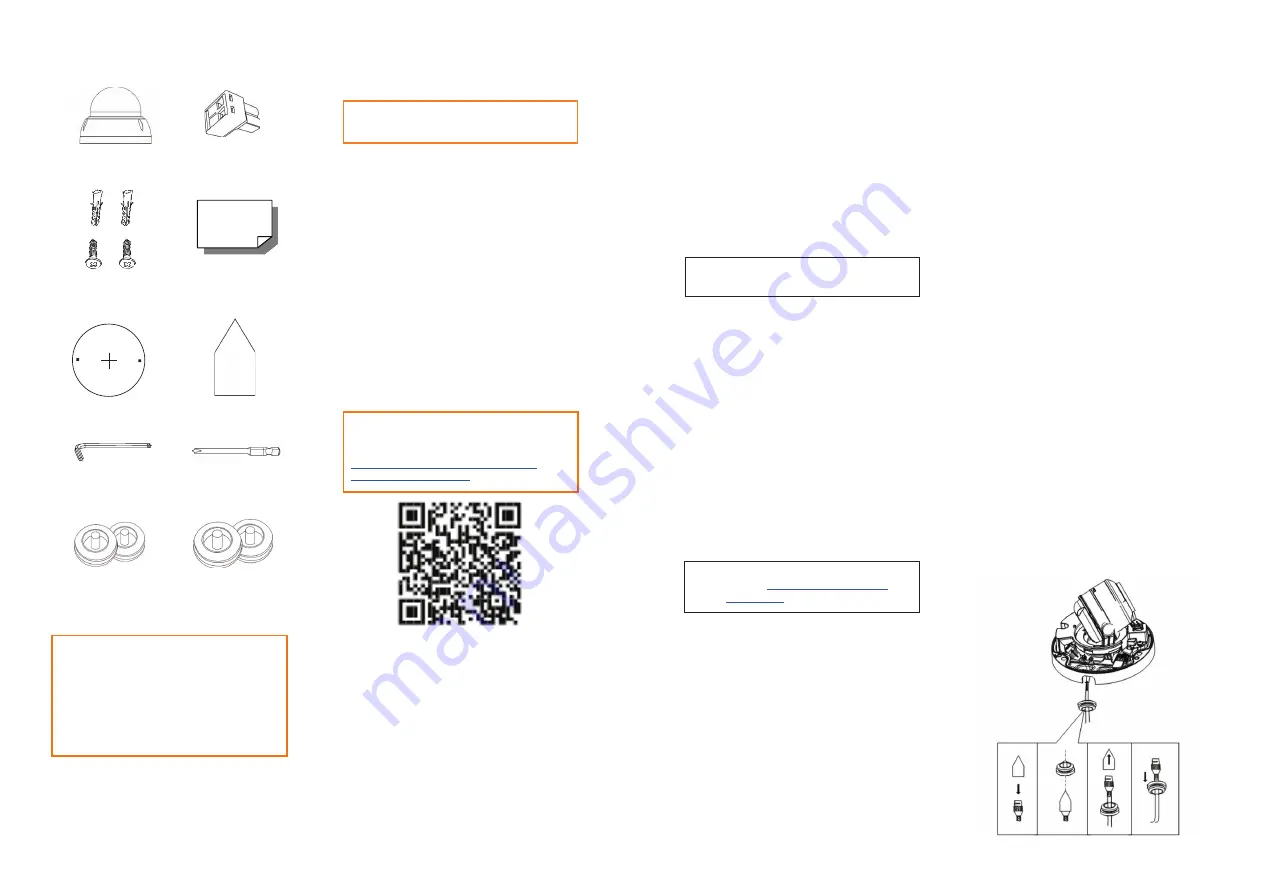
OE-3011D4
Mini Dome Camera
CABLING INSTRUCTIONS
Self-Tapping
Screws &
Plastic Anchors
2-Pin Terminal
Power Block
Quick Start
Guide
Mounting Template
ASSIGNING AN
IP ADDRESS
OpenEye IP cameras are set to DHCP
by default. If a DHCP server is not
detected after 4 minutes, the camera
will default to IP address 192.168.51.2.
If you are not using a DHCP server,
NCM will allow you to batch confi gure
a static IP address.
The IP address for the camera network
on your Apex recorder is 192.168.51.1.
NOTE:
To change this IP address please refer
to your Apex recorder manual.
CONNECTING TO THE
IP CAMERA
To access the camera setup menu,
you need to open Network Camera
Manager (NCM) utility. NCM is pre-
installed on all OpenEye Recorders,
and is also available for download on
the OpenEye website for installation on
your personal computer or laptop.
1.
Open Network Camera Manager.
2.
Locate your camera on the
Network Camera Manager list.
3.
To open the web browser, select
the camera and click LOAD.
NOTE:
OpenEye IP cameras ship
without a default password.
DEFAULT USERNAME
AND PASSWORD
The admin user password can be set
using the following methods:
1.
OpenEye recorders running Apex
2.1 or newer will automatically set
a new unique password if:
•
Connected to an M-Series
recorder with a built in PoE
switch.
•
Connected to a network
switch through the
camera network port
and selected then added in
setup, if a new password has
not already been set.
NOTE:
The NCM software manual can be
found at
https://www.openeye.net/
ncm-manual
Tapered RJ45 Sleeve
Security Torx Tool
#2 Phillips Bit
2x - 21mm Cable
Grommet
2x - 28mm Cable
Grommet
Optional Free Paintable Dome Cover
This camera has an available paintable dome
cover allowing it to be quickly converted to a
black housing or the allow custom painting to
match its installation environment. To reduce
waste it is not included in every package but
may be requested free of charge at time of
purchase.
1.
Push the RJ45 connector into the
tapered sleeve.
2.
Cut the end off the center of
the cable grommet and feed
the network cable through the
opening.
3.
Remove the tapered sleeve.
4.
Insert the RJ45 connector into
the network port. Pull the cable
downward to make sure the
cable grommet protrudes to the
direction opposite to the RJ45
connector.
2.
Connect to the camera directly
through a Web Browser and follow
the onscreen prompts.
3.
Use the Network Camera Manager
(NCM) Utility.
Username:
admin
Set the Default Camera Password
Use the QR code or link for instructions on
defi ning a unique camera password:
https://www.openeye.net/support/faqs/
default-camera-password


