background image

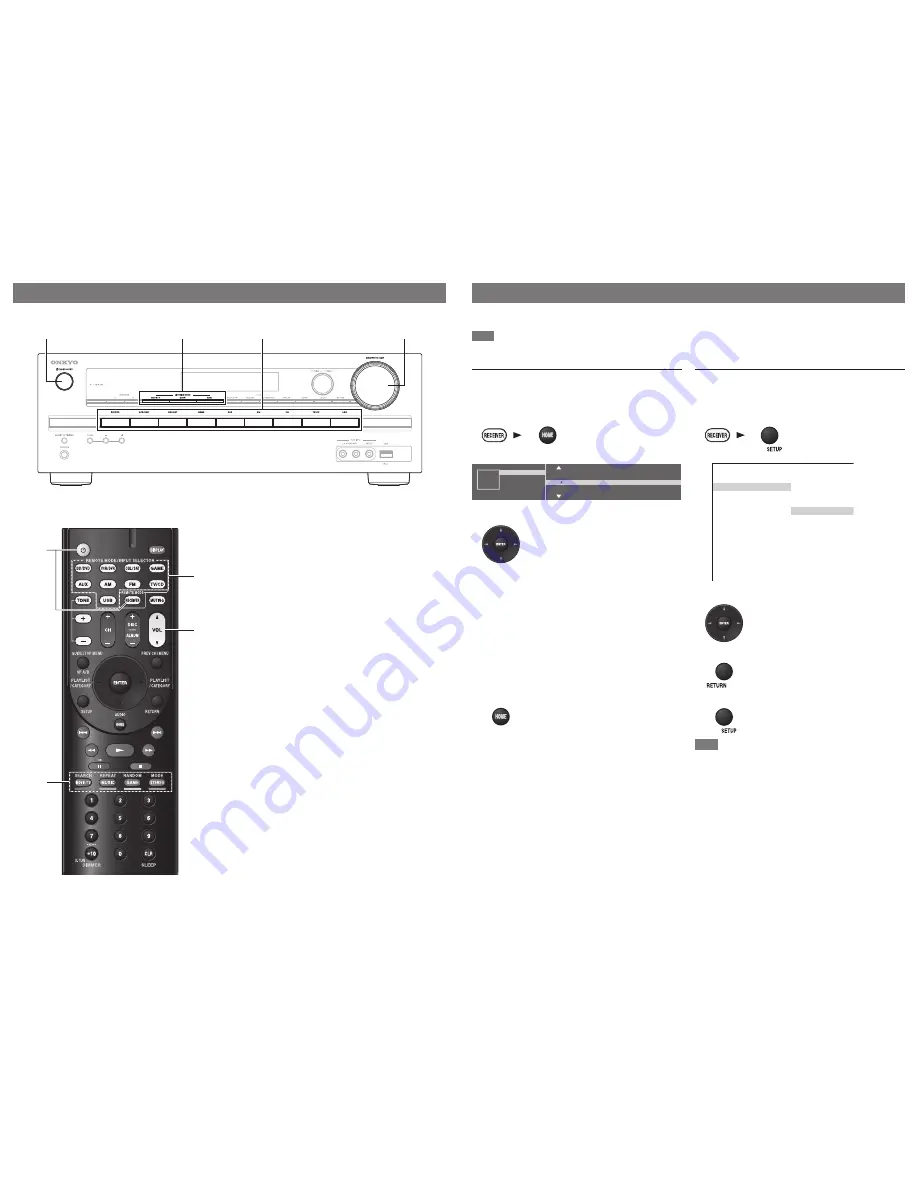
3. Turning On & Basic Operations

1

5

2

4

5

1

4

2

- 5 -

- 6 -

4. Using the Setup User Interface

The on-screen menus appear only on a TV that is connected to the 

HDMI OUT

. If your TV is connected to other video outputs, 

use the AV receiver’s display when changing settings.

Tip

If the menu doesn’t appear, make sure the appropriate external input is selected on your TV.

Home Menu

The Home menu provides you quick access to frequently used 
menus. This menu enables you to change settings and view 
the current information.

Opening the Home menu

1

2

Home

I

t

npu

AM

A d

u i o

I n f o
L i

i

Mode

g

n n

e

t

s

FM

TV  CD

USB

e l e c t ]

: S

E

r

n t

[

e

Navigating through the menus

Input

You can select the input source while viewing the related 
information.

Audio

You can change various audio settings such as tone 
controls, the subwoofer and center channel levels.

Info

You can view various information about the currently 
selected input source.

Listening Mode

You can select the listening modes that are grouped in 
categories.

Closing the menu

Setup Menu

The Setup menu provides extended setup that includes 
settings for advanced users. All the settings are organized in a 
user-friendly structure, which covers the whole TV screen area.

Opening the Setup menu

1

2

Menu

  1. HDMI Input

  2. Component

  3. Digital Audio

  4. Sp Config

  5. Sp Distance

  6. Level Cal

  7. Audio Adjust

  8. Source Setup

  9. Hardware

10. HDMI Setup

BD/DVD

VCR/DVR

CBL/SAT

GAME

AUX

TUNER

TV/CD

Navigating through the menus

Returning to the main menu

Closing the menu

Note

This procedure can also be performed on the AV receiver by 
using 

SETUP

, the cursor buttons, and 

ENTER

.

1

Turn on the AV receiver.

2

Select the input source.

3

Start playback on the source component.

4

Adjust the volume.

5

Select a listening mode and enjoy! 

Summary of Contents for TX-SR313

Page 1: ...c d e 3 2 1 Speaker Cable Using the Remote Controller Note Before connecting the power cord connect all of your speakers and AV components 1 Connecting Your Speakers 1 2 4 5 3 6 1 2 Front speakers 3 Center speaker 4 5 Surround speakers 6 Subwoofer Speaker Configuration 5 1 channel 1 2 3 4 5 6 Please connect 1 2 3 4 5 and 6 for 5 1 channel surround 3 8 1 2 10 12mm Powered subwoofer 6 Surround speake...

Page 2: ...CR or DVD recorder digital video recorder Game console The components connected to each terminal BD DVD GAME etc can be selected with the input selector buttons of the same name on the front panel Note that these default assignments can be changed For details please refer to the instruction manual Listening to TV audio Optional HDMI IN DIGITAL OPTICAL OUT AUDIO OUT L R TV Choose an audio connectio...

Page 3: ...s such as tone controls the subwoofer and center channel levels Info You can view various information about the currently selected input source Listening Mode You can select the listening modes that are grouped in categories Closing the menu Setup Menu The Setup menu provides extended setup that includes settings for advanced users All the settings are organized in a user friendly structure which ...

Page 4: ...or playback of music files u European Australian and Asian models RT PTY TP Used for RDS Radio Data System RDS works only in areas where RDS broadcasts are available Remote Controller a l m n h f d e c b k j i g To control the AV receiver press RECEIVER to select Receiver mode Sets the AV receiver to On or Standby Selects the remote controller modes or the input sources Adjust the bass and treble ...

Reviews: