


Safety Information and Introduction
En-10
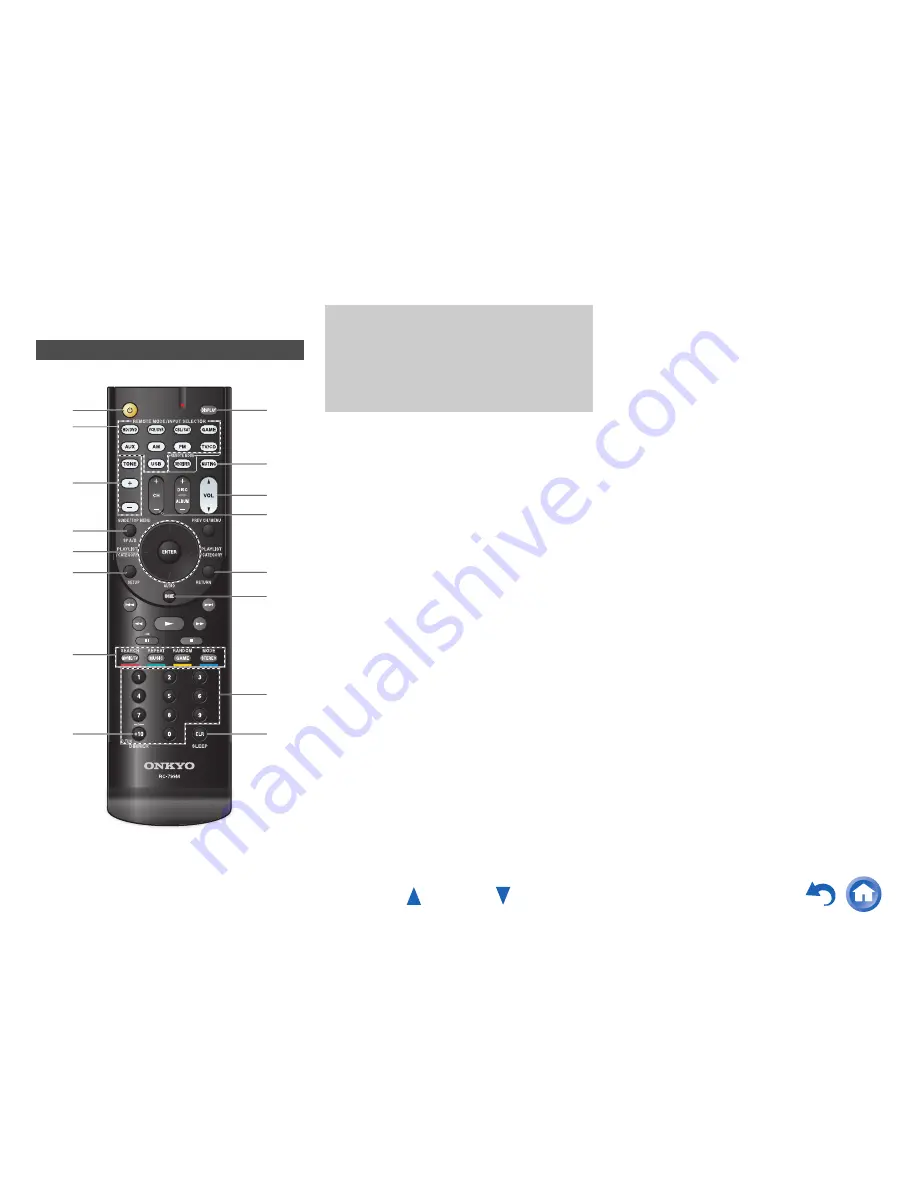
Remote Controller
For detailed information, see the pages in parentheses.
a
8
button (
19
)
b
REMOTE MODE/INPUT SELECTOR
buttons (
20
)
c
TONE
and Tone Level buttons (
44
)
d
SP A/B
button (
31
)
e
q
/
w
/
e
/
r
and
ENTER
buttons
f
SETUP
button (
35
)
g
Listening Mode buttons (
26
)
h
DIMMER
button (
32
)
i
DISPLAY
button (
32
)
j
MUTING
button (
33
)
k
VOL
q
/
w
button (
20
)
l
RETURN
button
m
HOME
button (
31
)
n
SLEEP
button (
32
)
■
Controlling the tuner
To control the AV receiver’s tuner, press
AM
or
FM
(or
RECEIVER
).
a
q
/
w
buttons (
24
)
b
D.TUN
button (
24
)
c
DISPLAY
button
d
CH +/–
button (
25
)
e
Number buttons (
24
)
Controlling the AV Receiver
a
l
m
n
b
h
f
d
a
e
c
b
k
j
d
i
c
e
g
To control the AV receiver, press
RECEIVER
to select
Receiver mode.
You can also use the remote controller to control
Onkyo Blu-ray Disc/DVD player, CD player, and
other components.
See “Entering Remote Control Codes” for more
details (
➔
page 48
).


