17
19
18
20
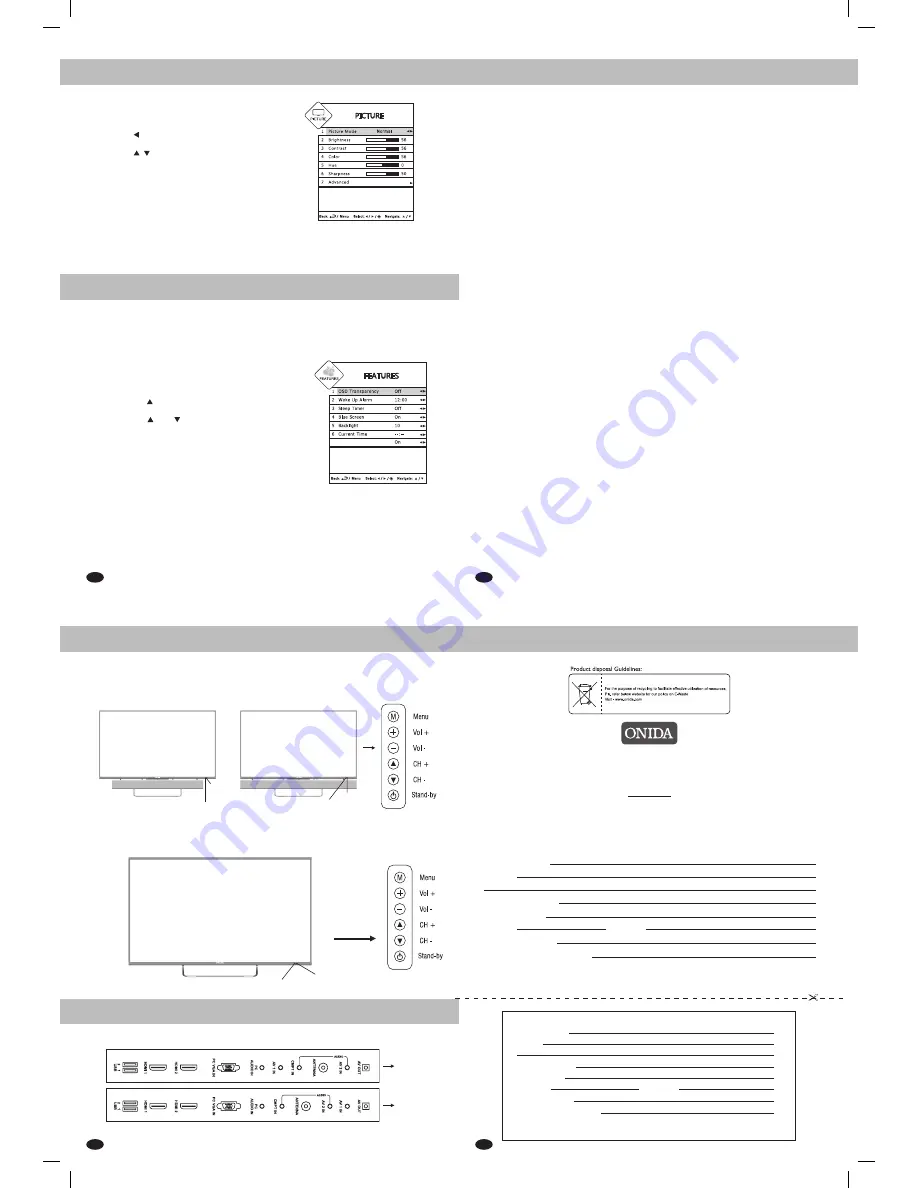
14. Picture
15. Features
ROCK STARZ LED SERIES
50 ROCK STARZ 1000 SERIES
40 ROCK STARZ 1000 SERIES
50 ROCK STARZ 400 SERIES
PC
05/07/2014
11053501
Remote Sensor
Note:
Please refer to either fig 1 or fig 2 for connectivity of various sources.
Fig 1
Fig 2
Key Controls of
Rock Starz LED Series
40 / 50 ROCK STARZ LED SERIES Connecting Terminals
16. Cabinet and Key Control Pictures
17. Quick Set-Up
Picture
• Press
MENU
key on remote control or
MENU
key on
Control Panel of LED TV to display TV Menu.
• Press
key on your remote control or
Vol-
on
Control panel to select Picture Menu.
• Press
/
key on remote control or
CH+/-
on
Control panel to select from following options
1. Picture Mode
2. Brightness
3. Contrast
4. Color
5. Hue
6. Sharpness
7. Advanced
Stand by
Power LED
Remote
Sensor
Remote
Sensor
Stand by
Power LED
Stand by
Power LED
18. Quick Set-Up
Input / Output Connectivity
1. HDMI IN (High Definition Multimedia Interface IN):
The LCD/LED TV provides one or two HDMI Input Port. The user can connect to this
socket any device which has HDMI output.
2. PC VGA IN (D-SUB)
(Optional)
:
The LCD/LED TV provides one PC VGA Input Port. The user can connect the PC to
the TV through a 15-pin D-sub connector. By doing so, the LCD/LED TV serves as
the screen for the PC, which can support resolution upto 720p.
3.
PC Audio IN
(Optional)
:
The LCD/LED TV provides one PC Audio Input Port. Connect the audio cable from
the PC to the PC audio IN of the TV set. By doing so, the user can listen to the audio
which is played from the PC.
4. Component
(YPbPr/YCbCr)
IN:
The LCD/LED TV provides one Component (YPbPr / YCbCr) Input Port. Connect the
component sockets of the DTV set top box or DVD player to the Component IN of
the set along with audio as shown on the side panel.
5. Component Audio IN (Optional):
The LCD/LED TV provides one Component Audio Input Port, Connect Left and Right
cable with given Component audio cable from the DVD, Set top box, etc.
6. AV IN:
This LCD/LED TV provides one or two AV Inputs Ports. The user can connect the Audio
and Video connectors (Video, Left and Right) of DVD, Set top box, etc. to the AV
input ports.
7. Antenna:
This LCD/LED TV provides one RF Input or Antenna Input. The user can connect the
local cable to this Antenna Input Port.
8. USB:
The LCD/LED TV provides One or Two USB Input Ports.
The user can connect the USB to play songs, video and view photos.
9. AV Out (Optional):
This LCD/LED TV provides one AV out Ports.
The user can connect Video,Audio (Video, Left & Right) out of TV to external Equipment.
Note:
Video out is available only for RF/AV source
Demo Mode (Scrolling Display) :-
When
“
Scrolling Display
”
is on, you will see the rolling display from right side to left side,
on top of the screen, showing the key features of the Model.
Procedure to switch
On/Off
Scrolling Display
•
Press
MENU
key on remote control or
MENU
key on
Control Panel of LCD/LED TV to display TV Menu.
•
Press
CH
key on remote control or
CH+
key on
Control Panel of LCD/LED TV to select Features.
•
Press
CH(
)
/ CH(
)
button on your remote control
or
CH+/ CH-
key on Control Panel of LCD/LED TV
to select
“
Scrolling Display
”
•
Press
V+/ V-
key on remote control or on Control Panel
of LCD/LED TV to make
“
Scrolling Display
” On/Off
Note:
1. Scrolling Display
is not available in usb source
2. Demo OSD get Off for Few Seconds if any key on remote
as well as control panel (Except Standby).
3. “FREEZE” functionality will not work when demo mode is ON
Key Controls
Note:
1.
By Pressing any Key on control Panel , Control Key position display appears on Screen.(Optional)
2. When set is in Stand-by Mode, Any Key Press on Key Control Panel will turns
the LCD/LED TV ON.(Optional)
7 Scrolling Display
Service Centre
Customer’s Warranty Card
THIS WARRANTY STANDS NULL AND VOID IF THE SERVICE CENTRE COPY OF
WARRANTY CARD IS NO DISPATCHED WTHIN 10 DAY OF DATE OF PURCHASE
Service Station Copy
Customer Name
Address
Name of the Town
Dealer’s Name
Model No.
Chassis No.
Date of purchase
Date of Expiry of Warranty
I accept the terms & conditions of the warranty Signature
Customer Name
Address
Name of the Town
Dealer’s Name
Model No.
Chassis No.
Date of purchase
Date of Expiry of Warranty
I accept the terms & conditions of the warranty Signature
MIRC ELECTRONICS LTD.
Onida House, G-1, MIDC, Mahakali Caves Road, Andheri (East), Mumbai - 400093
MADE IN INDIA
www
.
onida.com
I
Email: [email protected]
3988 9000
prefix State Capital STD Code


