


•
•
•
•
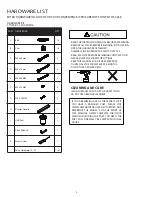
13
DO NOT stand on the desk. Do not use the desk as a stepladder.
ed.
Every 6 months, check all bolts and screws to ensure they are tight.
This product is California 93120 Compliant for Formaldehyde.
Comfort Products, Inc.
122 Gayoso Avenue
Memphis, TN 38103
Comfort Products warrants this product to be free from defects in material and workmanship for one (1) year. This warranty is made by
Comfort Products only to the original end-user customer acquiring the product directly from Comfort Products’ authorized dealers
as shown by the original sales receipt. The end-user customer remedy pursuant to this warranty is limited to repair or replacement of
parts at Comfort Products’ option within a reasonable amount of time. Comfort Products reserves the right to require damaged parts
to be returned to Comfort Products upon request. Consent from Comfort Products must be obtained before any warranty work is
performed. This warranty applies under conditions of normal use and is not subject to defects caused by improper assembly or
disassembly; defects occurring after purchase due to product mo
sure
to the elements; labor or assembly cost. This warranty does not cover the cost of transportation or labor. In no event shall Comfort
Products be liable in either tort or contract for any loss or direct, special, incidental, consequential or exemplary damages. This Limited
Warranty is NOT applicable to end-user customers who use Comfort Products for rental purposes. This warranty applies only to end-user
customers in the United States. All warranties are limited to the original purchaser for normal use. The weight capacity of the desktop is
165 pounds and the weight capacity of the drawers is 11 lbs.
For claims or questions concerning this warranty, please visit:
www.comfortproducts.net or email us at: [email protected]
PLEASE VISIT WWW.COMFORTPRODUCTS.NET FOR WARRANTY INFORMATION
www.comfortproducts.net
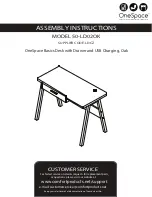
MODEL: 50-LD02OK
OneSpace is a Trademark of Comfort Products, Inc.
™


