One Stop Gardens ONE STOP GARDENS 95690 Assembly And Operating Instructions Manual Download Page 9

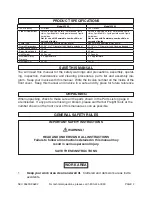
SKU 95690-95692               For technical questions, please call 1-800-444-3353. 

PAGE 9

PARTS LIST


NOTE:

Some parts are listed and shown for illustration purposes only,

and are not available individually as replacement parts.

THE  MANUFACTURER  AND/OR  DISTRIBUTOR  HAS  PROVIDED THE  PARTS  LIST  AND  ASSEM-
BLY  DIAGRAM  IN THIS  MANUAL  AS  A  REFERENCE TOOL  ONLY.    NEITHER THE  MANUFACTUR-
ER  OR  DISTRIBUTOR  MAKES  ANY  REPRESENTATION  OR  WARRANTY  OF  ANY  KIND TO THE 
BUYER THAT  HE  OR  SHE  IS  QUALIFIED TO  REPLACE  ANY  PARTS  OF THE  PRODUCT.    IN  FACT, 
THE  MANUFACTURER  AND/OR  DISTRIBUTOR  EXPRESSLY  STATES  THAT  ALL  REPAIRS  AND 
PARTS  REPLACEMENTS  SHOULD  BE  UNDERTAKEN  BY  CERTIFIED  AND  LICENSED TECHNI-
CIANS,  AND  NOT  BY THE  BUYER.   THE  BUYER  ASSUMES  ALL  RISKS  AND  LIABILITY  ARISING 
OUT OF HIS OR HER REPAIRS TO THE ORIGINAL PRODUCT OR REPLACEMENT PARTS THERE-
TO,  OR  ARISING  OUT  OF  HIS  OR  HER  INSTALLATION  OF  REPLACEMENT  PARTS  THERETO.

PLEASE READ ThE FOLLOWING CAREFULLY

IMPORTANT INFORMATION WhEN ORDERING PARTS:

When ordering parts, make sure to specify

model number (95690 or 95692) and the part number.

Part

Description

Qty.

1

Spray Head Nut

1

2

Separate Plate

1

3

O-Ring (14 x 2)

1

4

Bend

1

5

Spindle Nut

2

6

Spindle

1

7

Switch Pin

1

8

Lever

1

9

Switch Body

1

10

Valve Core O-Ring (6.8 x 1.6)

2

11

Valve Core O-Ring (7.6 x 1.9)

1

12

Valve Core

1

13

Switch Spring

1

14

Switch Sealing Washer

1

15

Switch Nut

1

16

Handle Sealing Washer

1

17

Handle Sealing Washer

1

18

Hose Nut

2

19

Hose

1

20

Safety Release Valve

1

21

Safety Valve Sealing Washer

1

22

Safety Cap

1

Part

Description

Qty.

23

Safety Spring

1

24

Fixed Buckle

1

25

Flat Sealing Washer

2

26

Belt Ring

2

27

Belt Buckle

2

28

Belt

1

29

Container Cap

1

30

Container Sealing Washer

1

31

Container

1

32

Container Bottom

1

33

Hose Connector

1

34

Suction Tube

1

35

Filter

1

36

Pump Nut

1

37

Direction Limiter

1

38

Piston

1

39

Piston O-Ring (35 x 4.8)

1

40

Air Tube

1

41

Air Tube Sealing Washer

1

42

Pump Sealing Washer

1

43

Pump Handle

1

Summary of Contents for ONE STOP GARDENS 95690

Page 1: ...work contained herein may be reproduced in any shape or form without the express written consent of Harbor FreightTools Diagrams within this manual may not be drawn proportionally Due to continuing improvements actual product may differ slightly from the product described herein Tools required for assembly and service may not be included For technical questions or replacement parts please call 1 8...

Page 2: ...ot for use with flammable combustible or corrosive liquids Pump Type Manual Hand operated piston pump Manual Hand operated piston pump Overall Dimensions 32 3 4 H x 7 Diameter with Handle extended 27 1 2 H x 7 Diameter with Handle extended Spray Lance Length 14 1 2 14 1 2 Spray Hose Length 4 Feet 4 Feet Unit Weight 3 3 Pounds 2 7 Pounds Maximum Spray Distance 3 4 approximate 3 4 approximate Maximu...

Page 3: ...r in unexpected situations 6 Always wear eye breathing and skin protection Wear ANSI approved safety impact goggles an ANSI approved respirator latex gloves and proper safety clothing when using this product TOOL USE AND CARE 7 Do not force the Sprayer Use the correct product for your application The correct product will do the job better and safer at the rate for which it is designed 8 Store idle...

Page 4: ...ot use this product for a purpose for which it was not intended 3 Industrial applications must follow OSHA requirements 4 Store idle tools When not in use store the Sprayer in a clean dry safe location out of reach of children 5 This Sprayer is intended to be used only with water liquid fertilizers liquid herbicides and liquid pesticides Never attempt to spray flammable combus tible or corrosive l...

Page 5: ...he tool while the system is pressurized Prior to refilling or emptying the Tank pull up on the Pressure Release Valve to completely depressurize the system 15 Prior to starting the Sprayer in cold weather check all of the parts of the tool to make sure ice has not formed Do not store the Sprayer where the temperature will fall below 32 Fahrenheit 16 Do not keep water or any liquid chemicals in the...

Page 6: ...pping the Sprayer onto your body If necessary adjust the Belt 28 for comfort See Assy Diagram 6 Always make sure other adults children and animals do not have access to the area s in which you intend to chemically treat 7 Pump the Pump Handle 43 to build up sufficient pressure in the Sprayer sys tem Once the system is pressurized as indicated by an increased tension on the Pump Handle you may disc...

Page 7: ... the Sprayer thoroughly with agents recommended by the chemical manufacturer Allow the unit to air dry Replace the Pump Handle and store the Sprayer in a clean dry safe location out of reach of children See Figure A 9 NOTE For a continuous spray mode press the Lever 8 forward and down to its locked position Then release your grip on the Lever To stop the continuous spray mode press down then let u...

Page 8: ...micals in a safe dry clean location out of reach of children 6 CAUTION All maintenance service and repairs not discussed in this manu al should only be performed by a qualified service technician Problem Possible Solution Unit does not spray 1 Make sure there is an adequate amount of liquid in the Container 2 Pump the Pump Handle to pressurize the system Do not squeeze the Lever on the Spray Gun A...

Page 9: ...LACEMENT PARTS THERETO PLEASE READ THE FOLLOWING CAREFULLY IMPORTANT INFORMATION WHEN ORDERING PARTS When ordering parts make sure to specify model number 95690 or 95692 and the part number Part Description Qty 1 Spray Head Nut 1 2 Separate Plate 1 3 O Ring 14 x 2 1 4 Bend 1 5 Spindle Nut 2 6 Spindle 1 7 Switch Pin 1 8 Lever 1 9 Switch Body 1 10 Valve Core O Ring 6 8 x 1 6 2 11 Valve Core O Ring 7...

Page 10: ...n purposes only and are not available individually as replacement parts 15 14 13 12 11 1010 1 2 3 4 5 6 5 7 8 9 16 17 18 19 A 20 21 22 23 24 25 26 27 28 27 26 29 30 31 32 A 19 18 33 25 34 35 36 37 38 39 40 41 42 43 IMPORTANT INFORMATION WHEN ORDERING PARTS When ordering parts make sure to specify model number 95690 or 95692 and the part number ...

Reviews: