Download our FREE ONVU360 Pro mobile application and
put the 360-degree experience right at your fingertips.
Scan the QR Code to get it now!
Android
iOS
© Copyright 2020 ONVU Technologies AG. All rights reserved. Oncam is a trading name of ONVU Technologies AG. Specifications and configurations subject to change without
notice.
EVO-12-NCD-02
|
Indoor Concealed
|
11.2020
|
Rev G
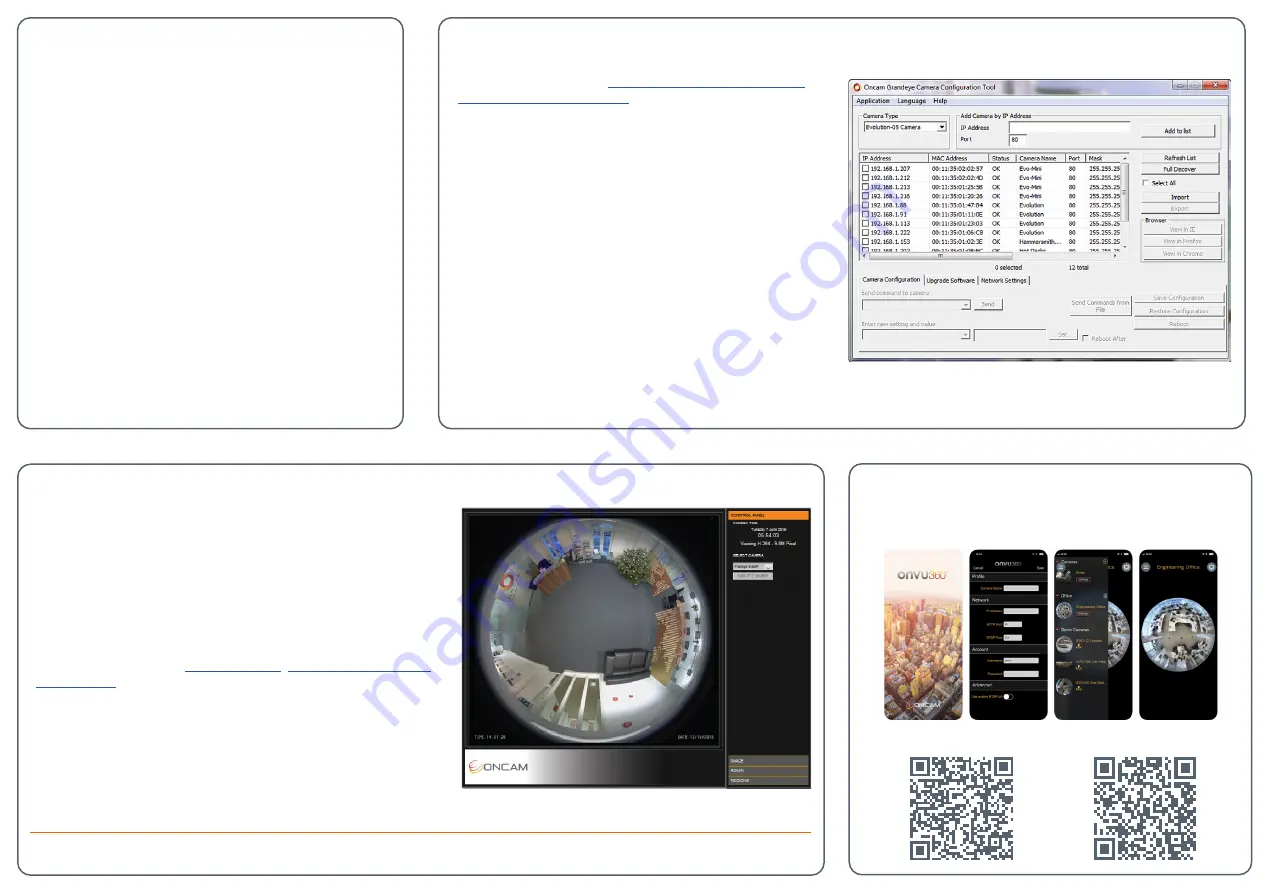
Note: The Evolution 05 screen is shown, the Evolution 12 is identical.
Using the Camera Configuration Tool
Go to the Oncam website (
https://www.oncamgrandeye.com/
resources/camera-config-tool/
) to download the latest version of
the Camera Configuration tool and corresponding User Manual.
The Camera Configuration tool quickly finds the IP and MAC
addresses of all Oncam Evolution cameras connected to
the network. It also allows you to change network settings,
configure the system and perform software updates on multiple
cameras. Initiate a new scan by clicking the Full Discover button
Start the application by clicking the CameraConfigurationTool
icon found on your desktop or from the program list (under
Oncam Grandeye). The software scans the network and provides
a list of all connected Oncam Evolution cameras.
Note: Some functions in this tool require a username and
password. If accessing the camera for the first time, an
administrator username and password will need to be set
Configuring Network Settings
Powering the Camera
Supply power to the camera with PoE IEEE802.3af
through the integrated RJ45 Ethernet cable.
IP Settings
In order to use the camera you need the IP address.
There are two IP Settings.
•
DHCP server or router to automatically assign
unique valid IP addresses to each camera.
•
A manually configured network using static IP
addresses.
If your network has a DHCP server, go to First Time Camera
Access.
Should a DHCP server not be available, the camera
adopts the default static IP address 192.168.0.200. You
will then need to manually assign each camera with a
new unique IP address.
Note: See the camera’s User Manual and Camera
Configuration Tool User Manual for IP Setting
adjustments.
First Time Camera Access
Web Browser
1. If you know the IP address of the camera, enter this
into the address bar of your web browser (Internet Explorer, Edge,
Firefox or Chrome). The camera should be on the same network.
2. Create an Admin username and password.
Notes:
Internet Explorer 11 is required to view live camera images in the browser.
All other browsers can be used for configuration purposes only.
Ensure you have the latest
) for viewing camera images on the web interface.
Camera Configuration Tool
1. Select a camera from the camera list
2. Select your browser to open the web interface.
3. Click OK on the authentication pop up. You will then be prompted
to create and set an Admin username and password to access the
camera.


