


Getting Started with RSL10
www.onsemi.com
12
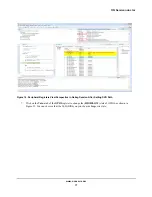
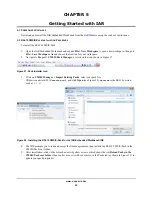
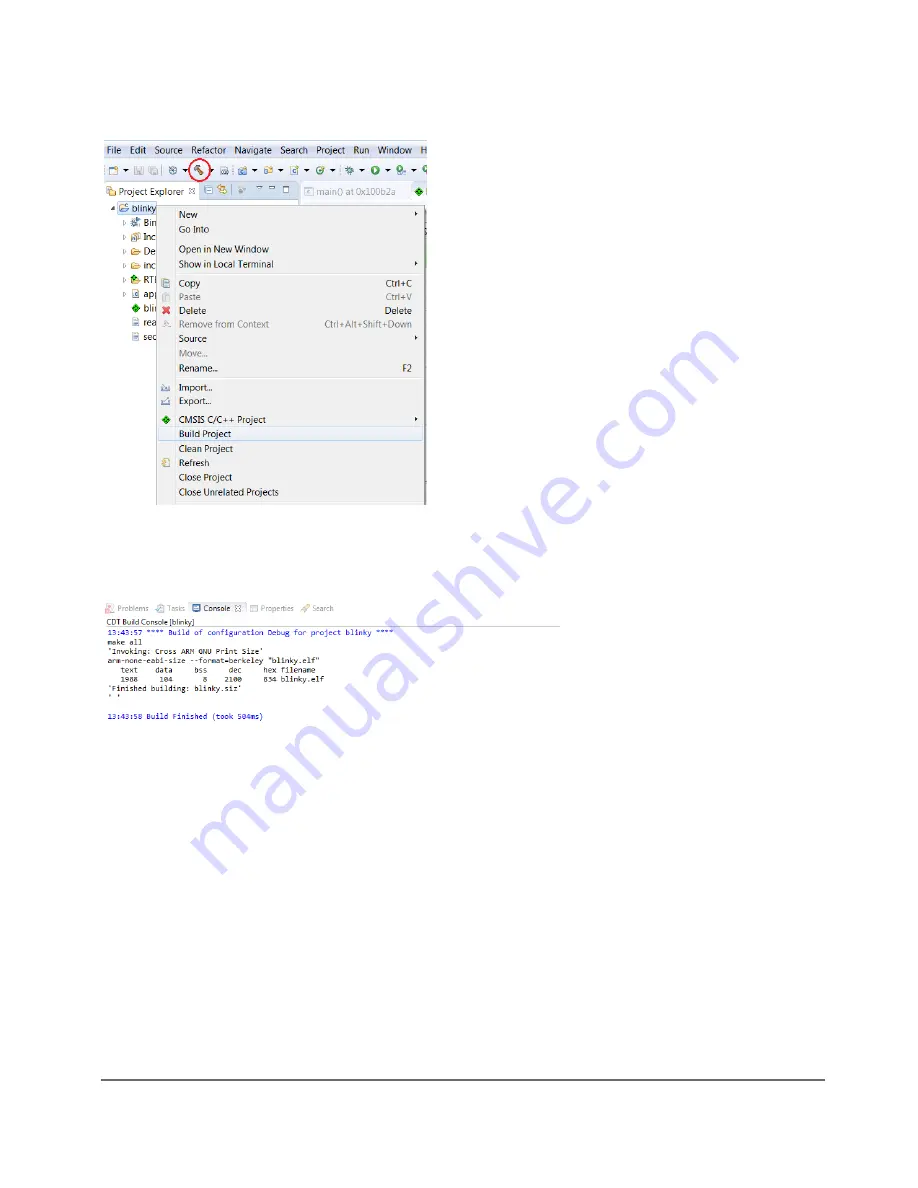
Figure 8. Starting to Build a Project in the ON Semiconductor IDE
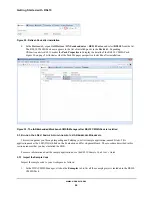
2. When the build is running, the output of the build is shown in the ON Semiconductor IDE C/C++
Development Tooling (CDT) Build Console, as illustrated in Figure 9.
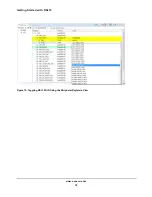
Figure 9. Example of Build Output
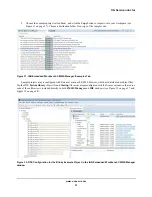
3. The key resulting output in Project Explorer includes:
•
blinky.hex
: HEX file for loading into Flash memory
•
blinky.elf
: Arm
®
executable file, run from RAM, used for debugging
•
blinky.map
: map file of the sections and memory usage
These files are shown in Figure 10 on page 13.
NOTE: You might need to refresh the project to see the three built output files. To do so, right-click on
the project name
blinky
and choose
Refresh
from the menu.