

Step 3 — Connect IC-3USB
Windows 7 and Vista
Connect the USB socket end of the IC-3USB cable
to a USB port on the host computer. A confirmation
dialog will appear, stating that the driver has been
installed and that the IC-3USB is ready to use.
Windows XP and 2000
1. Connect the USB socket end of the IC-3USB
cable to a USB port on the host computer.
2. The
Found New Hardware Wizard
will appear
and ask if you want to connect to Windows
Update to search for software. Select
No, not
this time
and click
Next
.
3. On the next screen, select
Install the software
automatically (Recommended)
and click
Next
.
4. If you are using Windows XP, a compatibility
warning may appear. Click
Continue Anyway
to begin installation.
5. When installation is complete, the
Completing
the Found New Hardware Wizard
screen will
appear. Click
Finish
to close the wizard.
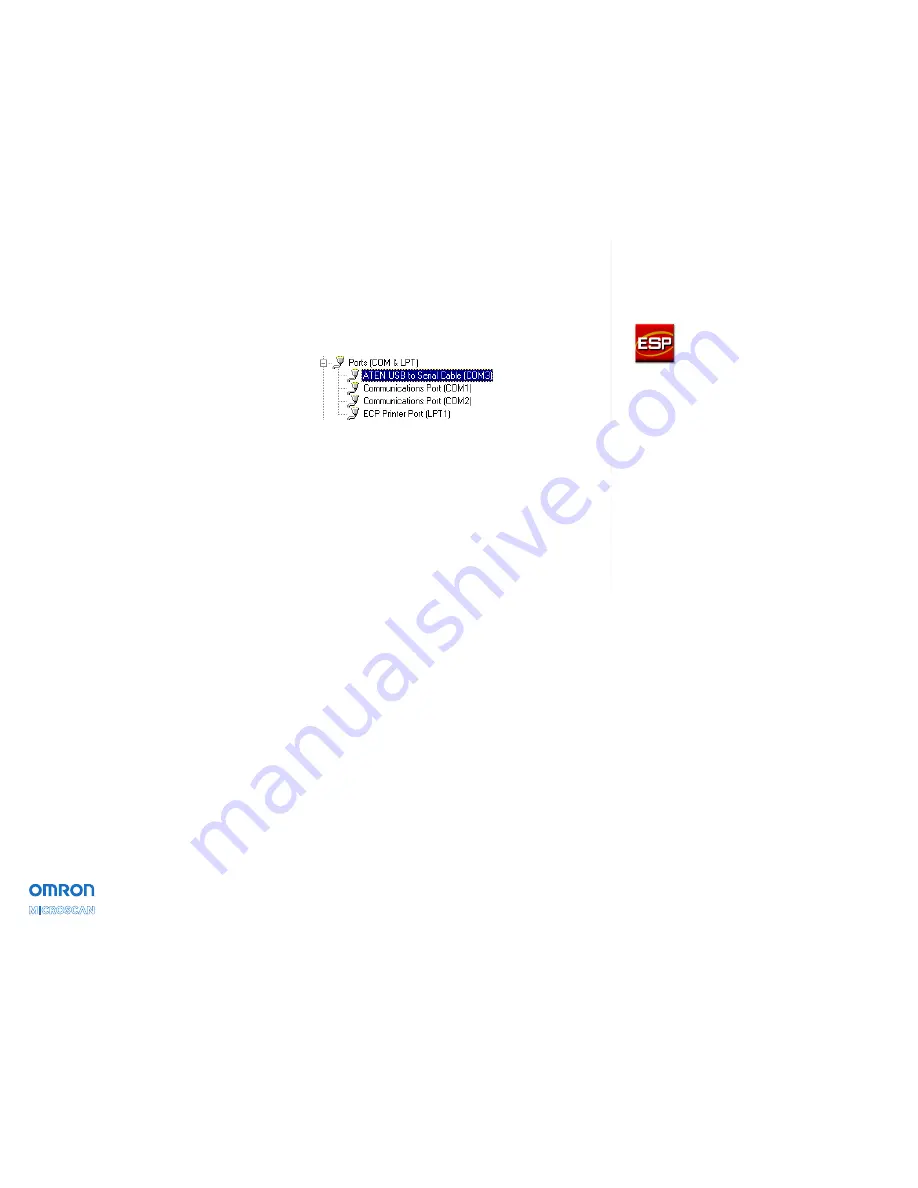
Step 4 — Locate Virtual COM Port
The installation wizard creates a virtual COM port that
will appear automatically whenever you insert the IC-3USB.
To verify correct installation, go to your Windows
Device Manager and click on
Ports
to see the virtual
port (highlighted below).
If you remove the IC-3USB from the USB port, the
associated COM port will disappear.
Caution:
Do not re-insert the IC-3USB into your USB
port without first restarting the computer. Doing so may
cause the computer to lose other COM port connections
and force you to reboot your computer.
Copyright ©201
8
Omron
Microscan Systems, Inc.
Step 5 — Start ESP
When you run
ESP
after installing the IC-3USB
driver, you will notice that a new COM port is now
available to ESP.
Select the highest available COM port on the list and
continue your reader setup in ESP.


