00053493.DOC, Version 1.0
41/50
6.2 Connecting a computer
1. Set the power selector switch to the position USB for power supply via the USB connection of the
computer.
2. Use the supplied USB cable to connect the controller to an available USB port on your computer. As
soon as the controller is connected to a computer, it will be recognized as a generic USB audio device
and the required drivers are installed. The power indicator lights up red to indicate that the controller is
receiving power from the USB bus.
The controller can be used in conjunction with your computer's soundcard without causing conflicts. You
may connect and disconnect the controller at any time.
3. The controller is supplied with power via the USB connection of the computer. However, if the
connection should not supply sufficient power (e.g. when connected to a non-powered USB hub), use
the supplied power unit: Connect the cable of the power unit to the power input DC IN 5V/1A and the
power unit to a power outlet. Set the power selector switch to the position ADAPTOR.
Use the unit only with the supplied power unit. Always disconnect the mains connector when you wish to
change connections, move the unit to a different place or if it is not used for a longer period.
4. After connecting, start the DJ software Virtual DJ LE. If the program has already been started prior to the
connection, it must be terminated and restarted, otherwise the controller cannot be operated.
6.3 Configuration of the controller
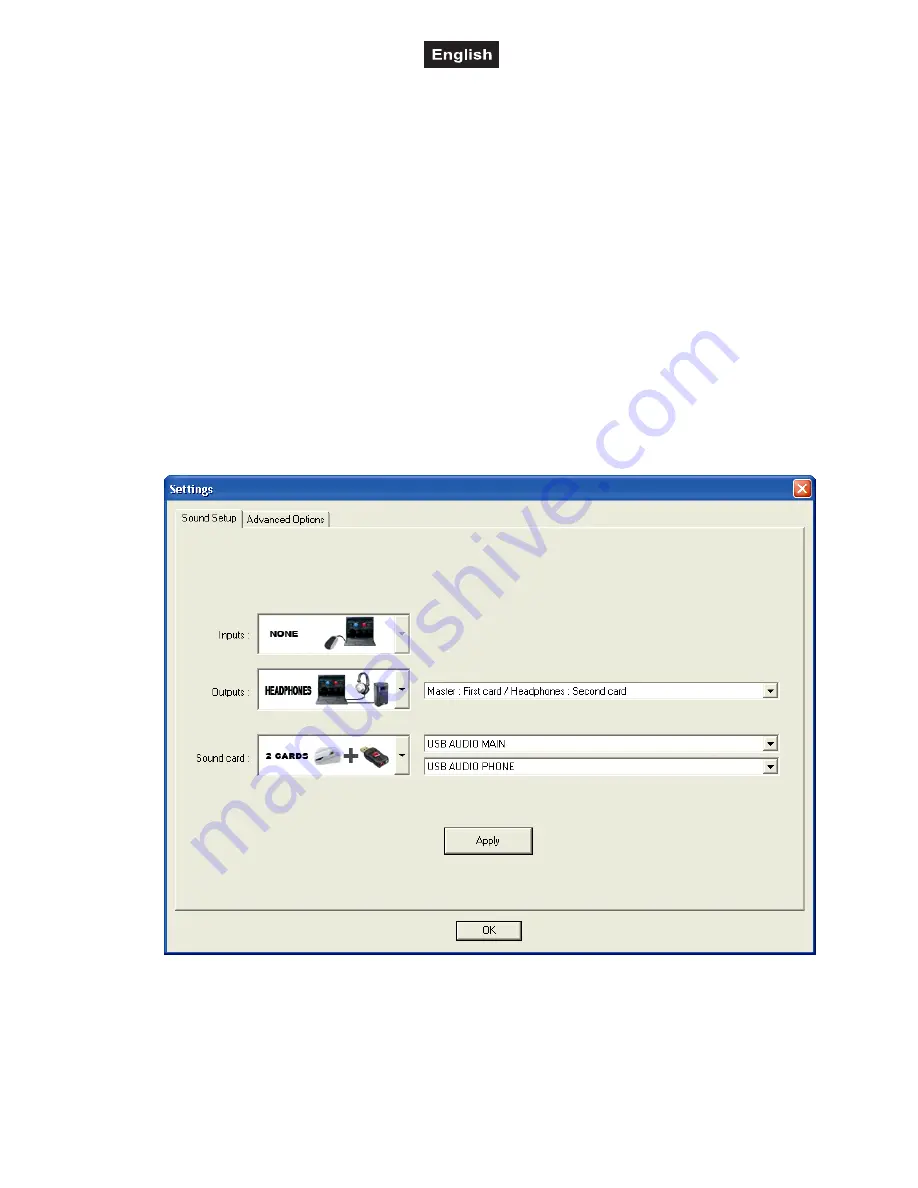
1. Call the software’s configuration menu with the button CONFIG and configure the program for operation
with the
TMC-02
in the tab Sound Setup.
2. In control panel Sound card, select the setting HEADPHONES. The two output channels master and
headphones will be available for the controller. If required, you can switch the output channels in the
adjacent control panel.
3. In control panel Sound card, select the setting 2 CARDS and in the adjacent panel the settings USB
AUDIO MAIN (=master channel) and USB AUDIO PHONE (=headphones channel).
4. Leave control panel Input at NONE and confirm your settings with Apply.


