


00068724.DOC, Version 1.0
9/12
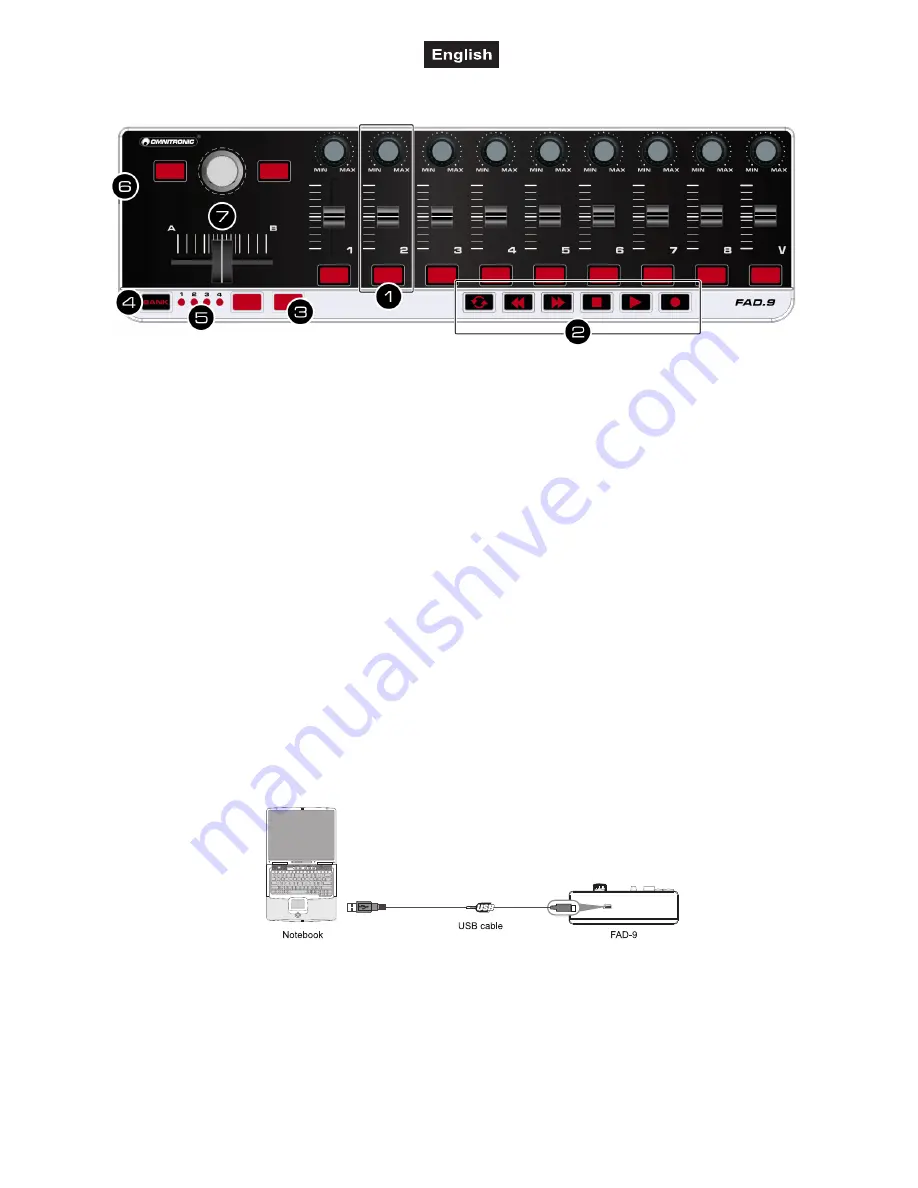
3. CONTROL ELEMENTS AND CONNECTIONS
1
MIDI control group
The FAD-9 offers 9 control groups. Each group
has one rotary control and one fader to
transmit control change messages, and one
button for control change or note messages.
2
Transport buttons
There are six transport buttons: [
LOOP
],
[
REW
], [
FF
], [
STOP
], [
PLAY
] and [
REC
].
These buttons transmit control change
messages or MMC messages (MIDI machine
control).
3
Freely assignable buttons
Transmit control change messages or note
messages.
4
BANK button
For switching between scenes. You can save
the parameter assignments for the MIDI
controller as scenes. The unit offers 4 scenes
which can be edited with the software editor.
4. CONNECTING A COMPUTER
Use the included USB cable to connect the FAD-9
to a USB 2.0 port on your computer.
The power will turn on and the scene LED will
light up.
When you first connect the MIDI controller to your
computer, the standard USB MIDI driver will be
installed automatically.
5
Scene indicators
The LED of the selected scene will light up.
6
USB port
For connecting a computer. The MIDI
controller sends and receives MIDI data via
the USB connection and is supplied with
power.
7
Fixed MIDI control group
These controllers cannot be edited.
• Rotary control: Adjusts the program change
message.
• Buttons: Transmit the control message
CC64/CC67.
• Fader: Adjusts the master volume.
Now select the FAD-9 as MIDI controller within
your music software and you are ready to go!


