6
Operation
Technical Specifications
1. Plug the cord into a grounded outlet. You do not need to switch the machine on. The machine will operate
only when the arm is down. Control the timer according to the thickness of the material to be sealed. Use
a higher setting for thicker material. Pull the handle down to seal. Sealing takes place when the light it on.
Leave the arm down for an additional few seconds after the light turns off to obtain a better seal.
2. Use a lower setting if the seal burns through.
3. Raise to a higher setting if the seal is not tight enough.
4. Should the bag stick to the silicon rubber, you did not give it enough time to cool.
5. Once you set the time, there is no need to reset it as the machine will remain constant and unchanged.
• Fast Operation.
• Precise Electric Circuit.
• Long Lasting.
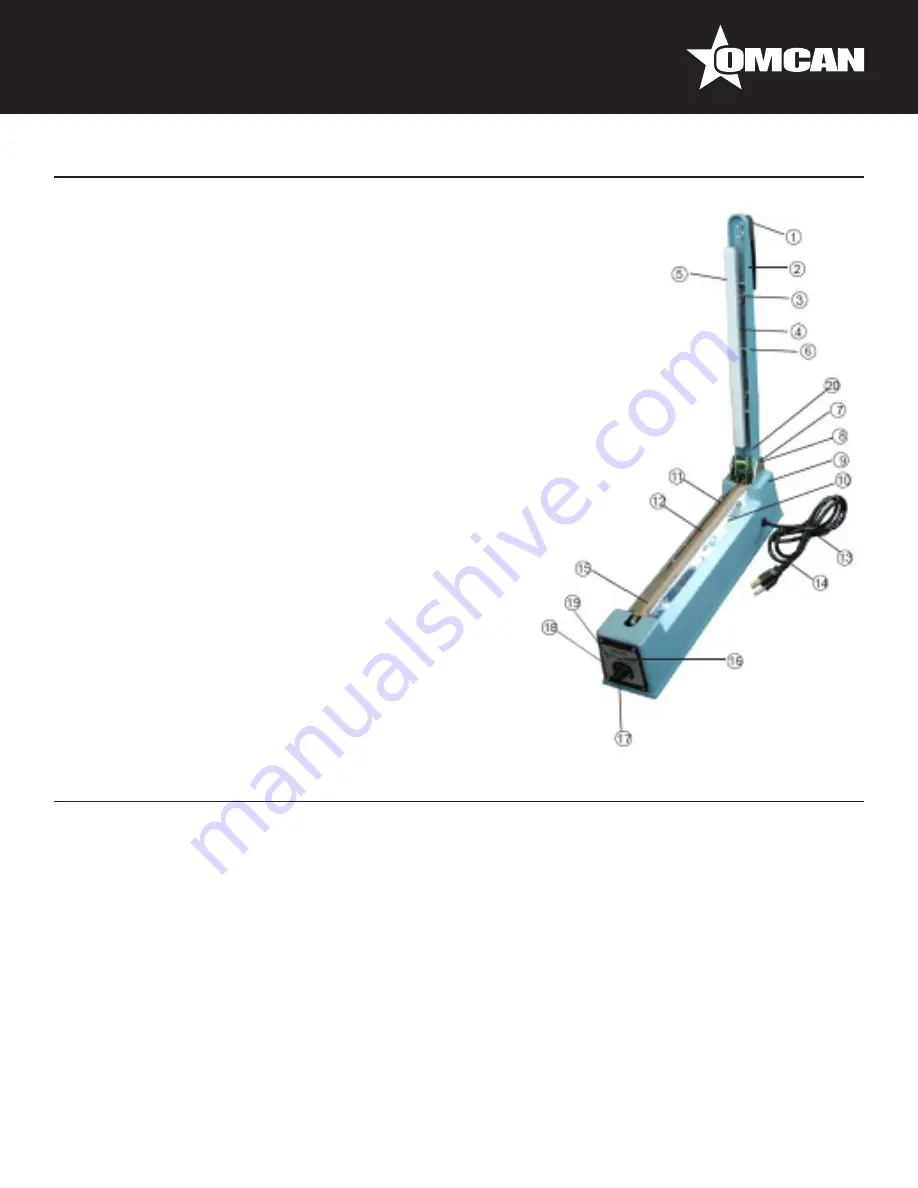
MAIN COMPONENTS
1. Handle Knob.
2. Platen Arm.
3. Platen Spring.
4. Platen.
5. Silicon Rubber.
6. Swivel.
7. Hinge.
8. Hinge Bracket.
9. Enclosure.
10. Metal Plate.
11. Lower Element non-
stick material.
12. Upper non-stick
material Cloth.
13. Strain Relief Busing.
14. Power Supply Cord.
15. Heating Element.
16. Pilot Lamp.
17. Timer Knob.
18. Control Panel.
19. Variable Resistor.
20. Switch Level.


