


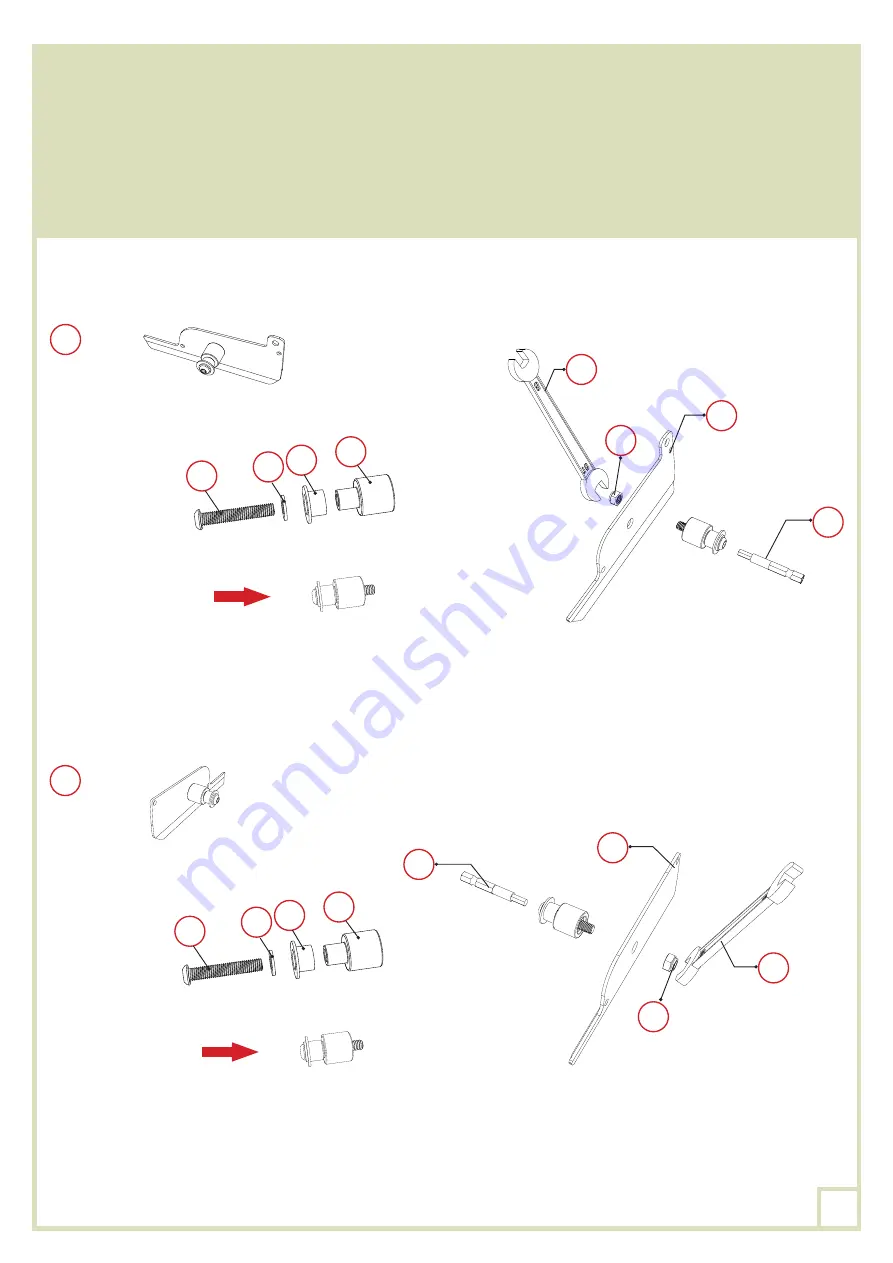
Build the pin composed of the parts
XO,VO
,
MO,MO-1
and
UO
onto the end caps
LO
and
LO-1
.
Make sure the pins are installed in the right direction as shown. Please, note that the direction is
different for the parts
LO
and
LO-1
.
Use an electric screwdriver with the hex bit
ZO-2
to insert the bolt
XO
onto the nut
UO
for more
convience. To avoid any injury and to make it easier, we recommand you to secure the nut with the
wrench
ZO-5
during this operation.
×24
LO
×25
LO
LO
UO
VO
VO
MO-1
MO-1
ZO-5
ZO-2
MO
MO
XO
XO
LO-1
UO
ZO-5
ZO-2
30
Summary of Contents for 15-728486
Page 8: ...8 PLAN DE MONTAGE dimensions en mm 5 2 4 5 2 5245 2 3706 3706 8...
Page 15: ...KO KO KO BO LO 1 LO 1 BO 1 1 KO BO LO 1 LO 1 BO 1 2 KO LO 1 GO GO GO GO 15...
Page 26: ...8 FOOTING MEASUREMENT dimensions in mm 5 2 4 5 2 5245 2 3706 3706 26...
Page 33: ...KO KO KO BO LO 1 LO 1 BO 1 1 KO BO LO 1 LO 1 BO 1 2 KO LO 1 GO GO GO GO 33...
Page 44: ...8 PLAN DEL MONTAJE DIMENSIONES EN MM 5 2 4 5 2 5245 2 3706 3706 44...
Page 51: ...KO KO KO BO LO 1 LO 1 BO 1 1 KO BO LO 1 LO 1 BO 1 2 KO LO 1 GO GO GO GO 51...
Page 62: ...8 PIANO DI MONTAGGIO DIMENSIONI IN MM 5 2 4 5 2 5245 2 3706 3706 62...
Page 69: ...KO KO KO BO LO 1 LO 1 BO 1 1 KO BO LO 1 LO 1 BO 1 2 KO LO 1 GO GO GO GO 69...


