www.microscopenet.com
5
3.2 Placing specimen
1) Place the slide on the mechanical stage.
2) Use the slide holder to gently secure the slide.
3) Turn the X and Y stage moving knobs to position the specimen in the center of
viewing field.
Caution:
Be sure not to allow an objective to touch a specimen slide when changing objectives.
3.3 Adjusting interpupillary distance
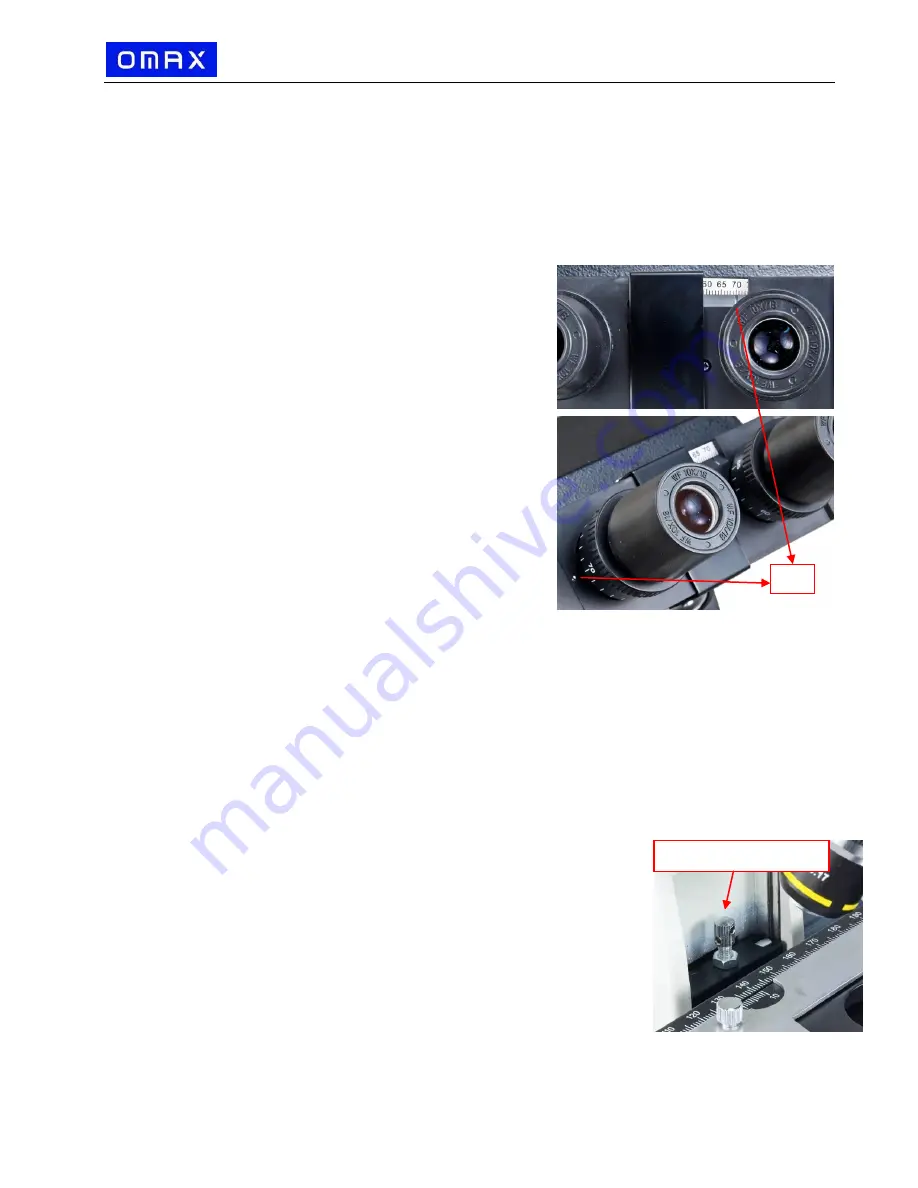
While observing with both eyes, hold the left and
right eyepiece tubes and slide the tubes in and
out. The interpupillary distance is correct when
the left and right fields of view converge
completely into one image.
3.4 Adjusting eyepiece diopter
1) Rotate the 10X objective into position.
2) Rotate the diopter ring on the right eyepiece
tube until its numerical value is the same as
your interpupillary distance, for example,
70
in
the right figure (See
Fig. 2
).
3) Close your left eye and bring the specimen into
focus following the focusing procedures in 3.5.
4) Close your right eye and bring the same
specimen into clear sharp focus by adjusting
the diopter ring on left eyepiece tube only. Do
not use focus knobs at this step.
5) Since both sides are adjustable, you may also do the above in the opposite way, in
other words, left eye first and right eye second.
3.5 Focusing
1) With the 10X objective in position, raise the mechanical stage using the coarse
focus knob until the specimen is close to the objective
2) Turn the coarse focus knob until the specimen is in focus. Use the fine focus knob
to obtain a sharp image. You may now switch to another magnification objective.
3) To get a good focused image, you may need to combine the focus knob adjustment
and interpupillary distance adjustment, along with eyepiece
diopter adjustment stated in
3.3
and
3.4
.
Tips:
T
o prevent your specimen slide from making contact with an
objective, turn the 100X objective in position and adjust the
focusing rack stop screw (
Fig. 3
) so that the 100X objective
will not contact the specimen while the stage is adjusted to
its highest position. Give the stage a tiny extra moving
space to ensure the objective can be focused every time.
70
Fig. 2
Fig. 3
Focusing Rack Stop
Screw


