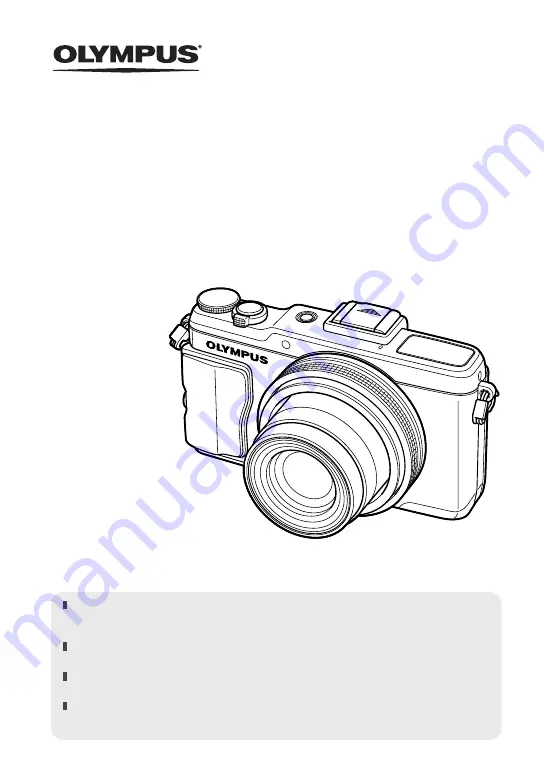
background image

  Thank you for purchasing an Olympus digital camera. Before you start to use your new 

camera, please read these instructions carefully to enjoy optimum performance and a longer 
service life. Keep this manual in a safe place for future reference.

  We recommend that you take test shots to get accustomed to your camera before taking 

important photographs.

  The screen and camera illustrations shown in this manual were produced during the 

development stages and may differ from the actual product.

  The contents in this manual are based on fi rmware version 1.0 for this camera. If there 

are additions and/or modifi cations of functions due to fi rmware update for the camera, the 
contents will differ. For the latest information, please visit the Olympus website.

Instruction Manual

DIGITAL CAMERA

X Z -2

Summary of Contents for XZ-2

Page 1: ...omed to your camera before taking important photographs The screen and camera illustrations shown in this manual were produced during the development stages and may differ from the actual product The contents in this manual are based on firmware version 1 0 for this camera If there are additions and or modifications of functions due to firmware update for the camera the contents will differ For th...

Page 2: ...P 29 P 89 6 Grip attachment screw 7 Fn2 button P 65 8 Lever P 43 9 Self timer lamp AF illuminator P 27 P 59 0 Hot shoe cover a Built in flash P 10 24 b Stereo microphone c Lens d Tripod socket e Battery card compartment cover P 5 f Battery card compartment lock P 5 g Connector cover h Multi connector P 66 71 74 i HDMI micro connector Type D P 66 In this manual the j icon represents operations perf...

Page 3: ...8 29 30 Rotate to choose an option 1 Flash switch P 10 2 Accessory port 3 Monitor Touch screen P 8 13 28 33 4 q Playback button P 11 29 5 Fn1 button P 29 65 6 MENU button P 46 7 INFO Information display button P 14 28 67 69 8 Hot shoe P 86 9 ON OFF button P 7 0 Indicator lamp P 6 a R Movie button P 10 29 b Arrow pad P 7 In this manual the j icon represents operations performed using the sub dial U...

Page 4: ...e camera strap and lens cap 1 2 3 4 5 Attach the strap to the other eyelet in the same manner Pull the strap tight so that it does not come loose Indications used in this manual The following symbols are used throughout this manual Cautions Warns of operations that should be absolutely avoided Also important information on factors which may lead to a malfunction or operational problems Notes Point...

Page 5: ...ior scratches etc may produce heat or an explosion Slide the battery lock knob in the direction of the arrow to unlock and then remove the battery Battery lock knob 3 Insert the card straight until it clicks into place Always use SD SDHC SDXC cards or Eye Fi card with this camera Do not insert other types of memory cards Cards compatible with this camera P 83 Do not touch the metallic parts of the...

Page 6: ...on the region where you purchased the camera If you received a plug in type USB AC adapter plug it directly into AC outlet The included USB AC adapter has been designed to be used for charging and playback Do not take pictures while the AC adapter is connected to the camera Be sure to unplug the power plug of the USB AC adapter from the wall outlet when the charging is complete or the playback end...

Page 7: ... and 3 useFGHIto set M month D day Time hours and minutes and Y M D date order and then press the A button For precise time setting press the A button as the time signal strikes 00 seconds 5 Use HI to select the x time zone and then press the A button Use FG to turn daylight saving time Summer on or off Seoul Tokyo Summer 12 10 26 12 30 Camera sleep operation If no operations are performed for the...

Page 8: ...control shutter speed You can express the motion of moving subjects or freeze motion without any blur M You control aperture and shutter speed You can shoot with long exposures for fireworks or other dark scenes C1 You can save shooting settings in advance and then quickly call those settings when shooting C2 SCN Select a scene according to the subject ART Select an art filter Taking photographs F...

Page 9: ... the camera are displayed Pressing the shutter button halfway and all the way down The shutter button has two positions The act of lightly pressing the shutter button to the first position and holding it there is called pressing the shutter button halfway that of pressing it all the way down to the second position pressing the shutter button all or the rest of the way down Press halfway Press the ...

Page 10: ...g the zoom lever adjusts the shooting range W side T side Recording movies 1 Set the mode dial to A 2 Press the R button to begin recording R button 3 Press the R button again to end recording 00 02 18 00 00 00 R R Displayed during recording Recording time ...

Page 11: ...xt frame 2012 10 26 12 30 20 100 0020 L N Still image 2012 10 26 12 30 4 100 0004 WB AUTO WB WB WB AUTO AUTO AUTO P HD Movie Index display In single frame playback turn the zoom lever to W for Index playback 2012 10 26 12 30 21 Index display Close up playback In single frame playback turn the zoom lever to T to zoom in up to 14 turn to W to return to single frame playback You can also use the cont...

Page 12: ... 02 00 00 14 Selecting images Select multiple pictures for protection or deletion Press the R button to select the current picture Selected pictures are marked with v To remove v and deselect the picture press the R button again Select multiple pictures and press Q You can protect or delete the multiple selected images 2012 10 26 12 30 21 Erasing images Display an image you want to delete and pres...

Page 13: ...arging in progress d Image stabilizer P 36 e Art filter P 19 Scene mode P 20 Picture mode P 37 f White balance P 38 g Live guide recall P 22 33 h Record mode still images P 40 i Record mode movies P 41 j Available recording time k Number of storable still pictures P 85 l Current memory P 84 m Tone control P 23 n Top Flash intensity control P 41 Bottom Exposure compensation indicator P 23 o Exposur...

Page 14: ...elow the lower limit in blue and the area metered using spot metering in green Focus lock If the camera is unable to focus on your chosen subject select single target mode and use focus lock to focus on another subject at about the same distance 1 In S AF mode position the AF target over the subject and press the shutter button halfway Check that the AF target mark has turned green Focus locks whi...

Page 15: ...o achieve optimal exposure Warning display example blinking Status Action 60 60 F1 8 F1 8 The subject is too dark Use the flash 2000 2000 F8 F8 The subject is too bright The metered range of the camera is exceeded Set ND Filter Setting P 35 to On Program shift In P mode you can use the control ring to change the combination of aperture value and shutter speed while maintaining the correct exposure...

Page 16: ...n focus softening background details Smaller apertures higher F numbers increase depth of field Lower aperture value F2 F5 6 F8 0 Higher aperture value The shutter speed display will blink if the camera is unable to achieve optimal exposure Warning display example blinking Status Action 60 60 F5 6 F5 6 The subject is underexposed Decrease the aperture value 2000 2000 F5 6 F5 6 The subject is overe...

Page 17: ...t action scene This blurring will give the impression of dynamic motion Slower shutter speed 2 1 15 60 100 400 1000 Faster shutter speed The aperture value display will blink if the camera is unable to achieve optimal exposure Warning display example blinking Status Action 2000 2000 F1 8 F1 8 The subject is underexposed Set the shutter speed slower 125 125 F8 F8 The subject is overexposed Set the ...

Page 18: ... landscapes and fireworks In M mode set the shutter speed to BULB Cautions Maximum 16 minutes default The maximum exposure time of bulb shooting depends on ISO sensitivity To reduce camera shake for bulb shooting mounting the camera on a stable tripod or using a remote cable sold separately is recommended The following features are not available during long exposures Sequential shooing self timer ...

Page 19: ...lter menu displays additional options Modifying filters Option I is the original filter while options II and on add effects that modify the original filter Adding effects Soft focus pin hole frames white edges starlight The effects available vary with the selected filter Cautions If RAW is currently selected for image quality image quality will automatically be set to YN RAW The art filter will be...

Page 20: ...cape 0 Multi Exposure J Sport g Beach Snow G Night Scene Y Underwater Wide U Night Portrait X Underwater Macro R Sunset Backlight HDR T Documents 2 Shoot To choose a different setting press Q to display the scene menu Cautions In e Portrait mode two images are recorded an unmodified image and a second image to which e Portrait effects have been applied The unmodified image is recorded using the op...

Page 21: ...guides overlap with the previous picture 2 125 125 F5 6 38 M ISO 200 3 Exit Exit A panorama may include up to 10 images A warning indicator g is displayed after the tenth shot 6 After taking the last shot press Q to end the series Cautions During panorama shooting the image previously taken for position alignment will not be displayed With the frames or other markers for display in the images as a...

Page 22: ...l photograph 0 Clear Vivid Flat Muted Cancel Set Level bar 4 Shoot Press the shutter button to shoot To clear the live guide from the display press the MENU button Cautions If RAW is currently selected for image quality image quality will automatically be set to YN RAW Live guide settings other than Blur Background and Express Motions are not applied to the RAW copy Pictures may appear grainy at s...

Page 23: ...autions Exposure compensation is not available in A M or SCN except partially modes Changing the brightness of highlights and shadows To display the tone control dialog press the F button F and press the INFO button Use HI to choose a tone level Choose low to darken shadows or high to brighten highlights 125 125 F5 6 ISO 200 L N 1 IS IS P 01 02 03 01 02 03 1234 1234 j HD 2 0 2 0 0 0 Exposure compe...

Page 24: ...you to reduce the red eye phenomenon Fill in flash The flash fires regardless of the light conditions Flash off The flash does not fire SLOW Slow synchronization Red eye reduction flash Combines slow synchronization with red eye reduction SLOW Slow synchronization Slow shutter speeds are used to brighten dimly lit backgrounds FULL 1 4 etc Manual For users who prefer manual operation 4 Press the sh...

Page 25: ...automatically in dark backlit conditions SLOW Slow synchronization S M AUTO Auto flash Fires automatically in dark backlit conditions Auto flash red eye reduction Fill in flash Always fires Flash off k AUTO can be set in A mode Minimum range The lens may cast shadows over objects close to the camera causing vignetting or be too bright even at minimum output Use optional off camera flash units to p...

Page 26: ... AF target All targets mode is restored if you move the cursor off the screen You can choose from the following 5 target types Press the INFO button and use FG All Targets Single Target Group Target The camera automatically chooses from the full set of focus targets Select the focus target manually The camera automatically chooses from the targets in the selected group All Targets 7 x 5 Single Tar...

Page 27: ...e settings for each frame bracket photography Y12s Self timer 12 SEC Press the shutter button halfway to focus the rest of the way down to start the timer First the self timer lamp lights up for approximately 10 seconds then it blinks for approximately 2 seconds and the picture is taken Y2s Self timer 2 SEC Press the shutter button halfway to focus the rest of the way down to start the timer The s...

Page 28: ...F5 6 0 0 0 0 G 10 G 10 A 10 A 10 Adobe Adobe iNatural iNatural ISO 400 ISO 400 125 125 2 0 2 0 45mm 45mm 1 8 3968 2976 10 10 4 3 L N 2012 10 26 12 30 15 100 0015 WB AUTO P 1 Battery check P 6 2 Eye Fi upload complete P 64 3 Print reservation Number of prints P 70 4 Sound record P 31 5 Protect P 31 6 Image selected P 12 7 File number P 62 8 Frame number 9 Storage device P 83 0 Record mode P 62 a As...

Page 29: ... 2012 10 26 12 30 21 Index display W T W T Playback zoom close up playback 2012 10 26 12 30 20 100 0020 L N 2x W T Single frame playback Close up playback Sub dial j Previous l next m Arrow pad FGHI Single frame playback next I previous H close up playbck move the position of close up index playbck selecting images INFO Displays the information of the image R Movie button Selecting images P 12 G E...

Page 30: ...ng Rotate Slideshow Print reservation Erase Performing operations on a movie frame Movie Play Q Pause or resume playback You can perform the following operations while playback is paused HIor Sub dial Previous Next Press and hold HI to continue the operation F Display the first frame G Display the last frame H I Advance or rewind a movie F G Adjust volume Cautions We recommend using the supplied P...

Page 31: ...ilable with protected images Audio recording is also available in the playback menu 2 Select R and press Q To exit without adding a recording select No JPEG L R Rotate H Play JPEG Edit Back Set 3 Select R Start and press Q to begin recording To stop recording part way through press Q 4 Press Q to end recording Images with audio recordings are indicated by a H icon To delete a recording select Eras...

Page 32: ...ed in order starting with the current picture BGM Set BGM 5 types or turn BGM Off Effect Choose the transition between frames Slide Set type of slideshow to execute Slide Interval Choose the length of time each slide is displayed from 2 to 10 seconds Movie Interval Select Full to include full length movie clips in the slideshow Short to include only the opening portion of each clip 3 Select Start ...

Page 33: ...de You can focus and shoot by tapping the monitor Tap to cycle through touch screen settings ISO 200 125 125 F5 6 P 0 0 0 0 01 02 03 01 02 03 30 30 L N HD Touch screen operations disabled Tap a subject to focus and automatically release the shutter Tap to display a focus frame You can use the touch screen to choose the position and size of the focus frame Photographs can be taken by pressing the s...

Page 34: ...Press Q to display the cursor 125 125 F5 6 P 38 38 Super Fine Off mall NORM ISO AUTO WB AUTO RAW RAW 4 3 i i ISO Off ND 2 Tap the desired item The item will be highlighted 3 Rotate the control ring to choose an option Some functions are changed by tapping the screen ISO AUTO WB AUTO 125 125 F5 6 P 38 38 Super Fine Off mall NORM RAW RAW 4 3 i i WB Off ND Cautions The situations in which touch scree...

Page 35: ...lash mode P 24 Flash intensity control P 41 Metering mode P 42 AF mode P 43 ISO sensitivity P 44 Face priority P 44 ND Filter Setting 1 Press Q to display the live control To hide the live control press Q again 2 Use FG on the arrow pad to select settings use HI to change the selected setting and press Q The selected settings take effect automatically if no operations are performed for about 8 sec...

Page 36: ...age OFF IS Off Image stabilizer is off IS1 Auto Image stabilizer is on IS2 Vertical IS Image stabilization applies only to vertical Y camera shake Use when panning the camera horizontally IS3 Horizontal IS Image stabilization applies only to horizontal Z camera shake Use when panning the camera horizontally with the camera held in portrait orientation Cautions The image stabilizer cannot correct e...

Page 37: ...ing FG L F 4 3 j j P WB AUTO WB WB WB AUTO AUTO AUTO IS OFF IS OFF h i j j Z J j k HD Muted 2 Select an option with HI and press Q h Vivid Produces vivid colors i Natural Produces natural colors j Muted Produces flat tones Z Portrait Produces beautiful skin tones J Monotone Produces black and white tone j Pop Art Choose an art filter and select the desired effect k Soft Focus l Pale Light Color m ...

Page 38: ...alance AUTO k Used for most light conditions when there is a white portion framed on the monitor Use this mode for general use Preset white balance 5 5300K For shooting outdoors on a clear day or to capture the reds in a sunset or the colors in a fireworks display N 7500K For shooting outdoors in the shadows on a clear day O 6000K For shooting outdoors on a cloudy day 1 3000K For shooting under a ...

Page 39: ...alance option The new value is stored until one touch white balance is measured again Turning the power off does not erase the data Tips If the subject is too bright or too dark or visibly tinted the message WB NG Retry will be displayed and no value will be recorded Correct the problem and repeat the process from Step 1 Setting the image aspect You can change the aspect ratio horizontal to vertic...

Page 40: ...a JPEG image with each shot JPEG modes combine image size Y X and W and compression ratio SF F N and B The options available can be selected using the K Set option in the custom menus Image size Compression rate Application Name Pixel count SF Super Fine F Fine N Normal B Basic Y Large 3968 2976 YSF YF YN YB Select for the print size X Middle 3200 2400 XSF XF XN XB 2560 1920 1920 1440 1600 1200 W ...

Page 41: ...ty control Flash output can be adjusted if you find that your subject to appears overexposed or is underexposed even though the exposure in the rest of the frame is just right 1 Display the live control and select the Flash intensity control item using FG 2 Choose the compensation value with HI and press Q ISO AUTO ISO ISO ISO AUTO AUTO AUTO P R R S AF S AF 0 0 OFF OFF 0 0 0 0 0 0 Cautions This do...

Page 42: ...eighted averaging metering This metering mode provides the average metering between the subject and the background lighting placing more weight on the subject at the center I Spot metering Choose this option to meter a small area with the camera pointed at the object you wish to meter Exposure will be adjusted according to the brightness at the metered point IHI Spot metering highlight control Inc...

Page 43: ...ion mark lights up on the monitor and the beep sounds when the focus is locked at the first time Even if the subject moves or you change the composition of the picture the camera continues trying to focus C AF TR AF tracking Press the shutter button halfway to focus the camera then tracks and maintains focus on the current subject while the shutter button is held in this position The AF target is ...

Page 44: ...R iR iL iL ISO AUTO ISO ISO ISO AUTO AUTO AUTO R R S AF S AF Face Priority On J Face Priority Off Face priority off I Face Priority On Face priority on K Face Eye Priority On The autofocus system selects the pupil of the eye closest to the camera for face priority AF L Face R Eye Priority On The autofocus system selects the pupil of the eye on the right for face priority AF M Face L Eye Priority O...

Page 45: ...ch sequence taken during sequential shooting Depending on the subject the camera may not be able to correctly detect the face In metering modes other than p ESP metering the camera will meter exposure for the selected position Notes Face priority is also available in MF Faces detected by the camera are indicated by white frames and the camera will meter exposure for the position ...

Page 46: ...m the setting Operation guide Press the MENU button to go back one screen Tab 2 Use FG to select a tab and press Q 3 Select an item using FG and press Q to display options for the selected item 2 1 c IS1 w 0 0 Back Shooting Menu 2 Set Image Stabilizer Bracketing RC Mode Sync Off 1 Off Sync 1 The current setting is displayed Function Q 2 1 c Back Shooting Menu 2 Set Off w 0 0 Image Stabilizer Brack...

Page 47: ...n the card including protected images is erased when the card is formatted Confirm there are no images that you still want to keep on the memory Cards formatted on a computer or other camera must be formatted with the camera before they can be used Be sure to remove the card before formatting the internal memory 1 Select Card Setup in shooting menu W P 88 2 Select Format 3 Select Yes and press Q F...

Page 48: ... Back Set Saving C Mode Setup Restore preselected settings for P A S or M mode The shooting mode does not change Up to 2 sets of preselected settings can be stored 1 Adjust settings in order to save 2 Select Reset C Mode Setup in shooting menu W 3 Select the desired destination Custom Mode 1 Custom Mode 2 and press I Set appears next to destinations Custom Mode 1 Custom Mode 2 to which settings ha...

Page 49: ...Menu 1 Back Set j 4 3 D Card Setup Reset C Mode Setup Backup Picture Mode Image Aspect 2 Select an option with FG and press Q h Vivid Produces vivid colors i Natural Produces natural colors j Muted Produces flat tones Z Portrait Produces beautiful skin tones J Monotone Produces black and white tone j Pop Art Choose an art filter and select the desired effect k Soft Focus l Pale Light Color m Light...

Page 50: ...ementary color is darkened k N Neutral Creates a normal black and white image Ye Yellow Reproduces clearly defined white cloud with natural blue sky Or Orange Slightly emphasizes colors in blue skies and sunsets R Red Strongly emphasizes colors in blue skies and brightness of crimson foliage G Green Strongly emphasizes colors in red lips and green leaves Pict Tone Monotone Colors the black and whi...

Page 51: ...he shutter button is pressed all the way down no modification negative positive Number of shots 2 or 3 AE BKT WB BKT FL BKT ISO BKT ART BKT A G 2f 0 7EV 2f 0 3EV 2f 1 0EV 3f 0 3EV 3f 0 7EV 3f 1 0EV Off Bracketing Back Set The camera modifies exposure by varying aperture and shutter speed mode P shutter speed modes A and M or aperture mode S The camera brackets the value currently selected for expo...

Page 52: ... button is pressed AE BKT WB BKT FL BKT ISO BKT ART BKT A G 3f 0 7EV 3f 0 3EV 3f 1 0EV Off Bracketing Back Set Bracketing is performed regardless of the upper limit set with ISO Auto Set g Customizing camera settings P 58 ART BKT ART bracketing Each time the shutter is released the camera records multiple images each with a different art filter settiing You can turn art filter bracketing on or off...

Page 53: ...ictures with a designated optional conversion lens Cautions When a conversion lens is attached light from the built in flash can cause vignetting where shadows from the conversion lens appear on the images When a conversion lens is attached the camera may take extra time to focus Conversion lens adapter CLA 12 available separately is required to attach the conversion lens to the camera ...

Page 54: ...JPEG Edit will be displayed Select the menu for the image to be edited 3 Select RAW Data Edit or JPEG Edit and press Q RAW Data Edit Create a JPEG copy of a RAW image edited according to the settings The editing was done with the curent settings Set the camera settings before editing JPEG Edit Choose from the following options Shadow Adj Brightens a dark backlit subject Redeye Fix Reduces the red ...

Page 55: ...C when there is not enough space in the card memory when an image is recorded on another camera When resizing Q an image you cannot select a larger number of pixels than was originally recorded P and Aspect can only be used to edit images with an aspect ratio of 4 3 standard Audio recording Add an audio recording up to 4 sec long to the current photograph This is the same function as R during play...

Page 56: ...nitial setting completed will be displayed and the settings are complete Connecting 1 Select Connection to Smartphone in the q playback menu and press Q 2 Select the connection method and press Q Private Connection Connect using the same preset password each time One Time Connection Connect using a password that is valid for only one connection Set the password and press Q 3 Select the camera s Fl...

Page 57: ...y during playback Use HI to highlight j color temperature or k brightness and FG to adjust the value Press the INFO button to switch between Natural and Vivid monitor color display 5 j 2 k Back Set Natural Vivid F Rec View Choose whether pictures are displayed immediately after shooting and for how long This is useful for making a brief check of the picture you have just taken Pressing the shutter...

Page 58: ...custom and accessory menus The c Custom menu is used to fine tune camera settings Custom Menu R AF MF P 59 HDMI Video Out Volume USB Mode 8 3 3 Auto C Connection Sound Back Set S Button Dial Lever P 59 T Connection Sound P 60 U Display P 60 V Exp p ISO P 61 W Custom P 61 X K Color WB P 61 Y Record P 62 Z Movie P 63 b K Utility P 64 ...

Page 59: ...er MENU c S Option Description g Button Function Choose the function assigned to the selected button UFunction Off AEL Preview k P Home Digital Tele converter Conversion Lens ND Filter Setting 65 VFunction IS Mode Picture Mode SCN ART WB j Y Aspect K Image Quality n Image Quality w Metering AF Mode ISO I Face Priority ND Filter Setting 65 Dial Function Choose the roles played by the control ring a...

Page 60: ...oose the information displayed when the camera is in shooting mode G Settings Choose the information displayed in index and calendar playback 69 Displayed Grid To choose a framing guide from w x y or X select Displayed Grid 69 KControl Settings Choose the controls displayed in each shooting mode Controls Shooting mode A P A S M ART SCN Live Control P 35 On Off On Off On Off On Off SCP P 68 On Off ...

Page 61: ...ty 44 ISO Auto Set Choose the upper limit and default value used for ISO sensitivity when Auto is selected for ISO High Limit Choose the upper limit for auto ISO sensitivity selection Default Choose the default value for auto ISO sensitivity selection Bulb Timer You can set the maximum time for bulb shooting 18 W Custom MENU c W Option Description g Slow Limit Choose the slowest shutter speed avai...

Page 62: ...iddle or Wmall and press I 3 Choose a pixel count and press Q Xiddle Wmall 3200 2400 1280 960 Pixel Count Set Back 40 Y Record MENU c Y Option Description g File Name Auto Even when a new card is inserted the file numbers are retained from the previous card File numbering continues from the last number used or from the highest number available on the card Reset When you insert a new card the folde...

Page 63: ...Repeat Step 1 to complete the name then highlight END and press Q To delete a character press the INFO button to place the cursor in the name area 1 and highlight the character After selecting press the INFO button to return the cursor to the area 2 and press Delete 0 1 2 3 4 5 6 7 8 9 A B C D E F G H I J K L M N O P Q R S T U V W X Y Z _ a b c d e f g h i j k l m n o p q r s t u v w x y z ABCDE 0...

Page 64: ...n to the camera s current angle Touch Screen Settings Activate the touch screen Choose Off to disable the touch screen 33 Eye Fi Enable or disable upload when using an Eye Fi card 84 m ft When AF Mode P 43 is set to MF you can select meters or feet as the unit of length displayed on the monitor EVF Adjust Adjust the brightness and color temperature of the electronic viewfinder sold separately The ...

Page 65: ... can assign any number of the following functions to the Fn2 button Select the check boxes for the functions you want to assign The functions that have been assigned change each time you press the Fn2 button The value can be changed using the control ring When you changed the functions by turning the control ring while holding down the Fn2 button the value can be changed by turning the control rin...

Page 66: ...monitor turns off when the cable is connected Press the q button when connecting via an AV cable Cautions For details on changing the input source of the TV refer to the TV s instruction manual Depending on the TV s settings the displayed images and information may become cropped If the camera is connected using both an A V and HDMI cable it will assign priority to HDMI If the camera is connected ...

Page 67: ...6 P 36 36 Super Fine Off Off mall NORM ISO AUTO WB AUTO RAW RAW 4 3 ND Metering Super control panel WB AUTO WB WB WB AUTO AUTO AUTO AUTO AUTO L F IS OFF IS OFF 4 3 WB AUTO WB WB WB AUTO AUTO AUTO P W W AUTO AUTO i HD WB Auto Live control INFO INFO INFO INFO INFO INFO Change Color Saturation Cancel P A S M 125 125 F5 6 P 36 36 Super Fine Off Off mall NORM ISO AUTO WB AUTO RAW RAW 4 3 ND Metering Su...

Page 68: ...on P 90 7 Picture mode P 37 8 Sharpness N P 50 Contrast J P 50 Saturation T P 50 Gradation z P 50 B W Filter x P 50 Picture tone y P 50 9 Color space P 61 0 Face priority P 44 a Metering mode P 42 b Aspect ratio P 39 c Record mode P 40 d AF mode P 43 AF target P 26 e Image stabilizer P 36 f ND Filter Setting P 35 1 After displaying the super control panel select the desired setting using FGHI and ...

Page 69: ... in red those below the lower limit in blue g Histogram Settings P 60 Display Level Guide Displays the camera s tilt The tilt is shown by the vertical bar and the level is shown by the horizontal bar Use the level guide display as your target level Playback information displays Use q Info to add the following playback information displays The added displays are displayed by repeatedly pressing the...

Page 70: ... that you want to set as print reservation then press FG to set the number of prints To set print reservation for several pictures repeat this step Press Q when all the desired pictures have been selected ALL Print Order Back Set All pictures Select U and press Q 3 Select the date and time format and press Q No The pictures are printed without the date and time Date The pictures are printed with t...

Page 71: ...d press Q Direct printing PictBridge By connecting the camera to a PictBridge compatible printer with the USB cable you can print out recorded pictures directly 1 Connect the camera to the computer using the supplied USB cable and turn the camera on USB port Smaller terminal USB cable Multi connector Use a fully charged battery for printing When the camera is turned on a dialog should be displayed...

Page 72: ...odes are as shown below Print Prints selected pictures All Print Prints all the pictures stored in the card and makes one print for each picture Multi Print Prints multiple copies of one image in separate frames on a single sheet All Index Prints an index of all the pictures stored in the card Print Order Prints according to the print reservation you made If there is no picture with print reservat...

Page 73: ...or operation refer to Setting printing data in the next section Setting printing data Select whether to print printing data such as the date and time or file name on the picture when printing When the print mode is set to All Print and Option Set is selected the following options appears Sets the number of prints Date Prints the date and time recorded on the picture File Name Prints the file name ...

Page 74: ...OM OLYMPUS Setup icon to open the OLYMPUS Setup window and then double click LAUNCHER EXE If a User Account Control dialog is displayed click Yes or Continue 2 Follow the on screen instructions on your computer Caution If nothing is displayed on the camera screen even after connecting the camera to the computer the battery may be exhausted Use a full charged battery Multi connector Smaller termina...

Page 75: ...commended See online help for information on using the software Macintosh 1 Insert the supplied CD in a CD ROM drive The disk contents should automatically be displayed in the Finder If they are not double click the CD icon on the desktop Double click the Setup icon to display the Setup dialog 2 Install OLYMPUS Viewer 2 Check the system requirements before beginning installation Click the OLYMPUS ...

Page 76: ... on the camera The selection screen for the USB connection is displayed 3 Press FG to select Storage Press Q USB Easy Print MTP Storage Charge Set Custom Print 4 The computer recognizes the camera as a new device Cautions If your computer is running Windows Vista Windows 7 select MTP in Step 3 to use Windows Photo Gallery Data transfer is not guaranteed in the following environments even if your c...

Page 77: ... is left for another 5 minutes it automatically turns off Press the n button to turn the camera on Press the q button to switch to the shooting mode Wait until flash charge stops blinking before taking pictures With prolonged camera use the internal temperature may increase resulting in automatic shutdown If this occurs remove the battery from the camera and wait until the camera has sufficiently ...

Page 78: ... in the internal memory and print reservation or new images cannot be recorded Insert the card or erase unwanted pictures Before erasing download important images to a PC Card Full The card is full No more pictures can be taken or no more information such as print reservation can be recorded There is no space in the card and print reservation or new images cannot be recorded Replace the card or er...

Page 79: ...ically Allow the internal temperature of the camera to cool before resuming operations Battery Empty The battery is drained Charge the battery No Connection The camera is not connected to the computer or printer correctly Disconnect the camera and connect it again correctly No Paper There is no paper in the printer Load some paper in the printer No Ink The printer has run out of ink Replace the in...

Page 80: ...own with high contrast at the same distance as the subject compose the shot and take the picture Subject with low contrast Excessively bright light in center of frame Subject containing no vertical lines 1 Subjects at different distances 1 Fast moving subject Subject not inside AF area 1 It is also effective to compose the shot by holding the camera vertically to focus and then returning to the ho...

Page 81: ...adjust in the negative direction Color hue Taking pictures with colors at the same shade as they appear Taking pictures by selecting white balance P 38 Best results in most environments can normally be obtained with the WB Auto setting but for some subjects you should try experimenting with different settings This is especially true for sunshade under a clear sky mixed natural and artificial light...

Page 82: ...ff the lens with a commercial blower then wipe gently with a lens cleaner Cautions Do not use strong solvents such as benzene or alcohol or a chemically treated cloth Mold may form on the lens surface if the lens is left dirty Battery USB AC adapter Wipe gently with a soft dry cloth Storage When storing the camera for extended periods remove the battery USB AC adapter and card and keep in a cool d...

Page 83: ...ted one When using F 3AC be sure to use the USB cable included with this camera Do not use any other AC adapter with this camera Using a separately sold charger A charger UC 90 sold separately can be used to charge the battery Using your charger and USB AC adapter abroad The charger and USB AC adapter can be used in most home electrical sources within the range of 100 V to 240 V AC 50 60Hz around ...

Page 84: ...you set the switch to the LOCK side you will not be able to write to the card delete data or format Return the switch to enable writing LOCK Format card Cards must be formatted with this camera before first use or after being used with other cameras or computers Checking the image saving location The memory indicator shows whether the internal memory or card is being used during shooting and playb...

Page 85: ...XSF 1600 1200 1 2 7 Approx 1 4 28 2 742 XF 1 4 Approx 0 7 41 4 023 XN 1 8 Approx 0 5 81 7 543 XB 1 12 Approx 0 3 119 10 971 WSF 1280 960 1 2 7 Approx 0 9 44 4 161 WF 1 4 Approx 0 6 64 6 034 WN 1 8 Approx 0 3 125 12 069 WB 1 12 Approx 0 2 179 17 241 WSF 1024 768 1 2 7 Approx 0 6 67 6 352 WF 1 4 Approx 0 4 100 9 283 WN 1 8 Approx 0 2 193 17 241 WB 1 12 Approx 0 1 279 24 138 WSF 640 480 1 2 7 Approx ...

Page 86: ... GN Guide number ISO100 FL 14 TTL AUTO AUTO MANUAL GN14 28mm FL 36R GN36 85mm GN20 24mm FL 50R GN50 85mm GN28 24mm FL 300R GN20 28mm FL 600R GN36 85mm GN20 24mm The focal length of the lens that can be used Calculated based on 35 mm film camera Wireless remote control flash photography External flash units that are designated for use with this camera and have a remote control mode can be used for ...

Page 87: ...ow synchronization longer than 4 seconds If the subject is too close to the camera the control flashes emitted by the built in flash may affect exposure this effect can be reduced by reducing the output of the built in flash by for example using a diffuser The upper limit of flash synchronization timing is 1 180 sec when using the flash in remote control mode Other external flash units Observe the...

Page 88: ...icture Mode iNatural 37 K Still Picture YN 40 Movie Full HD Image Aspect 4 3 39 X Image Stabilizer e 36 Bracketing AE BKT Off 51 WB BKT A B Off 51 G M FL BKT Off 52 ISO BKT Off 52 ART BKT Off 52 w 0 0 41 RC Mode Off 86 Sync Sync 1 52 1 Off 53 q Playback Menu Tab Function Default 1 2 3 g q L Start 32 BGM Cosmic Effect Standard Slide All Slide Interval 3sec Movie Interval Short R On 31 Edit Sel Imag...

Page 89: ...AF Illuminat On I Face Priority Face Priority Off MF Assist Off S Button dial Lever Button Function UFunction Off 59 VFunction Dial Function P j Ps j F A j FNo j F S j Shutter j F M j Shutter j FNo SCN j Scene Mode j F ART j ART filter j F Menu j A j B Value q j GU j Prev Next L Lever Function MF Dial Direction Exposure c Menu c MF b Zoom b dLock Off T Connection Sound HDMI HDMI Out 1080i 60 HDMI ...

Page 90: ...l ART Art Menu SCN Scene Menu Picture Mode Settings On Histogram Settings Highlight 255 Shadow 0 Live View Boost Off Sleep 1min V Exp p ISO Metering p 61 P Metering Off Noise Reduct Auto Noise Filter Standard ISO Auto ISO Auto Set High Limit 1600 Default 100 Bulb Timer 16 min W Custom Slow Limit 1 60 61 w F Off X K Color WB WB Auto 61 All All Set A 0 G 0 All Reset No W Keep Warm Color On WB Off Co...

Page 91: ...f dpi Settings 350 Copyright Settings Copyright Info Off Artist Name Copyright Name Z Movie Movie R On 63 Wind Noise Reduction Off b K Utility Pixel Mapping 64 Exposure Shift p 0 J 5 Level Adjust Reset Touch Screen Settings On Eye Fi On m ft 4 m EVF Adjust j 0 k 0 4 Displayed when MF is selected ...

Page 92: ...mager metering ESP metering Center weighted averaging metering Spot metering Selected target metering Metered range EV 3 17 ESP metering Center weighted averaging metering Spot metering ISO sensitivity 100 12800 1 3 EV step Exposure compensation 3EV 1 3 EV step White balance Mode setting Auto Preset WB 7 settings Customized WB One touch WB Recording Memory Built in memory SD SDHC SDXC supports UHS...

Page 93: ...al voltage DC 3 6 V Nominal capacity 1 270 mAh No of charge and discharge times Approx 300 times varies with usage conditions Usage environment Temperature 0 C 40 C 32 F 104 F charging USB AC adapter MODEL NO F 2AC 1B F 2AC 2B Rated input AC 100V 240V 50 60Hz Rated output DC 5V 500mA Usage environment Temperature 0 C 40 C 32 F 104 F operation 20 C 60 C 4 F 140 F storage SPECIFICATIONS ARE SUBJECT ...

Page 94: ...nfants to prevent the following dangerous situations which could cause serious injury Becoming entangled in the camera strap causing strangulation Accidentally swallowing the battery cards or other small parts Accidentally firing the flash into their own eyes or those of another child Accidentally being injured by the moving parts of the camera Do not look at the sun or strong lights with the came...

Page 95: ...imes To prevent batteries from leaking overheating or causing a fire or explosion use only batteries recommended for use with this product Insert the battery carefully as described in the operating instructions If rechargeable batteries have not been recharged within the specified time stop charging them and do not use them Do not use a battery if it is cracked or broken If a battery leaks becomes...

Page 96: ... materials or software and in no event shall be liable for any implied warranty of merchantability or fitness for any particular purpose or for any consequential incidental or indirect damages including but not limited to damages for loss of business profits business interruption and loss of business information arising from the use or inability to use these written materials or software or equipm...

Page 97: ...s and accessories of other manufacturers which may be distributed by Olympus is the responsibility of the manufacturers of such products and accessories in accordance with the terms and duration of such manufacturers warranties b any Product which has been disassembled repaired tampered with altered changed or modified by persons other than Olympus s own authorized service personnel unless repair ...

Page 98: ...l crossed out wheeled bin WEEE Annex IV indicates separate collection of waste electrical and electronic equipment in the EU countries Please do not throw the equipment into the domestic refuse Please use the return and collection systems available in your country for the disposal of this product This symbol crossed out wheeled bin Directive 2006 66 EC Annex II indicates separate collection of was...

Page 99: ... defective although it has been used properly in accordance with the written Handling Care and Operating instructions supplied with it during a period of up to one year from the date of purchase this product will be repaired or at Olympus s option replaced free of charge To claim under warranty the customer must take the product and this Warranty certificate before the end of the one year warranty...

Page 100: ...rruption and loss of business information arising from the use of inability to use these written materials or software Some states do not allow the exclusion or limitation of liability for consequential or incidental damages so the above limitations may not apply to you Trademarks Trademarks Microsoft and Windows are registered trademarks of Microsoft Corporation Macintosh is a trademark of Apple ...

Page 101: ......

Page 102: ...VM576101 ...

Reviews: