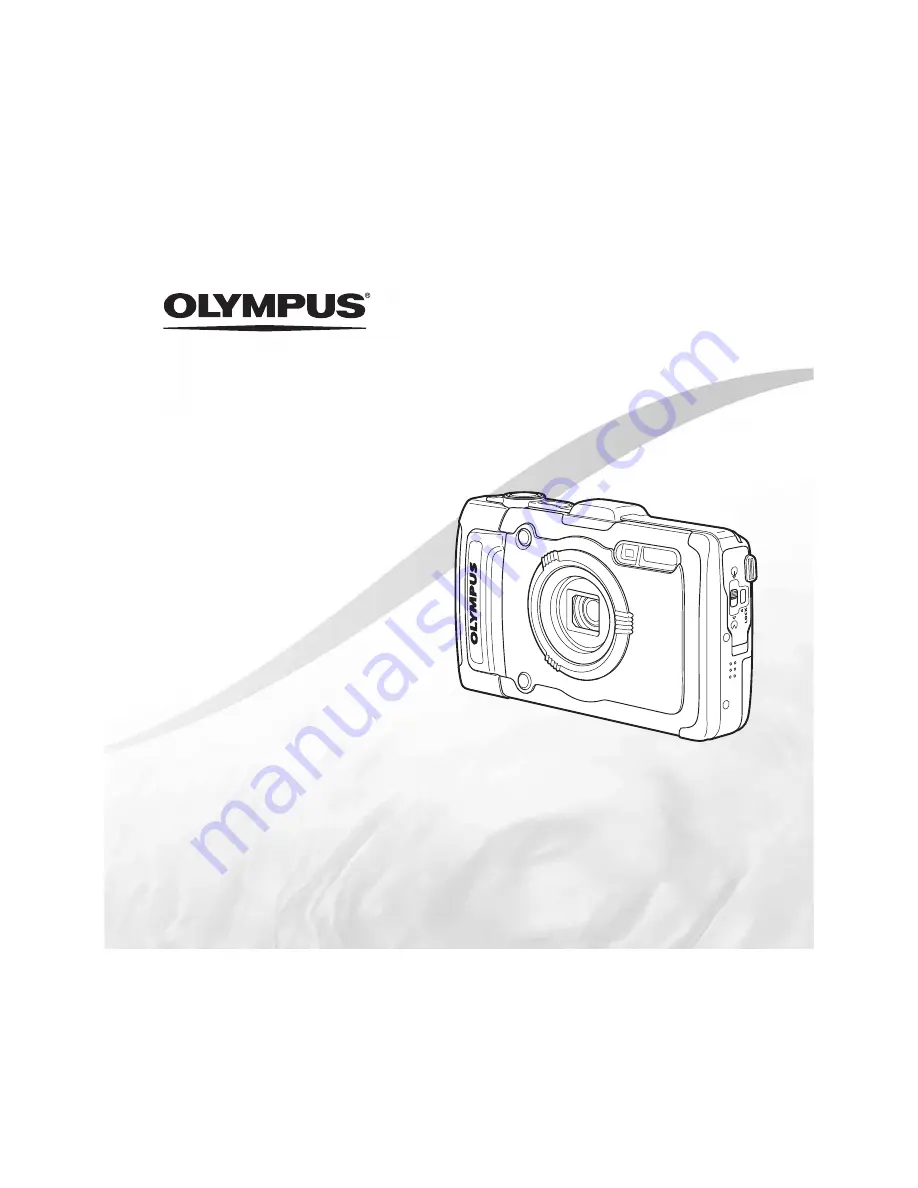
background image

DIGITAL CAMERA

Instruction Manual

TG-2

Ɣ

 Thank you for purchasing an Olympus digital camera. Before you start to use your new camera, please 

read these instructions carefully to enjoy optimum performance and a longer service life. Keep this 
manual in a safe place for future reference.

Ɣ

 We recommend that you take test shots to get accustomed to your camera before taking important 

photographs.

Ɣ

 In the interest of continually improving products, Olympus reserves the right to update or modify 

information contained in this manual.

Summary of Contents for TG-2

Page 1: ... carefully to enjoy optimum performance and a longer service life Keep this manual in a safe place for future reference Ɣ We recommend that you take test shots to get accustomed to your camera before taking important photographs Ɣ In the interest of continually improving products Olympus reserves the right to update or modify information contained in this manual ...

Page 2: ... 1 2 3 5 4 6 7 8 10 9 12 13 11 14 3 1 Connector cover 2 Connector cover lock 3 LOCK knob 4 Speaker 5 Multi connector 6 HDMI micro connector 7 Strap eyelet 8 Self timer lamp LED Illuminator AF illuminator 9 Flash 10 Lens 11 Lens ring 12 Tripod socket 13 Battery card cover 14 Battery card cover lock Other accessories not shown Warranty card Contents may vary depending on purchase location ...

Page 3: ... 9 Mode dial 10 q button switching between shooting and playback 11 Arrow pad INFO changing information display ash Y self timer erase 12 A button OK 13 button Attaching the camera strap Attaching the camera strap 1 2 3 Pull the strap tight so that it does not come loose Arrow pad H left G down F up I right A FGHI instruct to press the up down left right arrow pad ...

Page 4: ...oward the battery lock knob Damage to the battery exterior scratches etc may produce heat or an explosion Slide the battery lock knob in the direction of the arrow to unlock and then remove the battery 3 Insert the card straight until it clicks into place Write protect switch Always use SD SDHC SDXC Eye Fi FlashAir with Wireless LAN function card with this camera Do not insert other types of memor...

Page 5: ... charge the battery For charging the battery abroad see Using your charger and USB AC adapter abroad p 79 Ɣ The battery is not fully charged at shipment Before use be sure to charge the battery until the indicator lamp turns off up to 4 hours Connecting the camera Connecting the camera 1 2 AC outlet USB cable supplied Connector cover Multi connector LOCK knob Connector cover lock Indicator lamp On...

Page 6: ...ncluded USB AC adapter has been designed to be used for charging and playback Do not take pictures while the USB AC adapter is connected to the camera Be sure to unplug the power plug of the USB AC adapter from the wall outlet when the charging is complete or the playback ends For details on the battery see Battery Handling Precautions p 98 For details on the USB AC adapter see USB AC adapter p 99...

Page 7: ...A button 2 Press FG of the arrow pad to select the year for Y X MENU Back Y M D Y M D Time 2013 Date and time setting screen 3 Press I of the arrow pad to save the setting for Y X MENU Back Y M D Y M D Time 2013 4 As in Steps 2 and 3 press FGHI of the arrow pad to set M month D day Time hours and minutes and Y M D date order and then press the A button For precise time setting press the A button a...

Page 8: ...m agps The update software can also be installed from the supplied PC software 2 Connect the camera to the computer and launch the update software Connecting with a computer p 56 Ɣ Once the software has started follow the on screen instructions Using GPS Using GPS 1 Select On for GPS Settings GPS in the d Settings Menu 3 tab p 55 Ɣ Once the camera has determined the position and location coordinat...

Page 9: ... GPS devices is prohibited Ɣ The provision of A GPS data may be terminated without prior notice Ɣ Position data may be unavailable or contain errors in the following locations Ɣ Locations without a clear view of the sky indoors underground or underwater or near trees or tall buildings Ɣ Locations subject to strong magnetic or radio interference near high voltage power lines magnets electronic devi...

Page 10: ...en release it Ɣ Press and hold the q button while the camera is turned off to start up the camera in the playback mode Ɣ In this case pressing the q button again sets the camera to the standby mode Shooting still images 1 Press the n button to turn on the camera 2 Select the shooting mode p 14 3 Hold the camera and compose the shot When holding the camera take care not to cover the ash microphone ...

Page 11: ...the shutter button all the way down while being careful not to shake the camera Press halfway Press fully Using the zoom Pressing the zoom buttons adjusts the shooting range W side T side Image size Zoom bar 12M Super resolution zoom 1 Optical zoom Other 2 1 For Super resolution zoom see Super Res Zoom p 36 2 Due to increased processing of the pixel counts the image quality will not degrade The ma...

Page 12: ... Wireless RC Flash System p 82 Slave Using the self timer After the shutter button is pressed all the way down the picture is taken after a short delay 1 Press G 12 12 0 0 0 0 AUTO WB AUTO WB AUTO ISO AUTO ISO MENU MENU 12M 2 2 Y Off 4 3 2 Use HI to select the setting option and press the A button to set Option Description Y Off The self timer is deactivated Y 12 sec The self timer lamp turns on f...

Page 13: ... No info ĺ Measurement position information each time F INFO is pressed No Name Normal Detailed No info 1 Shooting mode R R 2 Landmark R R 3 Flash R R 4 Self timer R R R 5 Exposure compensation R R 6 White balance R R 7 ISO sensitivity R R 8 Drive R R 9 Image size still images R R 10 Aspect R R 11 Metering R 12 World time R 13 Recording with sound wind noise reduction R R 14 Image size movies R R ...

Page 14: ...ht Scene MNight Portrait CSport NIndoor RSelf Portrait SSunset XFireworks VCuisine dDocuments qBeach Snow MSnapshot kWide1 lWide2 HMacro UPet Mode Cat tPet Mode Dog aSnow Panorama h Backlight HDR A A mode P P mode Pop Art Pin Hole Fish Eye Soft Focus Punk Sparkle Watercolor Re ection Miniature Fragmented Dramatic C1 C2 Custom mode Ɣ List of settings available in each shooting mode p 73 List of set...

Page 15: ...ng modes P P mode The camera will select the appropriate aperture value and shutter speed for the subject Changes can also be made to various shooting settings such as exposure compensation as needed M M mode The camera will automatically select the optimal shooting mode for the scene The shooting condition is decided by the camera and settings cannot be changed excepting some functions a Super Ma...

Page 16: ... and press the Q button to set Retouching setting NORM 4 4 3M 4 3 0 34 0 34 4 Point the camera toward the subject Check the frame appearing around the face detected by the camera and then press the shutter button to take the picture 5 To save the image select OK on the review screen and press the Q button To retouch the image additionally select Beauty Fix OK Beauty Fix MENU Back Beauty Fix Beauty...

Page 17: ...rk AFLOCK AFLOCK 4 4 NORM 0 34 0 34 0 0 0 0 12M 4 3 To take panoramic photos To take panoramic photos Panorama Panorama 1 Select p Panorama 2 Press G to go to the submenu 3 Use HI to select Auto Manual or PC and press the A button to set Submenu Application Auto Panorama images are automatically combined just by swinging the camera in the shooting direction Manual Three frames are taken and combin...

Page 18: ...ra automatically combines the frames into a single panorama image Ɣ To cancel the panorama function press the button Ɣ If the shutter does not automatically release try Manual or PC Taking pictures with Manual Taking pictures with Manual 1 Use FGHI to specify at which edge the next picture is to be connected Direction for combining frames MANUAL MANUAL 2 Press the shutter button to take the rst fr...

Page 19: ... combined into a single panorama image by the PC software Ɣ For details on installing the PC software refer to p 56 In addition refer to the PC software help guide for details on how to make panorama images A A mode When an aperture value is set the camera automatically sets an appropriate shutter speed After pressing H you can change the aperture value using FG P P mode You can shoot with special...

Page 20: ...e shooting screen To play sound recordings To play sound recordings To play sound recorded with an image select the image and press the A button Ɣ Press FG to adjust volume Index view and close up view Index view enables quick selection of a desired image Close up view up to 10 magni cation allows checking of image details 1 Press the zoom buttons Single image view Close up view Index view Locatio...

Page 21: ...4 30 4 30 OK Replay 13 02 26 12 30 2 Press the A button Viewing area To control panorama image playback To control panorama image playback Stop playback Press the button Pause Press the A button Control while paused Press FGHI to scroll the image in the direction of the pressed button Press the zoom buttons to enlarge shrink the image Press the A button to restart scrolling Playing back grouped im...

Page 22: ...togram R 19 Exposure compensation R 20 Shooting submode R 21 White balance R 22 Image size R 23 File name R 24 Recording date and time R R 25 Grouped images R R R 12 30 13 02 26 13 02 26 12 30 10 10 4 30 4 30 9 8 24 25 2 3 6 4 5 Still image Ɣ Detailed 100 0004 4 30 4 30 2 0 1 1000 3968 2976 AUTO WB 100 ISO NORM 1 MAGIC 13 02 26 12 30 F3 9 10 10 877hpa 1200m 13 02 26 12 30 100 0004 2 0 1 1000 3968 ...

Page 23: ...ing 0 00 REC REC 0 00 0 00 0 00 REC REC 0 34 0 34 0 34 0 34 Lights up red when recording Recording time Recording length p 81 Ɣ The movie is shot in the set shooting mode Note that the shooting mode effects may not be obtained for some shooting modes Ɣ Sound is also recorded Ɣ When using a camera with a CMOS image sensor moving objects may appear distorted due to the rolling shutter phenomenon Thi...

Page 24: ...ume Use FG to adjust the volume Operations while playback is paused Operations while playback is paused During pause 00 14 00 34 00 14 00 34 Elapsed time Total shooting time Cueing Use F to display the rst frame and press G to display the last frame Advancing and rewinding one frame at a time Press I or H to advance or rewind one frame at a time Hold I or H pressed for continuous advance or rewind...

Page 25: ...ensitivity 2 Self timer 6 Drive 3 Exposure compensation 7 Image Size 4 White balance 8 Aspect Using the function menu 1 Use H of the arrow pad to display the function menu 2 Use FG of the arrow pad to select the function to be set 3 Use HI of the arrow pad to select the setting value and then press the A button to enter the setting Example Exposure compensation Exposure Comp MENU MENU 12M AUTO WB ...

Page 26: ... Slave Self timer Sets the time after the shutter button is pressed until the picture is taken b Y Off The self timer is deactivated c Y 12 sec The self timer lamp turns on for approx 10 seconds then blinks for approx 2 seconds and then the picture is taken d Y 2 sec The self timer lamp blinks for approx 2 seconds then the picture is taken Auto Release When your pet cat or dog turns its head towar...

Page 27: ...O sensitivity l ISO Auto The camera automatically sets the sensitivity with priority on image quality m High ISO Auto The camera automatically sets the sensitivity with priority on minimizing blur caused by a moving subject or by camera shake Q to P Value Set a smaller value to reduce noise in the picture or a larger value to reduce blur Drive Sets the sequential shooting function o Single One fra...

Page 28: ...One Touch 2 face the camera toward a piece of white paper or other white object and press the button Ɣ The camera releases the shutter and the white balance is registered When the white balance was previously registered the registered data is updated Ɣ The registered white balance data will not be cleared by turning off the power Ɣ Perform this procedure under the light where the pictures will be ...

Page 29: ...w Pic Orientation Icon Guide Date Stamp Super Res Zoom a Movie Menu p 37 A Image Size IS Movie Mode R Movie sound recording Wind Noise Setting Recording Volume b Playback Menu p 38 q Slideshow Edit Erase Print Order R Protect Upload Order FlashAir c Settings Menu 1 p 43 d Memory Format Format Backup Eye Fi Custom Mode Setup USB Connection q Power On Sound Settings d Settings Menu 2 p 45 d File Nam...

Page 30: ... File Name Reset MENU Settings Menu 2 Back Page tab File Name Reset Pixel Mapping Info Off Power Save Power Save Off 10sec TV Out English MENU Settings Menu 2 Back Submenu 1 3 Use FG to select the desired submenu 1 and then press the A button Power Save Power Save Off Pixel Mapping Info Off 10sec TV Out English File Name Reset MENU Settings Menu 2 Back Power Save Power Save Pixel Mapping Info Off ...

Page 31: ...nu Functions No The settings will not be changed Selecting the image quality for still Selecting the image quality for still images images z z Compression Compression Submenu 2 Application Fine Shooting at high quality Normal Shooting at normal quality Ɣ Number of storable pictures still images Recording length movies in the internal memory and cards p 81 Brightening the subject against Brightenin...

Page 32: ...t continuously AF Tracking continuously AF Tracking 1 Hold the camera to align the AF target mark on the subject and press the A button 2 When the camera recognizes the subject the AF target mark automatically tracks the subject movement to focus on it continuously 3 To cancel the tracking press the A button Ɣ Depending on the subjects or the shooting conditions the camera may be unable to lock th...

Page 33: ...mage Stabilizer set to On Ɣ Images may not be stabilized if camera shake is too severe Ɣ When the shutter speed is extremely slow such as when taking pictures at night Image Stabilizer may not be as effective z Camera Menu 2 Using separately sold accessories Using separately sold accessories z z Accessory Settings Accessory Settings Submenu 2 Submenu 3 Application Remote Flash Off The external ash...

Page 34: ...s allows the user to make a brief check of the image that was just taken Automatically rotating images Automatically rotating images shot with the camera in a vertical shot with the camera in a vertical position during playback position during playback z z Pic Orientation Pic Orientation Ɣ During shooting the y p 41 setting on the playback menu is set automatically Ɣ This function may not work pro...

Page 35: ...UTO ISO 6400 ISO ISO 100 ISO ISO 100 HIGH ISO ISO HIGH 6400 ISO Auto The camera will automatically set the ISO sensitivity for optimal image quality 12 4 3 Imprinting the date of recording Imprinting the date of recording z z Date Stamp Date Stamp Submenu 2 Application Off Do not imprint the date On Stamp new photographs with the date of recording Ɣ When the date and time are not set Date Stamp ca...

Page 36: ...Enable super resolution zoom Ɣ Super Res Zoom is available only when Image Size is set to 5 Super resolution zoom Digital zoom Image size Zoom bar On Off 12M Super resolution zoom Off On 12M Digital zoom Other 1 On On 12M Super resolution zoom Digital zoom 1 Due to increased processing of the pixel counts the image quality will not degrade The magni cation ratio changes depending on the image size...

Page 37: ...n place on a tripod or other stable surface On The image stabilizer is activated Ɣ Images may not be stabilized if camera shake is too severe Ɣ In HS movie mode this setting is xed to Off Recording sound when shooting Recording sound when shooting movies movies A A R R Submenu 2 Application Off No sound is recorded On Sound is recorded Ɣ Sound is not recorded when an HS movie mode is selected Redu...

Page 38: ... size Changing the image size q q Q Q This saves a high resolution image as a separate image with a smaller size for use in e mail attachments and other applications Submenu 1 Submenu 2 Submenu 3 Edit Q n 9 1 Use HI to select an image 2 Use FG to select an image size and press the A button Ɣ The resized image is saved as a separate image Cropping image Cropping image q q P P Submenu 1 Submenu 2 Ed...

Page 39: ...ges Retouching faces on still images q q Beauty Fix Beauty Fix Submenu 1 Submenu 2 Edit Beauty Fix Ɣ Depending on the picture the editing may not be effective 1 Use HI to select an image and press the Q button 2 Use FG to select a retouching item and press the Q button 3 To save the image select OK on the review screen and press the Q button To retouch the image additionally select Beauty Fix Ɣ Th...

Page 40: ... press the A button Ɣ The edited image is saved as a separate image Ɣ Depending on the picture the editing may not be effective Ɣ The retouching process may lower the image resolution Changing the landmark Changing the landmark information recorded on the information recorded on the images images q q Landmark Landmark You can change the landmark information such as place names and names of buildin...

Page 41: ...ubmenu 2 Application All Erase All images in the internal memory or card will be erased Sel Image Images are individually selected and erased Erase Deletes the image displayed Erase Group All images in the group are erased Ɣ When erasing pictures in the internal memory do not insert the card into the camera Ɣ Protected images cannot be erased To individually select and erase images To individually...

Page 42: ...ase Group p 41 or All Erase p 41 but all images are erased by Memory Format Format p 43 1 Use HI to select an image 2 Press the A button Ɣ Press the A button again to cancel the settings 3 If necessary repeat Steps 1 and 2 to protect other images and press the button Ɣ If you protect the grouped images all images in the group will be protected at once Setting images to upload to Setting images to ...

Page 43: ...ttp olympuspen com OIShare Ɣ Before use refer to FlashAir Eye Fi card p 79 d Settings Menu 1 Erasing data completely Erasing data completely d d Memory Format Memory Format d d Format Format Ɣ Before formatting check that no important data is left in the internal memory or card Ɣ Cards must be formatted with this camera before rst use or after being used with other cameras or computers Ɣ Be sure t...

Page 44: ... Custom Mode 1 or Custom Mode 2 is displayed Submenu 2 Application Set Save current settings Reset Return to the default setting Selecting a method for connecting Selecting a method for connecting the camera to other devices the camera to other devices d d USB Connection USB Connection Submenu 2 Application Auto Set to select the connection method each time the camera is connected to another devic...

Page 45: ...ound Settings Sound Settings Submenu 2 Submenu 3 Application Sound Type 1 2 3 Selects the camera sounds operation sounds shutter sound and warning sound Volume 0 1 2 3 4 5 Selects the operation volume of camera buttons q Volume 0 1 2 3 4 5 Selects the image playback volume d Settings Menu 2 Resetting the le names of Resetting the le names of pictures pictures d d File Name File Name Month 1 to C A...

Page 46: ...Ɣ For best results wait at least one minute after taking or viewing pictures before performing pixel mapping If the camera is turned off during pixel mapping be sure to perform it again To adjust the image processing function To adjust the image processing function Press the A button when Start Submenu 2 is displayed Ɣ The check and adjustment of the image processing function starts Adjusting the ...

Page 47: ...y HDMI Control Off Operate with the camera On Operate with the TV remote control The factory default settings differ according to the region where the camera is sold To play back camera images on a TV To play back camera images on a TV Ɣ Connection via AV cable 1 Use the camera to select the same video signal system as the one of connected TV NTSC PAL 2 Connect the TV and camera Ɣ Connection via H...

Page 48: ...settings the displayed images and information may become cropped To operate images with the TV remote control To operate images with the TV remote control 1 Set HDMI Control to On and turn off the camera 2 Connect the camera and TV with an HDMI cable Connection via HDMI cable p 47 3 First turn on the TV and then turn on the camera Ɣ Operate by following the operation guide that is displayed on the...

Page 49: ... for the menus and error messages displayed on the monitor is selected d Settings Menu 3 Setting the date and time Setting the date and time d d X X 1 Press FG of the arrow pad to select the year for Y 2 Press I of the arrow pad to save the setting for Y 3 As in Steps 1 and 2 press FGHI of the arrow pad to set M month D day Time hours and minutes and Y M D date order and then press the A button Ɣ ...

Page 50: ...use FG to turn daylight saving time Summer on 2 When you select a time zone the camera automatically calculates the time difference between the selected zone and the home time zone x to display the time in the travel destination time zone z Registering the settings for Beauty Registering the settings for Beauty Fix Fix d d Beauty Settings Beauty Settings Ɣ Depending on the picture the editing may ...

Page 51: ...ing standby mode screen 20 m to 5 000 m Calibrate Proceed to the setting screen See below Ɣ When set to On a cautionary message appears if the water depth reaches 12 m 39 4 ft followed by a warning if the depth exceeds 15 m 49 2 ft To adjust the altitude water depth display To adjust the altitude water depth display 1 Use FG to select Calibrate and press the A button 2 Use FG to select the current...

Page 52: ...oting mode Example Flash mode 1 Tap the right or left side of the camera body once Ɣ The ash mode selection screen is displayed 2 Tap the right or left side of the camera body to select a function 3 Tap the back of the camera body twice to con rm your selection MENU MENU Flash Auto 0 0 0 0 12M AUTO WB AUTO WB AUTO ISO AUTO ISO 4 3 Take a picture Tap the back of the camera twice Only for the a Snow...

Page 53: ...lt the camera to the right or the left Return to the shooting mode Tap the top side of the camera twice When tapping the camera s top To adjust the tap control To adjust the tap control 1 Select Calibrate in Submenu 3 and press the A button 2 Select the part to adjust with FG and press the A button 3 Select the Str setting with FG and press I 4 Select the Intvl setting with FG and press the A butt...

Page 54: ...d hold the INFO button down until the LED illuminator lights up Ɣ If you perform an operation when the LED illuminator is on it will illuminate up to approx 90 seconds LED illuminator Ɣ The LED illuminator turns off if no operation is performed for approx 30 seconds Ɣ Even when the camera s power is turned off if the INFO button is pressed until the LED illuminator lights up it lights for 30 secon...

Page 55: ...e state or province is not to be displayed On When the state or province is to be displayed City Off When the city is not to be displayed On When the city is to be displayed Landmark Off When the landmark is not to be displayed On When the landmark is to be displayed Ɣ Auto Time Adjust applies only when x home time zone is selected for World Time Ɣ Track logs are stored automatically at regular in...

Page 56: ...ater Ɣ Even if a computer has USB ports proper operation is not guaranteed in the following cases Ɣ Computers with USB ports installed using an expansion card etc Ɣ Computers without a factory installed OS and home built computers Ɣ When the computer does not support SDXC cards a message may appear urging to format the internal memory or card Formatting will completely erase all images so do not f...

Page 57: ...Setup window and then double click Launcher exe If a User Account Control dialog is displayed click Yes or Continue 2 Register your Olympus product Ɣ Click the Registration button and follow the on screen instructions Ɣ To register the camera must be connected to the computer Connecting the camera p 56 Ɣ If nothing is displayed on the camera screen even after connecting the camera to the computer ...

Page 58: ...help for information on using the software 4 Install the camera manual Ɣ Click the Camera Instruction Manual button and follow the on screen instructions Macintosh Macintosh 1 Insert the supplied CD in a CD ROM drive Ɣ Double click the CD OLYMPUS Setup icon on the desktop Ɣ Double click the Setup icon to display the Setup dialog 2 Install OLYMPUS Viewer 3 Ɣ Check the system requirements before beg...

Page 59: ...rd Drive Space 3GB or more Monitor Settings 1024 768 pixels or more Minimum 32 000 colors 16 770 000 colors recommended Ɣ Other languages can be selected from the language combo box For information on using the software see online help 3 Copy the camera manual Ɣ Click the Camera Instruction Manual button to open the folder containing the camera manuals Copy the manual for your language to the comp...

Page 60: ...o the printer s instruction manual Ɣ For details on the available paper types loading paper and installing ink cassettes refer to the printer s instruction manual Ɣ In the setup menu set USB Connection to Print USB Connection p 44 Printing images at the printer s standard settings Easy Print 1 Display the image to be printed on the monitor Ɣ Viewing images p 20 2 Turn on the printer and then conne...

Page 61: ...This prints images based on the print reservation data on the card 1 Print Order is available only when print reservations have been made Print Reservations p 63 5 Use FG to select Size Submenu 3 and press I Ɣ If the Printpaper screen is not displayed the Size Borderless and Pics Sheet are set to the printer s standard MENU Printpaper Size Borderless Back Standard Standard 6 Use FG to select the B...

Page 62: ...Without prints the images without the date File Name With Without Selecting With prints the le name on the image Selecting Without does not print any le name on the image P Proceeds to the setting screen This selects a portion of the image for printing To crop an image To crop an image P P 1 Use the zoom buttons to select the size of the cropping frame use FGHI to move the frame and then press the...

Page 63: ...t Reservations In print reservations the number of prints and date imprint option are saved in the image on the card This enables easy printing at a printer or print shop supporting DPOF by using only the print reservations on the card without a computer or a camera Ɣ Print reservations can be set only for the images stored on the card Ɣ DPOF reservations set by another DPOF device cannot be chang...

Page 64: ... Use FG to select and press the A button NORM NORM 0 4 30 2976 3968 2976 3968 4 30 13 02 26 13 02 26 12 30 12 30 100 0004 100 0004 OK Print Print Order 4 Use HI to select the image for print reservation Use FG to select the quantity Press the A button 5 Use FG to select the X date print screen option and press the A button Submenu 2 Application No This prints the image only Date This prints the im...

Page 65: ... 4 Use HI to select the image with the print reservation you want to cancel Use FG to set the print quantity to 0 5 If necessary repeat Step 4 and then press the A button when nished 6 Use FG to select the X date print screen option and press the A button Ɣ The settings are applied to the remaining images with the print reservation data 7 Use FG to select Set and press the A button ...

Page 66: ... again remove the battery and memory card and dry fully with the battery card cover open Shutter button Shutter button No picture is taken when the shutter button is pressed Ɣ Cancel sleep mode To save battery power the camera automatically goes into sleep mode and the monitor turns off if there is no operation for 3 minutes when the camera is turned on No picture is taken even if the shutter butt...

Page 67: ... date and time settings return to the default setting varies depending on how long the batteries have been loaded Turning on the camera and making the initial settings p 7 Miscellaneous Miscellaneous The camera makes a noise when taking pictures Ɣ The camera may activate the lens and make a noise even if no operation is performed This is because the camera automatically performs actions of auto fo...

Page 68: ...blem Use FG to select Memory Format and press the A button Next use FG to select Yes and press the A button 2 Error message Corrective action No Picture Internal memory Card problem Take pictures before viewing them Picture Error Problem with selected image Use photo retouch software etc to view the image on a computer If the image still cannot be viewed the image le is corrupted The Image Cannot ...

Page 69: ...k the printer for any problems and then turn the power on again Cannot Print 4 Problem with selected image Use a computer to print Caution Depth Depth problem The depth exceeds 15m Please use at depths of 15m or less 3 This is displayed for instance when the printer s paper tray has been removed Do not operate the printer while making the print settings on the camera 4 This camera may be unable to...

Page 70: ...a picture of a shadowy subject Using the AF illuminator makes focusing easier AF Illuminat p 34 Ɣ Taking a picture of subjects where autofocus is dif cult In the following cases after focusing on an object by pressing the shutter button halfway down with high contrast at the same distance as the subject compose the shot and take the picture Subjects with low contrast When extremely bright objects ...

Page 71: ...subject against a backlight Faces or backgrounds are bright even when shot against backlight Shadow Adjust p 31 h Backlight HDR p 14 Ɣ Taking pictures using Face iESP p 32 Appropriate exposure is obtained for a face against backlight and the face is brightened Ɣ Taking pictures using n for ESP n p 32 Brightness is matched with a subject in the center of the screen and the image is not affected by ...

Page 72: ...icture is taken with a high ISO sensitivity noise small colored spots and color unevenness that were not in the original image can occur and the image can appear grainy ISO sensitivity p 27 Batteries Making batteries last longer Ɣ Set Power Save p 49 to On Playback Editing tips Playback Playing images in the internal memory and card Ɣ Remove the card and display the images in internal memory Ɣ Ins...

Page 73: ...ensation R R R White balance R R R ISO sensitivity R R R Drive R R Image Size R R R R R Aspect R R R R R Filter Effect R Reset R R R R R Compression R R R R R Shadow Adjust R R R AF Mode R R ESP n R R R R Digital Zoom R R R Image Stabilizer R R R R R Accessory Settings R 1 1 R R AF Illuminat R R R R R Rec View R R R R R Pic Orientation R R R R R Icon Guide R R R R R Date Stamp R R R R Super Res Zo...

Page 74: ...ect Reset R R R R R R R R R R Compression R R R R R R R R R R Shadow Adjust R R R R R R R AF Mode R R R R R R R R ESP n R R R R R R R R Digital Zoom R R R R R R R R Image Stabilizer R R R R R R R R R R Accessory Settings R 1 R R R R R R 1 R AF Illuminat R R R R R R R R R R Rec View R R R R R R R R R R Pic Orientation R R R R R R R R R R Icon Guide R R R R R R R R R R Date Stamp R R R R R R R R R S...

Page 75: ...ilter Effect Reset R R R R R R R R R Compression R R R R R R R R R Shadow Adjust R R R R R R R R AF Mode R R R 1 1 1 ESP n R R R R R R R R R Digital Zoom R R R R R R R R R Image Stabilizer R R R R R R R R R Accessory Settings R R R R R R 1 R 1 AF Illuminat R R R R R R R Rec View R R R R R R R R Pic Orientation R R R R R R R R R Icon Guide R R R R R R R R R Date Stamp R R R R R R R R R Super Res Zo...

Page 76: ...e R R 1 1 Aspect R R R Filter Effect Reset R R R R Compression R R R R Shadow Adjust R R AF Mode R 1 R ESP n R R R R Digital Zoom R R Image Stabilizer R R R R Accessory Settings 1 R R R AF Illuminat R R Rec View R R R R Pic Orientation R R R R Icon Guide R R R R Date Stamp R R R Super Res Zoom 1 Some functions cannot be set ...

Page 77: ...ettings Pop Art Pin Hole Fish Eye Soft Focus Punk Sparkle Exposure compensation R R R R R White balance R R R R Watercolor Re ection Miniature Fragmented Dramatic Exposure compensation R R R R R White balance R R R R R ...

Page 78: ...placing it directly under a strong stream of tap water with pressing the button Monitor Wipe gently with a soft cloth Lens Blow dust off the lens with a commercial blower then wipe gently with a lens cleaner Do not use strong solvents such as benzene or alcohol or chemically treated cloth Mold may form on the lens surface if the lens is left dirty Battery USB AC adapter Wipe gently with a soft dry...

Page 79: ...an be used without a card by storing images in its internal memory FlashAir Eye Fi card FlashAir SD cards have built in wireless LAN and cannot be formatted Use the software supplied with the FlashAir card to format the card Use the FlashAir or Eye Fi card in compliance with the laws and regulations of the country where the camera is used Remove the FlashAir or Eye Fi card from the camera or disab...

Page 80: ...ard is not completely erased When disposing of the card damage the card to prevent the disclosure of personal data Switching between a card and internal memory is not available When using the internal memory remove the card rst Readout recording process of the card Readout recording process of the card During shooting the current memory indicator lights up in red while the camera is writing data N...

Page 81: ...s of image size when the aspect ratio is 4 3 Movies Movies Image Size Recording length Internal memory SD SDHC SDXC card 4GB C 1920 1080 1 8 sec 24 min D 1280 720 1 12 sec 36 min E 640 480 31 sec 96 min y 640 x 480 2 2 sec 7 min z 320 x 240 2 3 sec 10 min 1 The recording length is up to 29 minutes in the HD quality speci ed 2 The recording length is up to 20 sec in the HS quality speci ed The maxi...

Page 82: ...30 30 2 Turn on the wireless ash 3 Use the MODE button on the wireless ash to set to RC mode and make the channel and group settings Channel CH1 Group A 4 Set Remote Flash p 41 on the camera to RC 5 Select the ash option in the function menu and then select the remote control Ɣ Using the ash p 12 6 Take a test shot to check the operation of the ash and the resulting image Ɣ Be sure to check the ch...

Page 83: ...Teleconverter TCON T01 To use the conversion lens sold separately remove the lens ring which has been attached to the camera and then attach the converter adapter sold separately to the camera To attach remove the lens ring To attach remove the lens ring Marks for attaching Attach direction Remove direction Lens ring ...

Page 84: ... attaching Attach direction Converter adapter Conversion lens Remove direction Filter ij40 5 To attach the lens ring or converter adapter to the camera align the marks and screw it in the direction of attaching until it clicks into place For details please visit the Olympus website for your local area ...

Page 85: ...ermined by Olympus pressure testing equipment in accordance with IEC Standard Publication 529 IPX8 This means that the camera can be used normally under water at a speci ed water pressure 2 This anti shock performance is con rmed by Olympus testing conditions in accordance with MIL STD 810F Method 516 5 Procedure IV Transit Drop Test For more details of Olympus testing conditions please refer to t...

Page 86: ...ented technologies from Apical Limited All other company and product names are registered trademarks and or trademarks of their respective owners THIS PRODUCT IS LICENSED UNDER THE AVC PATENT PORTFOLIO LICENSE FOR THE PERSONAL AND NONCOMMERCIAL USE OF A CONSUMER TO i ENCODE VIDEO IN COMPLIANCE WITH THE AVC STANDARD AVC VIDEO AND OR ii DECODE AVC VIDEO THAT WAS ENCODED BY A CONSUMER ENGAGED IN A PE...

Page 87: ... capable of vehicle navigation positioning dispatch real time route guidance eet management or similar applications or b with or in communication with any positioning devices or any mobile or wireless connected electronic or computer devices including without limitation cellular phones palmtop and handheld computers pagers and personal digital assistants or PDAs Warning The Data may contain inaccu...

Page 88: ...ws provisions or ii the United Nations Convention for Contracts for the International Sale of Goods which is explicitly excluded You agree to submit to the jurisdiction of the State of Illinois for any and all disputes claims and actions arising from or in connection with the Data provided to you hereunder United States Government End Users If the Data is being acquired by or on behalf of the Unit...

Page 89: ...cipality of Liechtenstein LIECHTENSTEIN Principality of Monaco MONACO Republic of Finland FINLAND Republic of Iceland ICELAND Republic of Italy ITALY Country or regions Screen display Republic of Malta MALTA Republic of San Marino SAN MARINO State of the City of Vatican VATICAN CITY STATE Swiss Confederation SWITZERLAND England ENGLAND Bosnia and Herzegovina BOSNIA AND HERZEGOVINA Montenegro MONTE...

Page 90: ...GUA Republic of Paraguay PARAGUAY Republic of Trinidad and Tobago TRINIDAD AND TOBAGO Republic of Burundi BURUNDI Country or regions Screen display Belize BELIZE Co operative Republic of Guyana GUYANA Republic of Cuba CUBA Republic of Suriname SURINAME Republic of Cote d Ivoire COTE D IVOIRE Republic of Rwanda RWANDA Republic of Maldives MALDIVES Republic of Nepal NEPAL Falkland Islands FALKLAND I...

Page 91: ... Lao People s Democratic Republic LAOS Union of Myanmar BURMA MYANMAR Democratic Socialist Republic of Sri Lanka SRI LANKA Kingdom of Bhutan BHUTAN People s Republic of Bangladesh BANGLADESH New Caledonia NEW CALEDONIA Country or regions Screen display Saint Helena SAINT HELENA Mayotte MAYOTTE Bermuda BERMUDA Turks and Caicos TURKS AND CAICOS ISLANDS Saint Pierre and Miquelon SAINT PIERRE AND MIQU...

Page 92: ...blications Inc Australia Copyright Based on data provided under license from PSMAAustralia Limited www psma com au Product incorporates data which is 2012 Telstra Corporation Limited GM Holden Limited Intelematics Australia Pty Ltd and Continental Pty Ltd Austria Bundesamt für Eich und Vermessungswesen Canada This data includes information taken with permission from Canadian authorities including ...

Page 93: ... upon electronic data National Land Survey Sweden Switzerland Topogra sche Grundlage Bundesamt für Landestopographie United States United States Postal Service 2012 Prices are not established controlled or approved by the United States Postal Service The following trademarks and registrations are owned by the USPS United States Postal Service USPS and ZIP 4 Nepal Copyright Survey Department Govern...

Page 94: ...mary color lter Lens Olympus lens 4 5 to 18 0 mm f2 0 to 4 9 Equivalent to 25 to 100 mm on a 35 mm lm Photometric system Digital ESP metering spot metering system Shutter speed 4 to 1 2000 sec Shooting range Normal 0 1 m 0 3 ft to W T Super macro mode 0 01 m 0 3 ft to 0 1 m 0 3 ft f 5 5 to 18 0 mm xed Monitor 3 0 organic EL display 614 000 dots Connector Multi connector DC IN jack USB connector A ...

Page 95: ...cluding battery and card Lithium ion battery LI 90B Lithium ion battery LI 90B Product type Lithium ion rechargeable battery Model No LI 90B Standard voltage DC 3 6 V Standard capacity 1270 mAh Battery life Approx 300 full charges varies on usage Operating environment Temperature 0 C to 40 C 32 F to 104 F charging USB AC adapter F 2AC USB AC adapter F 2AC Model No F 2AC 1B F 2AC 2B Power requireme...

Page 96: ...nplug this product from the wall outlet before cleaning Use only a damp cloth for cleaning Never use any type of liquid or aerosol cleaner or any type of organic solvent to clean this product Attachments For your safety and to avoid damaging the product use only accessories recommended by Olympus Water and Moisture For precautions on products with weatherproof designs read the weatherproo ng secti...

Page 97: ... getting a low temperature burn When the camera contains metal parts overheating can result in a low temperature burn Pay attention to the following When used for a long period the camera will get hot If you hold on to the camera in this state a low temperature burn may be caused In places subject to extremely cold temperatures the temperature of the camera s body may be lower than the environment...

Page 98: ...ar a heat source etc To prevent causing battery leaks or damaging their terminals carefully follow all instructions regarding the use of batteries Never attempt to disassemble a battery or modify it in any way solder etc If battery uid gets into your eyes ush your eyes immediately with clear cold running water and seek medical attention immediately Always store batteries out of the reach of small ...

Page 99: ...e batteries to help save our planet s resources When you throw away dead batteries be sure to cover their terminals and always observe local laws and regulations USB AC adapter USB AC adapter The included USB AC adapter F 2AC is designed to be used only with this camera Other cameras cannot be charged with this USB AC adapter Do not connect the included USB AC adapter F 2AC to equipment other than...

Page 100: ...ht Notice All rights reserved No part of these written materials or this software may be reproduced or used in any form or by any means electronic or mechanical including photocopying and recording or the use of any type of information storage and retrieval system without the prior written permission of Olympus No liability is assumed with respect to the use of the information contained in these w...

Page 101: ... one 1 year from the date of purchase If any Product proves to be defective within the one year warranty period the customer must return the defective Product to any of Olympus Service Centers following the procedure set forth below See WHAT TO DO WHEN SERVICE IS NEEDED Olympus at its sole discretion will repair replace or adjust the defective Product provided that Olympus investigation and factor...

Page 102: ...ANTY SET FORTH ABOVE OLYMPUS MAKES NO AND DISCLAIMS ALL OTHER REPRESENTATIONS GUARANTIES CONDITIONS AND WARRANTIES CONCERNING THE PRODUCTS WHETHER DIRECT OR INDIRECT EXPRESS OR IMPLIED OR ARISING UNDER ANY STATUTE ORDINANCE COMMERCIAL USAGE OR OTHERWISE INCLUDING BUT NOT LIMITED TO ANY WARRANTY OR REPRESENTATION AS TO THE SUITABILITY DURABILITY DESIGN OPERATION OR CONDITON OF THE PRODUCTS OR ANY P...

Page 103: ...r that sold you the Product or ship it postage prepaid and insured to any of our Olympus Service Centers When returning Products for service your package should include the following 1 Sales receipt showing date and place of purchase 2 Copy of this limited warranty bearing the Product serial number corresponding to the serial number on the Product unless it is a model on which Olympus does not pla...

Page 104: ...y defect or damage that occurs due to transport a fall shock etc after purchase of the product d Any defect or damage that occurs due to re earthquake ood damage thunderbolt other natural disasters environmental pollution and irregular voltage sources e Any defect that occurs due to careless or improper storage such as keeping the product under conditions of high temperature and humidity near inse...

Page 105: ...y the Warranty does not apply to any other accessory equipment such as the case strap lens cap and batteries 5 Olympus sole liability under this warranty shall be limited to repairing or replacing the product and any liability for indirect or consequential loss or damage of any kind incurred or suffered by the customer due to a defect in the product and in particular any loss or damage caused to a...

Page 106: ......

Page 107: ...VM883101 ...

Page 108: ...OLYMPUS DIGITAL CAMERA APPAREIL PHOTO NUMERIQUE CAMARA DIGITAL TG 2 1m Quick Start Guide 0 1m Guide de dernarrage rapide IE Guia rapida de inicio VM820801 ...

Page 109: ...dapter F 2AC Adapteur secteur USB F 2AC a or b a ou b USB cable CB USB8 Cable USB CB USB8 OLYMPUS Setup CD ROM OLYMPUS Setup CD ROM j Lens ring Bague d objectif mJ Other accessories not shown Warranty card Contents may vary depending on purchase location 1m Autres accessoires non illustres Carte de garantie Le contenu est susceptible de varier en fonction du lieu d achat 119 Otros accesorios no mo...

Page 110: ...n type 1 Press the ON OFF button to turn on the camera USB AC adapter plug it directly into AC outlet 0 The included USB AC adapter has been designed to be used 2 Select the shooting mode a r a h k es while the 3 Hold the camera and compose the shot i t r i light check the USB cable and 4 Press the shutter button halfway down to focus Turning on the camera and making the initial settings 1 Press t...

Page 111: ... the card by force If you find that the USB AC adapter is extremely hot or notice any unusual odors noise or smoke around it unplug the power plug from wall outlet immediately and stop using it Then contact an authorized distributor or service center it cAUTION Stop using the camera immediately If you notice any unusual odors noise or smoke around it Never remove the batteries with bare hands whic...

Page 112: ...ion Interference Changes or modifications not expressly approved by the manufacturer may void the user s authority to operate this equipment This equipment has been tested and found to comply with the limits for a Class 8 digital device pursuant to Part 15 of the FCC Rules These limits are designed to provide reasonable protection against harmful interference in a residential installation This equ...

Page 113: ...ica etb net co CV Tronica LTDA Cra 9 No 23 49 Local215 C C lntercentro Bogota Tel 0571 284 4365 CV Tronica LTDA Av Cra 15 No 105A 22 Piso 2 Local 5 Bogota Tel 0571 637 4540 619 1682 Tel 300 337 5777 CV Tronica LTDA Cra 48 No 10 45 Centro Comercial Monterrey Sotano Interior 3 Medellin Tel 4 444 0229 Tel 301 552 7537 Costa Rica Olympus de Costa Rica Ltda Forum 1 Edificio A 2do piso Santa Ana San Jos...

Page 114: ...OLYMPUS ...

Page 115: ...de l utilisateur Lisez attentivement Ia page concernant les INFORMATIONS IMPORTANTES RELATIVES AUX FONCTIONS D ETANCHEITE AL EAU ET DE RESISTANCE AUX CHOCS Les illustrations de l appareil photo presentees dans ce manuel peuvent ne pas correspondre au produit reel mais l operation est Ia meme Es necesario actuar con el debido cuidado antes y despues de usar Ia camara para mantener Ia resistencia al...

Page 116: ...ena o gotas de agua en el interior de Ia tapa de Ia bateria tarjeta conector las zonas coloreadas de gris en las ilustraciones Si hay objetos extrafios o gotas de agua lfmpielos con un pafio suave sin hilos Asegurese de que no hay grietas ni fisuras en las juntas de sellado impermeable HEj2 1 I 7f I 7i iEj 7it I J IEIOIIAi 1 11 j g Oil Ol D j2 l7f OILf 11 5 5 2 ol Oi7fXI P i I f 2l f AI2 o1 o1 Oi7...

Page 117: ...ess the ON OFF button repeatedly Furthermore rinse around the lens lens cover and the battery card connector cover under running tap water Pour les modeles pourvus d un couvercle d objectif appuyez plusieurs fois sur Ia touche ON OFF pendant que l appareil photo est immerge afin d enlever les salissures du couvercle de l objectif Si le couvercle de l objectif ne peut pas eire retire passez le sous...

Page 118: ...e OLYMPUS Viewer 3l nmmm e Camera Instruction Manual TG 2 ...

Page 119: ......

Page 120: ......

Page 121: ...f the problem IF YOU HAVE QUESTIONS OR NEED HELP If you have questions about the use or performance of your Products or if you have any questions or comments regarding service performed in the United States which have not been resolved to your satisfaction write directly to Olympus Imaging America Inc 3500 Corporate Parkway P O Box 610 Center Valley PA 18034 0610 U S A Attn Customer Care Do not se...

Page 122: ...alizado en los Estados Unidos que no han sido resueltos a su satisfacci6n escriba directamente a Olympus Imaging America Inc 3500 Corporate Parkway P O Box 610 Center Valley PA 18034 0610 U S A Attn Customer Care Servicio al cliente No envie productos a esta direcci6n SERVICE CENTERS WHERE TO SEND PRODUCT FOR SERVICE Olympus Imaging America Inc 400 Rabro Drive Hauppauge NY 11788 4258 1 800 0 CAMER...

Reviews: