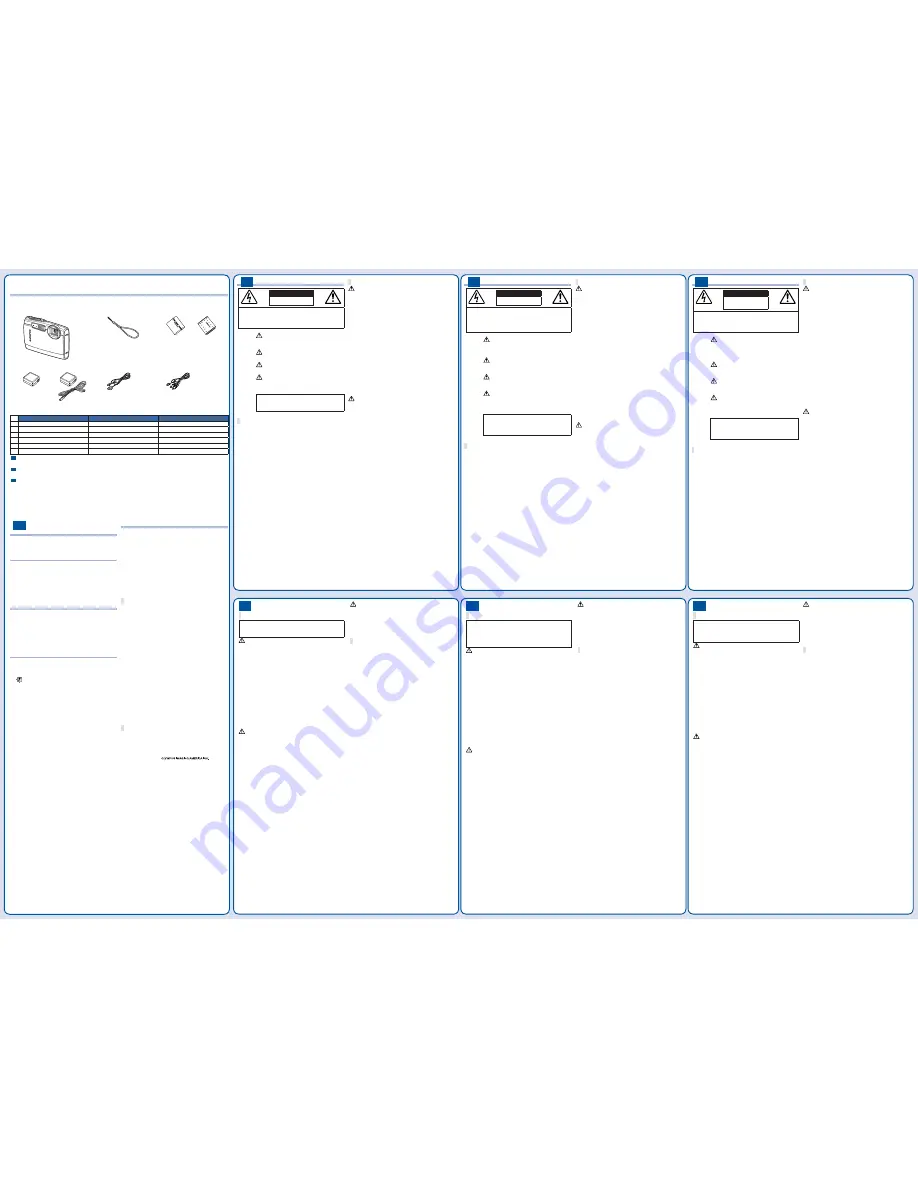
background image

EN

FR

ES

1

Digital camera

Appareil photo numérique

Cámara digital

2

Strap

Courroie

Correa

3

Lithium Ion Battery

Batterie au lithium-ion

Batería de ion de litio

4

USB-AC adapter

Adaptateur secteur USB

Adaptador USB de CA

5

USB cable

Câble USB

Cable USB

6

AV cable

Câble AV

Cable AV

EN     


Other accessories not shown: Warranty card
Contents may vary depending on purchase location.

FR     


Autres accessoires non illustrés : Carte de garantie
Le contenu est susceptible de varier en fonction du lieu d’achat.

ES     


Otros accesorios no mostrados: Tarjeta de garantía
Los contenidos pueden variar dependiendo del lugar de compra.

Checking the contents of the box / Véri er le contenu de la boîte / 
Comprobación de los contenidos de la caja

EN


 SAFETY PRECAUTIONS

CAUTION

RISK OF ELECTRIC SHOCK

DO NOT OPEN

CAUTION: TO REDUCE THE RISK OF ELECTRICAL 

SHOCK, DO NOT REMOVE COVER (OR BACK).

NO USER-SERVICEABLE PARTS INSIDE.

REFER SERVICING TO QUALIFIED OLYMPUS 

SERVICE PERSONNEL.

An exclamation mark enclosed in a 
triangle alerts you to important operating 
and maintenance instructions in the 
documentation provided with the product.

DANGER

If the product is used without observing 
the information given under this symbol, 
serious injury or death may result.

WARNING

If the product is used without observing the 
information given under this symbol, injury 
or death may result.

CAUTION

If the product is used without observing the 
information given under this symbol, minor 
personal injury, damage to the equipment, 
or loss of valuable data may result.

WARNING!
TO AVOID THE RISK OF FIRE OR ELECTRICAL SHOCK, 
NEVER DISASSEMBLE, EXPOSE THIS PRODUCT TO 
WATER OR OPERATE IN A HIGH HUMIDITY ENVIRONMENT.

General Precautions

Read All Instructions

 — Before you use the product, read all 

operating instructions. Save all manuals and documentation for 
future reference.

Cleaning

 — Always unplug this product from the wall outlet before 

cleaning. Use only a damp cloth for cleaning. Never use any type 
of liquid or aerosol cleaner, or any type of organic solvent to clean 
this product.

Attachments

 — For your safety, and to avoid damaging the product, 

use only accessories recommended by Olympus.

Water and Moisture

 — For precautions on products with 

weatherproof designs, read the weatherproo ng sections.

Location

 — To avoid damage to the product, mount the product 

securely on a stable tripod, stand, or bracket.

Power Source

 — Connect this product only to the power source 

described on the product label.

Lightning

 — If a lightning storm occurs while using an AC adapter, 

remove it from the wall outlet immediately.

Foreign Objects

 — To avoid personal injury, never insert a metal 

object into the product.

Heat

 — Never use or store this product near any heat source such 

as a radiator, heat register, stove, or any type of equipment or 
appliance that generates heat, including stereo ampli ers.

Handling the Camera


WARNING

Do not use the camera near  ammable or explosive gases.
Do not use the  ash and LED on people (infants, small 
children, etc.) at close range.

You must be at least 1 m (3 ft.) away from the faces of your 
subjects. Firing the  ash too close to the subject’s eyes could 
cause a momentary loss of vision.

Keep young children and infants away from the camera.

Always use and store the camera out of the reach of young 
children and infants to prevent the following dangerous situations 
which could cause serious injury:

Becoming entangled in the camera strap, causing 
strangulation.
Accidentally swallowing the battery, cards or other small parts.
Accidentally  ring the  ash into their own eyes or those of 
another child.
Accidentally being injured by the moving parts of the camera.

Do not look at the sun or strong lights with the camera.
Do not use or store the camera in dusty or humid places.
Do not cover the  ash with a hand while  ring.
Use SD/SDHC memory cards only. Never use other types of 
cards.

If you accidently insert another type of card into the camera, 
contact an authorized distributor or service center. Do not try to 
remove the card by force.


CAUTION

Stop using the camera immediately if you notice any unusual 
odors, noise, or smoke around it.

Never remove the batteries with bare hands, which may cause a 
 re or burn your hands.

Do not leave the camera in places where it may be subject to 
extremely high temperatures.

Doing so may cause parts to deteriorate and, in some 
circumstances, cause the camera to catch  re. Do not use the 
charger or AC adapter if it is covered (such as a blanket). This 
could cause overheating, resulting in  re.

Handle the camera with care to avoid getting a low-
temperature burn.

When the camera contains metal parts, overheating can result in 
a low-temperature burn. Pay attention to the following:

When used for a long period, the camera will get hot. If you 
hold on to the camera in this state, a low-temperature burn 
may be caused.
In places subject to extremely cold temperatures, the 
temperature of the camera’s body may be lower than the 
environmental temperature. If possible, wear gloves when 
handling the camera in cold temperatures.

Be careful with the strap.

Be careful with the strap when you carry the camera. It could 
easily catch on stray objects and cause serious damage.

Do not touch the metallic parts of the camera for a long period 
of time at low temperatures.

This may damage your skin. At low temperatures, handle the 
camera while wearing gloves.


EN


Battery Handling Precautions

Follow these important guidelines to prevent 
batteries from leaking, overheating, burning, 
exploding, or causing electrical shocks or burns.

 DANGER

The camera uses a lithium ion battery speci ed by Olympus. 
Charge the battery with the speci ed AC adapter or charger. Do 
not use any other AC adapters or chargers.
Never heat or incinerate batteries.
Take precautions when carrying or storing batteries to prevent 
them from coming into contact with any metal objects such as 
jewelry, pins, fasteners, etc.
Never store batteries where they will be exposed to direct sunlight, 
or subjected to high temperatures in a hot vehicle, near a heat 
source, etc.
To prevent causing battery leaks or damaging their terminals, 
carefully follow all instructions regarding the use of batteries. 
Never attempt to disassemble a battery or modify it in any way, 
solder, etc.
If battery  uid gets into your eyes,  ush your eyes immediately 
with clear, cold running water and seek medical attention 
immediately.
Always store batteries out of the reach of small children. If a 
child accidentally swallows a battery, seek medical attention 
immediately.

 WARNING

Keep batteries dry at all times.
To prevent batteries from leaking, overheating, or causing a  re 
or explosion, use only batteries recommended for use with this 
product.
Insert the battery carefully as described in the operating 
instructions.
If rechargeable batteries have not been recharged within the 
speci ed time, stop charging them and do not use them.
Do not use a battery if it is cracked or broken.
If a battery leaks, becomes discolored or deformed, or becomes 
abnormal in any other way during operation, stop using the 
camera.
If a battery leaks  uid onto your clothing or skin, remove the 
clothing and  ush the affected area with clean, running cold water 
immediately. If the  uid burns your skin, seek medical attention 
immediately.
Never subject batteries to strong shocks or continuous vibration.


 CAUTION

Before loading, always inspect the battery carefully for leaks, 
discoloration, warping, or any other abnormality.
The battery may become hot during prolonged use. To avoid 
minor burns, do not remove it immediately after using the camera.
Always unload the battery from the camera before storing the 
camera for a long period.

Trademarks

BM is a registered trademark of International Business Machines 

Corporation.
Microsoft and Windows are registered trademarks of Microsoft 
Corporation.
Macintosh is a trademark of Apple Inc.
The SDHC logo is a trademark.
All other company and product names are registered trademarks 
and/or trademarks of their respective owners.
The standards for camera  le systems referred to in this manual 
are the “Design rule for Camera File system/DCF” standards 
stipulated by the Japan Electronics and Information Technology 
Industries Association (JEITA).


FR


 PRÉCAUTIONS DE SÉCURITÉ

ATTENTION

RISQUE DE DÉCHARGE

NE PAS OUVRIR

ATTENTION : POUR RÉDUIRE LE RISQUE DE DÉCHARGE ÉLECTRIQUE, 
NE RETIRER NI LA PARTIE ANTÉRIEURE NI POSTÉRIEURE DU BOÎTIER.

AUCUNE PIÈCE À L’INTÉRIEUR NE PEUT ÊTRE RÉPARÉE PAR 

L’UTILISATEUR. 

SE RÉFÉRER À DU PERSONNEL DE DÉPANNAGE QUALIFIÉ POUR UNE 

RÉPARATION.

Le point d’exclamation à l’intérieur d’un 
triangle vous alerte sur certains points 
importants concernant le maniement et 
l’entretien de l’appareil  gurant dans la 
documentation fournie avec le produit.

DANGER

Si le produit est utilisé sans respecter les 
informations données sous ce symbole, 
des blessures graves, voire mortelles 
pourraient en résulter.

AVERTISSE-
MENT

Si le produit est utilisé sans respecter les 
informations données sous ce symbole, 
des blessures voire la mort pourraient 
en résulter.

ATTENTION Si le produit est utilisé sans observer les 

informations données sous ce symbole, 
des blessures, des dommages à l’appareil 
ou des pertes de données pourraient en 
résulter.

AVERTISSEMENT !
POUR ÉVITER LES RISQUES D’INCENDIE OU DE DÉCHARGE 
ÉLECTRIQUE, NE JAMAIS DÉMONTER, EXPOSER CE 
PRODUIT À L’EAU NI LE FAIRE FONCTIONNER DANS UN 
ENVIRONNEMENT TRÈS HUMIDE.

Précautions générales

Lire toutes les instructions

 — Avant d’utiliser l’appareil, lire toutes 

les instructions de fonctionnement. Sauvegarder tous les manuels 
et la documentation pour s’y référer ultérieurement.

Nettoyage

 — Toujours débrancher ce produit de la prise de courant 

avant nettoyage. N’utiliser qu’un chiffon humide pour le nettoyage. 
Ne jamais utiliser de produits de nettoyage liquides ou aérosols, ni 
de solvants organiques pour nettoyer ce produit.

Accessoires

 — Pour votre sécurité, et pour éviter d’endommager 

le produit, n’utiliser que des accessoires recommandés par 
Olympus.

Eau et humidité

 — Pour les précautions sur des produits avec une 

conception imperméable, lire les sections imperméabilisation.

Emplacement

 — Pour éviter d’endommager l’appareil, monter le 

produit solidement sur un trépied ou un sabot stable.

Alimentation

 — Ne raccorder ce produit qu’à la source 

d’alimentation décrite sur l’étiquette du produit.

Foudre

 — Si un orage éclate pendant l’utilisation d’un adaptateur 

secteur, le débrancher immédiatement de la prise de courant.

Entrée d’objets

 — Pour éviter des blessures, ne jamais introduire 

d’objet métallique dans le produit.

Chaleur

 — Ne jamais utiliser ni ranger ce produit près d’une source 

de chaleur telle qu’un radiateur, un accumulateur de chaleur, ou 
tout type d’appareil qui génère de la chaleur, comprenant les 
ampli cateurs.

Maniement de l’appareil


AVERTISSEMENT

Ne pas utiliser l’appareil à proximité de gaz in ammables ou 
explosifs.
Ne pas utiliser le  ash ou la LED de très près sur des 
personnes (bébés, jeunes enfants, etc.).

Vous devez être au moins à 1 m des visages de vos sujets. 
Déclencher le  ash trop près des yeux du sujet pourrait causer 
une perte momentanée de la vision.

Ne pas laisser l’appareil à la portée des enfants.

Toujours utiliser et ranger l’appareil hors de la portée des jeunes 
enfants et des bébés pour empêcher les situations dangereuses 
suivantes qui pourraient causer des blessures graves :

S’enrouler dans la courroie de l’appareil, causant la 
strangulation.
Avaler accidentellement la batterie, des cartes ou d’autres 
petites pièces.
Déclencher accidentellement le  ash dans leurs yeux ou ceux 
d’un autre enfant. 
Se blesser accidentellement par des parties en mouvement 
de l’appareil.

Ne pas regarder le soleil ni de la lumière puissante avec 
l’appareil.
Ne pas utiliser ni ranger l’appareil dans des endroits 
poussiéreux ou humides.
Ne pas couvrir le  ash avec une main pendant le 
déclenchement.
N’utilisez que des cartes mémoire SD/SDHC. N’utilisez jamais 
d’autres types de cartes.

Si vous insérez accidentellement un autre type de carte dans 
l’appareil, contactez un revendeur agréé ou un centre de service. 
N’essayez pas de retirer la carte par la force.


ATTENTION

Arrêter immédiatement d’utiliser l’appareil si vous remarquez 
une odeur, un bruit anormal ou de la fumée provenant de 
l’appareil.

Ne jamais retirer les batteries les mains nues, ce qui pourrait 
vous brûler les mains.

Ne pas laisser l’appareil dans des endroits où il pourrait être 
soumis à des températures très élevées.

Ceci pourrait causer une détérioration de certaines pièces et, 
dans certaines circonstances, l’appareil pourrait prendre feu. Ne 
pas utiliser le chargeur ni un adaptateur secteur s’il est couvert 
(par exemple par une couverture). Ce qui pourrait causer une 
surchauffe, débouchant sur un incendie.

Manipuler l’appareil soigneusement a n d’éviter une brûlure à 
basse température.

Lorsque l’appareil contient des parties métalliques, une 
surchauffe peut déboucher sur une brûlure à basse température. 
Faire attention aux points suivants :

Utilisé pendant une longue durée, l’appareil devient chaud. Si 
vous tenez l’appareil dans ces conditions, une brûlure à basse 
température risque de se produire.
Dans des endroits sujets à des températures très froides, la 
température du corps de l’appareil peut être plus basse que la 
température ambiante. Si possible, mettre des gants en tenant 
l’appareil à des températures basses.

Faire attention avec la courroie.

Faire attention avec la courroie en portant l’appareil. Elle peut 
facilement s’accrocher à des objets sur le passage et causer des 
dommages sérieux.

Ne pas toucher les parties métalliques de l’appareil photo 
pendant une longue durée lorsqu’il fait froid.

Votre peau peut être blessée. À des températures basses, tenez 
l’appareil photo avec des gants.

FR


Précautions de manipulation de la batterie

Veuillez suivre ces consignes importantes 
pour éviter le coulage du liquide de la batterie, 
une génération de chaleur, des brûlures, 
une explosion, ou de causer des décharges 
électriques ou brûlures.

 DANGER

L’appareil photo utilise une batterie au lithium-ion spéci ée par 
Olympus. Chargez la batterie avec l’adaptateur secteur ou le 
chargeur spéci é. N’utilisez aucun autre adaptateur secteur ou 
chargeur.
Ne jamais chauffer ni mettre au feu la batterie.
Prendre des précautions en transportant ou rangeant la batterie 
pour éviter qu’elle vienne en contact avec des objets métalliques 
comme des bijoux, des épingles à cheveux, des agrafes, etc.
Ne jamais ranger la batterie dans un lieu où elle serait exposée 
en plein soleil, ou sujette à des températures élevées dans un 
véhicule chaud, près d’une source de chaleur, etc.
Pour éviter de causer des coulages de liquide de la batterie ou 
d’endommager ses bornes, respecter scrupuleusement toutes les 
instructions concernant l’usage de la batterie. Ne jamais tenter de 
démonter une batterie ni la modi er de quelque façon que ce soit, 
ni la souder, etc.
Si du liquide de la batterie entrait dans vos yeux, les laver 
immédiatement avec de l’eau claire et froide du robinet et 
consulter immédiatement un médecin.
Toujours ranger la batterie hors de la portée des jeunes enfants. 
Si un enfant avale accidentellement une batterie, consulter 
immédiatement un médecin.

 AVERTISSEMENT

Maintenir à tout moment la batterie au sec. 
Pour éviter un coulage du liquide de la batterie, une génération de 
chaleur ou de causer un incendie ou une explosion, n’utiliser que 
la batterie recommandée pour l’usage avec ce produit.
Introduire soigneusement la batterie comme décrit dans les 
instructions de fonctionnement.
Si les batteries rechargeables n’ont pas été rechargées au bout 
de la durée spéci ée, arrêter de les charger et ne pas les utiliser.
Ne pas utiliser une batterie si elle est endommagée ou cassée.
Si la batterie coule, devient décolorée ou déformée, ou devient 
anormale sous d’autres aspects pendant le fonctionnement, 
arrêter d’utiliser l’appareil.
Si du liquide de la batterie coule sur vos vêtements ou sur votre 
peau, retirer le vêtement et laver immédiatement la zone affectée 
avec de l’eau claire et froide du robinet. Si le liquide vous brûle la 
peau, consulter immédiatement un médecin.
Ne jamais soumettre la batterie à des chocs violents ni à des 
vibrations continues.


 ATTENTION

Avant sa mise en place, toujours contrôler soigneusement la 
batterie pour des coulages, décoloration, gauchissement ou 
toutes autres anormalités.
La batterie peut devenir chaude pendant une utilisation 
prolongée. Pour éviter des brûlures mineures, ne pas la retirer 
immédiatement après avoir utilisé l’appareil.
Toujours retirer la batterie de l’appareil avant de le ranger pour 
une longue durée.

Marques déposées

IBM est une marque déposée de la société International Business 
Machines Corporation.
Microsoft et Windows sont des marques de la société Microsoft 
Corporation.
Macintosh est une marque de Apple Inc.
Le logo SDHC est une marque commerciale.
Tous les autres noms de sociétés et appellations de produits sont 
des marques, déposées ou non, des propriétaires respectifs.
Les normes pour les systèmes de  chiers d’appareil photo 
indiquées dans ce manuel sont les normes “Design rule for 
Camera File system/DCF” stipulées par l’association JEITA 
(Japan Electronics and Information Technology Industries 
Association).


ES


 PRECAUCIONES DE SEGURIDAD

PRECAUCIÓN

RIESGO DE DESCARGAS 

ELÉCTRICAS

NO ABRIR

PRECAUCIÓN: PARA REDUCIR EL RIESGO DE DESCARGAS 

ELÉCTRICAS, NO RETIRE LA CUBIERTA (O PARTE TRASERA). EN EL 

INTERIOR NO HAY PIEZAS QUE EL USUARIO PUEDA REPARAR. 

REMITA LA REPARACIÓN A PERSONAL DE SERVICIO ESPECIALIZADO 

OLYMPUS.

El signo de admiración dentro de un 
triángulo equilátero tiene como  nalidad 
alertar al usuario de la existencia de 
importantes instrucciones de operación 
y mantenimiento en la documentación 
suministrada con el producto.

PELIGRO

Si el producto es utilizado sin observar 
la información representada bajo este 
símbolo, podría causar serias lesiones 
o muerte.

ADVERTENCIA

Si el producto es utilizado sin observar 
la información representada bajo este 
símbolo, podría causar serias lesiones 
o muerte.

PRECAUCIÓN Si el producto es utilizado sin observar 

la información representada bajo este 
símbolo, podría causar lesiones personales 
menores, daños al equipo, o pérdida de 
datos importantes.

¡ADVERTENCIA!
PARA EVITAR EL RIESGO DE INCENDIO O DESCARGAS 
ELÉCTRICAS, NUNCA DESMONTE NI EXPONGA ESTE 
PRODUCTO AL AGUA NI LO UTILICE EN UN ENTORNO 
MUY HÚMEDO.

Precauciones Generales

Lea todas las instrucciones

 — Antes de utilizar este producto, lea 

todas las instrucciones operativas. Guarde todos los manuales y 
la documentación para futuras consultas.

Limpieza

 — Siempre desenchufe el producto de la toma de corriente 

antes de limpiarlo. Para la limpieza use sólo un paño húmedo. 
Nunca use limpiadores líquidos o aerosoles, ni solventes 
orgánicos de ningún tipo para limpiar este producto.

Accesorios

 — Para su seguridad y evitar daños al producto, utilice 

únicamente los accesorios recomendados por Olympus.

Agua y humedad

 — En las precauciones de los productos 

diseñados a prueba de la intemperie, consulte las secciones de 
resistencia a la intemperie en sus respectivos manuales.

Ubicación

 — Para evitarle daños al producto, monte el producto 

sobre un trípode, caballete o soporte estable.

Fuentes de alimentación

 — Conecte este producto únicamente con 

la fuente de alimentación descrita en la etiqueta del producto.

Rayos

 — Si se produce una tormenta eléctrica mientras está 

utilizando el adaptador de CA, retírelo de la toma de corriente 
inmediatamente.

Objetos extraños

 — Para evitar daños personales, nunca inserte 

objetos de metal en el producto.

Calentadores

 — Nunca utilice ni guarde este producto cerca de 

fuentes de calor, tales como radiadores, rejillas de calefacción, 
estufas o cualquier tipo de equipo o aparato generador de calor, 
incluyendo ampli cadores estéreo.

Manejo de la cámara


ADVERTENCIA

No utilice la cámara cerca de gases in amables o explosivos.
No utilice el  ash ni el LED a corta distancia de las personas 
(bebés, niños pequeños, etc.).

Cuando dispare el  ash, deberá mantener, por lo menos, una 
distancia de 1 m de la cara de los sujetos. El disparo demasiado 
cercano de los ojos del sujeto podrá causarle la pérdida de 
visión momentánea.

Mantenga a los niños alejados de la cámara.

Utilice y guarde siempre la cámara fuera del alcance de los 
niños, para prevenir las siguientes situaciones de peligro que 
podrían causarles serias lesiones:

Enredarse con la correa de la cámara, ocasionando as xia.
Ingerir accidentalmente una pila, tarjetas, u otras piezas 
pequeñas.
Disparar el  ash accidentalmente hacia sus propios ojos o 
hacia los ojos de otro niño.
Lesionarse accidentalmente con las piezas móviles de la 
cámara.

No mire al sol ni a luces fuertes a través de la cámara.
No utilice ni guarde la cámara en lugares polvorientos o 
húmedos.
No cubra el  ash con la mano mientras efectúa el disparo.
Utilice sólo tarjetas de memoria  SD/SDHC. No utilice nunca 
otro tipo de tarjetas.

Si por accidente insertara otro tipo de tarjeta en la cámara, 
póngase en contacto con un distribuidor o centro de servicio 
autorizado. No intente quitar la tarjeta a la fuerza.


PRECAUCIÓN

Interrumpa inmediatamente el uso de la cámara si percibe 
algún olor, ruido o humo extraño alrededor de la misma.

Nunca retire las pilas con las manos descubiertas, ya que podría 
causar un incendio o quemarle las manos.

No deje la cámara en lugares donde pueda estar sujeta a 
temperaturas extremadamente altas.

Si lo hace puede provocar el deterioro de las piezas y, en 
algunas circunstancias, provocar que se prenda fuego. No utilice 
el cargador o el adaptador de CA si está cubierto (por ejemplo 
con una manta). Esto podría causar recalentamiento, resultando 
en incendio.

Manipule la cámara con cuidado para evitar una quemadura de 
leve.

Ya que la cámara contiene partes metálicas, el recalentamiento 
puede resultar en una quemadura de baja temperatura. Preste 
atención a lo siguiente:

Cuando la utilice durante un largo período, la cámara se 
recalentará. Si mantiene a la cámara en este estado, podría 
causar una quemadura de baja temperatura.
En lugares sujetos a temperaturas extremadamente bajas, la 
temperatura de la carcasa de la cámara puede ser más baja 
que la temperatura ambiente. Si es posible, póngase guantes 
cuando manipule la cámara en temperaturas bajas.

Tenga cuidado con la correa.

Tenga cuidado con la correa cuando transporte la cámara. 
Podría engancharse en objetos sueltos y provocar daños graves.

No toque las partes metálicas de la cámara de forma 
prolongada a bajas temperaturas.

Puede dañarse la piel. Si la temperatura es baja, utilice la 
cámara con guantes puestos.


ES


Precauciones acerca del uso de la batería

Siga estas importantes indicaciones para evitar 
que se produzcan fugas, recalentamientos, 
incendios o explosión de la batería, o que cause 
descargas eléctricas o quemaduras.

 PELIGRO

La cámara utiliza una batería de iones de litio especi cada por 
Olympus. Cargue la batería con el adaptador de CA o cargador 
especi cados. No utilice otros adaptadores de CA o cargadores.
Nunca caliente ni incinere las baterías.
Tome precauciones al transportar o guardar las baterías a  n de 
evitar que entren en contacto con objetos metálicos, tales como 
alhajas, horquillas, cierres, etc.
Nunca guarde las baterías en lugares donde queden expuestas a 
la luz solar directa o sujetas a altas temperaturas en el interior de 
un vehículo con calefacción, cerca de fuentes de calor, etc.
Para evitar que ocurran fugas de líquido de las baterías o daños 
de sus terminales, siga cuidadosamente todas las instrucciones 
respectivas al uso de las baterías. Nunca intente desarmar una 
pila ni modi carla de ninguna manera, realizar soldaduras, etc.
Si el  uido de la batería penetrara en sus ojos, lávelos de 
inmediato con agua corriente fresca y limpia, y solicite atención 
médica inmediatamente.
Siempre guarde las baterías fuera del alcance de los niños 
menores. Si un niño ingiere una batería accidentalmente, solicite 
atención médica inmediatamente.

 ADVERTENCIA

Conserve la batería siempre seca.
Para evitar que ocurran fugas de líquido, recalentamiento de la 
batería, o que cause incendio o explosión, utilice únicamente la 
batería recomendada para el uso con este producto.
Inserte la pila cuidadosamente, tal como se describe en el manual 
de instrucciones.
Si las baterías recargables no han sido recargadas dentro del 
tiempo especi cado, interrumpa la carga y no las utilice.
No utilice una batería si está rajada o quebrada.
Si se producen fugas de líquido, decoloración o deformación de 
la batería, o cualquier otra anormalidad durante la operación, 
interrumpa el uso de la cámara.
Si el  uido de la pila entrara en contacto con su ropa o con su 
piel, qu tese la ropa y lave de inmediato la parte afectada con 
agua corriente fresca y limpia. Si el  uido quemara su piel, solicite 
atención médica inmediatamente.
Nunca exponga la batería a fuertes impactos ni a vibraciones 
continuas.


 PRECAUCIÓN

Antes de colocarla, siempre inspeccione la batería atentamente 
para veri car si no se producen fugas de líquido, decoloración, 
deformación o cualquier otra anomalía.
Las baterías pueden recalentarse durante el uso prolongado. Para 
evitar quemaduras menores, no la retire inmediatamente después 
de utilizar la cámara.
Siempre retire la batería de la cámara antes de guardar la cámara 
por un largo tiempo.

Marcas comerciales

BM es una marca registrada de International Business Machines 

Corporation.
Microsoft y Windows son marcas registradas de Microsoft 
Corporation.
Macintosh es una marca comercial de Apple Inc.
El logo SDHC es una marca comercial.
Todos los demás nombres de compañías y productos son 
marcas registradas y/o marcas comerciales de sus respectivos 
propietarios.
Las normas para sistemas de archivos de cámara referidas en 
este manual son las “Normas de diseño para sistema de archivos 
de cámara/DCF” estipuladas por la Asociación de Industrias 
Electrónicas y de Tecnología de Información de Japón (JEITA).


EN


 Important information about 

water and shock resistant features

Be sure to close the battery/card/connector cover  rmly so that lock 
makes the clicking sound.
Do not open the battery/card/connector cover with wet hands, while 
under water, or in a damp or dusty environment (e g. beach).

Using a separately sold AC adapter

An AC adapter (D-7AC/sold separately) is useful for time-
consuming tasks such as when running a slideshow for a long 
period of time. To use a separately sold AC adapter for this camera, 
the multi-adapter (CB-MA3/sold separately) is required.
Do not use any other AC adapter with this camera.

Using a separately sold charger

A charger* (sold separately) can be used to charge the battery. In 
this case, remove the battery from the camera and set the battery 
to the charger.
*  STYLUS TOUGH-6020/ TOUGH-6020: LI-50C

STYLUS TOUGH-3000/ TOUGH-3000: LI-41C/LI-40C

Using your charger and USB-AC 
adapter abroad

The charger and USB-AC adapter can be used in most home 
electrical sources within the range of 100 V to 240 V AC (50/60Hz) 
around the world. However, depending on the country or area you 
are in, the AC wall outlet may be shaped differently and the charger 
and USB-AC adapter may require a plug adapter to match the wall 
outlet. For details, ask at your local electrical shop or travel agent.
Do not use travel voltage converters as they could damage your 
charger and USB-AC adapter.

Battery, USB-AC adapter (included), 
Charger (sold separately)

This camera uses one Olympus lithium ion battery*. No other type 
of batteries can be used.
*  STYLUS TOUGH-6020/ TOUGH-6020: LI-50B

STYLUS TOUGH-3000/ TOUGH-3000: LI-42B

 Caution:

There is a risk of explosion if the battery is replaced 
with the incorrect battery type.
Dispose of the used battery following the instructions.

Please recycle batteries to help save our planet’s 
resources. When you throw away dead batteries, be sure 
to cover their terminals and always observe local laws 
and regulations.

Power consumption by the camera varies depending on which 
functions are used.
During the conditions described below, power is consumed 
continuously and the battery becomes exhausted quickly.

The zoom is used repeatedly.
The shutter button is pressed halfway repeatedly in shooting 
mode, activating the auto focus.
A picture is displayed on the monitor for an extended period of 
time.
The camera is connected to a printer.

Using an exhausted battery may cause the camera to turn off 
without displaying the battery level warning.
The rechargeable battery is not fully charged at the time of 
purchase. Before using the camera, charge it by connecting it to a 
computer, or charge it using the included USB-AC adapter (F-2AC), 
a separately sold AC adapter (F-1AC/D-7AC) or charger*.
*  STYLUS TOUGH-6020/ TOUGH-6020: LI-50C

STYLUS TOUGH-3000/ TOUGH-3000: LI-41C/LI-40C

STYLUS TOUGH-6020/ TOUGH-6020: When the included 
USB-AC adapter (F-2AC) is used, charging usually takes 
approximately 3 hours (varies on usage).
STYLUS TOUGH-3000/ TOUGH-3000: When the included 
USB-AC adapter (F-2AC) is used, charging usually takes 
approximately 2 5 hours (varies on usage).
The included USB-AC adapter (F-2AC) has been designed to be 
used for charging and playback. Make sure that shooting is not 
being used while the USB-AC adapter is connected to the camera.
The included USB-AC adapter (F-2AC) is designed to be used 
only with this camera. Other cameras cannot be charged with this 
USB-AC adapter.
Do not connect the included USB-AC adapter (F-2AC) to 
equipment other than this camera.
For plug-in type USB-AC adapter:
The included USB-AC adapter (F-2AC) is intended to be correctly 
orientated in a vertical or  oor mount position.


FCC Notice

Radio and Television Interference
Changes or modi cations not expressly approved by the 
manufacturer may void the user’s authority to operate this 
equipment. This equipment has been tested and found to comply 
with the limits for a Class B digital device, pursuant to Part 15 of 
the FCC Rules. These limits are designed to provide reasonable 
protection against harmful interference in a residential installation.
This equipment generates, uses, and can radiate radio 
frequency energy and, if not installed and used in accordance 
with the instructions, may cause harmful interference to radio 
communications.
However, there is no guarantee that interference will not occur 
in a particular installation. If this equipment does cause harmful 
interference to radio or television reception, which can be 
determined by turning the equipment off and on, the user is 
encouraged to try to correct the interference by one or more of the 
following measures:

Adjust or relocate the receiving antenna.
Increase the distance between the camera and receiver.
Connect the equipment to an outlet on a circuit different from that 
to which the receiver is connected.
Consult your dealer or an experienced radio/TV technician for 
help. Only the OLYMPUS-supplied USB cable should be used to 
connect the camera to USB enabled personal computers (PC).

Any unauthorized changes or modi cations to this equipment would 
void the user’s authority to operate it.

For customers in North and South America

For customers in USA

Declaration of Conformity
Model Number 

: STYLUS TOUGH-6020/ TOUGH-6020


STYLUS 

TOUGH-3000/ 

TOUGH-3000

Trade Name 

: OLYMPUS

Responsible Party 

Address 

: 3500 Corporate Parkway, P.O. Box 610,


  Center Valley, PA 18034-0610, U.S A.

Telephone Number 

: 484-896-5000

Tested To Comply With FCC Standards
FOR HOME OR OFFICE USE

This device complies with Part 15 of the FCC rules. Operation is 
subject to the following two conditions:

(1) This device may not cause harmful interference.
(2) This device must accept any interference received, including 

interference that may cause undesired operation.

For customers in Canada

This Class B digital apparatus meets all requirements of the Canadian 
Interference-Causing Equipment Regulations.

Pour les utilisateurs au Canada

Cet appareil numérique de la catégorie B est conforme à la législation 
canadienne sur les appareils générateurs de parasites.


THIS PRODUCT IS LICENSED UNDER THE AVC PATENT PORTFOLIO LICENSE FOR THE PERSONAL AND NONCOMMERCIAL 
USE OF A CONSUMER TO (i) ENCODE V DEO  N COMPLIANCE WITH THE AVC STANDARD (“AVC V DEO”) AND/OR (ii) DECODE 
AVC V DEO THAT WAS ENCODED BY A CONSUMER ENGAGED  N A PERSONAL AND NON-COMMERCIAL ACTIVITY AND/OR WAS 
OBTAINED FROM A V DEO PROVIDER LICENSED TO PROV DE AVC VIDEO. NO LICENSE IS GRANTED OR SHALL BE  MPL ED FOR 
ANY OTHER USE. ADDITIONAL INFORMATION MAY BE OBTAINED FROM MPEG LA, L.L.C. SEE HTTP://WWW.MPEGLA.COM

1

2

5

(CB-USB6)

6

(CB-AVC3)

4

(F-2AC)

or

ou

o

3

*1 

STYLUS TOUGH-6020/ TOUGH-6020

*2 

STYLUS TOUGH-3000/ TOUGH-3000

or

ou

o

(LI-50B

*1

)

(LI-42B

*2

)

Summary of Contents for STYLUS STYLUS TOUGH-3000 /TOUGH-3000

Page 1: ... software and instruction manual PDF le are stored on the internal memory of the camera We recommend that you take test shots to get accustomed to your camera before taking important photographs In the interest of continually improving products Olympus reserves the right to update or modify information contained in this manual The screen and camera illustrations shown in this manual were produced ...

Page 2: ...ng Shooting Modes 23 Using Shooting Functions 28 Menus for Shooting Functions 33 Menus for Playback Editing and Printing Functions 38 Menus for Other Camera Settings 44 Printing 53 Usage Tips 58 Appendix 63 Step 1 Checking the contents of the box Other accessories not shown Warranty card Contents may vary depending on purchase location Digital camera USB cable CB USB6 AV cable CB AVC3 Strap USB AC...

Page 3: ... Arrow pad H left G down D button erase p 20 F up INFO button changing information display p 18 21 I right A button Operation guides displayed at the bottom of the screen indicate that the m button A button or zoom buttons can be used MENU OK ERASE CANCEL Operation guide OK SET SHADOW ADJUST AUTO AF MODE FACE iESP ESP ESP FINE ZOOM OFF DIGITAL ZOOM OFF COMPRESSION NORMAL MENU OK SET EXIT 2 2 IMAGE...

Page 4: ...u is displayed SHADOW ADJUST AUTO AF MODE FACE iESP ESP ESP FINE ZOOM OFF DIGITAL ZOOM OFF COMPRESS ON NORMAL MENU OK SET EXIT 2 2 IMAGE SIZE IMAGE SIZE 14M 14M 2 Press H to select the page tabs Use FG to select the desired page tab and press I x X MENU OK SET EXIT WORLD TIME TV OUT OFF POWER SAVE 2 2 Page tab MENU OK SET EXIT TV OUT OFF POWER SAVE x X X X X WORLD TIME Submenu 1 3 Use FG to select...

Page 5: ... p 42 0 Protect p 42 14M 4 4 P P 0 0 0 0 AUTO WB AUTO WB AUTO ISO AUTO ISO PROGRAM AUTO PROGRAM AUTO PHOTO SURFING EVENT COLLECTION BEAUTY FIX EDIT ERASE SETUP SLIDESHOW SLIDESHOW 6 7 3 2 1 5 4 DIGITAL ZOOM p 35 R Still images p 35 R Movies p 36 IMAGE STAB LIZER Still images IS MOVIE MODE Movies p 36 REC V EW p 36 PIC ORIENTATION 1 p 37 ICON GUIDE p 37 REMOTE FLASH 2 p 37 8 9 8 3 2 1 4 MENU OK SET...

Page 6: ...D TIME p 48 TV OUT p 48 POWER SAVE p 50 MANOMETER 1 p 50 TAP CONTROL 2 p 51 LED LLUMINATOR 2 p 52 COPY ENGLISH RESET USB CONNECTION PC MENU OK MEMORY FORMAT SET EXIT INTERNAL SD DATA REPAIR AUTO 1 2 1 2 3 3 2 1 1 STYLUS TOUGH 8010 TOUGH 8010 only 2 STYLUS TOUGH 8010 TOUGH 8010 and STYLUS TOUGH 6020 TOUGH 6020 only Operating the camera by tapping the Operating the camera by tapping the body body p ...

Page 7: ...9 71 Camera unit 11 1 1 1 2 3 4 5 6 10 7 8 9 STYLUS TOUGH 6020 TOUGH 6020 STYLUS TOUGH 3000 TOUGH 3000 6 Lens p 63 7 Self timer lamp LED illuminator 2 p 30 p 32 52 8 Flash p 28 9 Battery lock knob p 11 10 Tripod socket 11 Microphone 3 p 35 43 1 STYLUS TOUGH 8010 TOUGH 8010 only 2 STYLUS TOUGH 8010 TOUGH 8010 and STYLUS TOUGH 6020 TOUGH 6020 only 3 STYLUS TOUGH 3000 TOUGH 3000 ...

Page 8: ...n OK p 3 7 Indicator lamp p 12 13 8 Shutter button p 16 58 9 Zoom buttons p 17 20 10 Movie record button p 17 11 Strap eyelet p 8 12 Arrow pad p 3 INFO button changing informa ion display p 18 21 D button erase p 20 13 E button camera guide menu guide p 22 14 m button p 3 4 Attaching the camera strap Pull the strap tight so that it does not come loose 1 STYLUS TOUGH 8010 TOUGH 8010 and STYLUS TOUG...

Page 9: ...p 4 5 6 12 World time p 48 13 Image stabilization still images Digital image stabilization movies p 36 14 Metering p 34 15 Shadow Adjustment Technology p 34 16 Compression still images p 33 66 67 68 17 Image size still images p 33 66 67 68 18 Number of storable still pictures still images p 16 19 Current memory p 65 20 Remaining recording time movies p 17 21 Al itude water depth 2 p 50 22 Atmosphe...

Page 10: ...s p 56 p 55 3 Protect p 42 4 Adding sound p 35 36 43 5 Current memory p 65 6 Frame number total number of images still images p 18 Elapsed time total recording time movies p 19 7 Histogram p 18 8 Shutter speed p 16 9 Aperture value p 16 10 ISO p 31 11 Exposure compensation p 30 12 White balance p 30 13 Compression still images p 33 66 67 68 Image quality movies p 33 66 67 68 14 Image size p 33 66 ...

Page 11: ...en using the camera be sure to close the battery card connector cover Battery charge and camera setup Connect the camera to the computer to charge the battery and setup the camera System requirements Windows XP SP2 or later Windows Vista Windows 7 When using another system other than the above or no computer see Charging the battery with the included USB AC adapter p 13 Inserting the battery 1 STY...

Page 12: ...oper operation is not guaranteed in the following cases Computers with USB ports installed using an expansion card etc Computers without a factory installed OS and home built computers Double click the icon for the camera drive Removable Disk and then execute Setup exe to start the camera setup 3 Follow the instructions on the computer screen and setup the camera 1 Connect the camera to the comput...

Page 13: ...harged The battery is not fully charged at shipment Before use be sure to charge the battery until the indicator lamp turns off STYLUS TOUGH 8010 TOUGH 8010 STYLUS TOUGH 6020 TOUGH 6020 up to 3 hours STYLUS TOUGH 3000 TOUGH 3000 up to 2 5 hours If the indicator lamp does not light the AC adapter is not connected to the camera correctly or the battery camera or AC adapter may be broken For details ...

Page 14: ... date and time are not set Date and time setting screen X Y M D Y M D TIME MENU CANCEL 2 Use FG to select the year for Y MENU CANCEL X Y M D Y M D TIME 2010 2010 3 Press I to save the setting for Y 2010 X Y M D Y M D TIME MENU CANCEL 00 00 4 As in Steps 2 and 3 use FGHI and the A button to set M month D day TIME hours and minutes and Y M D date order For precise time setting press the A button as ...

Page 15: ...ert other types of memory card Using a SD SDHC memory card p 64 Although the camera can store images in internal memory SD SDHC memory cards sold separately can be also used to store pictures 1 Insert the card straight until it clicks into place Do not touch the contact area directly 2 STYLUS TOUGH 8010 TOUGH 8010 STYLUS TOUGH 6020 TOUGH 6020 STYLUS TOUGH 3000 TOUGH 3000 1 2 3 1 2 Close the batter...

Page 16: ...lue Focusing p 60 Shooting with the optimum aperture value and shutter speed P mode In this mode automa ic shooting settings are ac ivated while also allowing changes to a wide range of other shooting menu functions such as exposure compensation white balance etc as needed 1 Press the n button to turn on the camera P mode indicator 4M 4 4 P P 0 0 0 0 AUTO WB AUTO WB AUTO SO AUTO SO 00 34 00 34 Num...

Page 17: ...ing is performed with the P mode setting 2 Press the movie record button again to stop recording Sound will also be recorded When recording sound in a movie the sound of the lens triggering and camera operating may be recorded STYLUS TOUGH 3000 TOUGH 3000 During sound recording only the digital zoom can be used To record a movie with optical zoom set R movies p 36 to OFF Using the zoom Pressing th...

Page 18: ...time the button is pressed Shooting mode display p 9 14M 4 4 P P 0 0 0 0 A T W A T W A T A T 14M 4 4 NORM P P 0 0 0 0 A T W A T W A T A T 00 34 00 34 00 34 00 34 Normal Detailed No information Reading a histogram If the peak lls too much of the frame the image will appear mostly white If the peak lls too much of the frame the image will appear mostly black The green section shows luminance distrib...

Page 19: ...o display the last frame Advancing and rewinding one frame at a time Press I or H to advance or rewind one frame at a time Hold I or H pressed for continuous advance or rewind Resuming playback Press the A button to resume playback To stop movie playback Press the m button To play sound recordings To play sound recorded with an image select the image and press the A button A icon appears on images...

Page 20: ...ndex Index view enables quick selection of a desired image Close up view up to 10 magni ca ion allows checking of image details In event index 1 images are grouped by he shoo ing dates and representative images for an event can be displayed 1 Pictures with different dates can be grouped into the same event using the PC software ib 1 Press the zoom buttons 10 02 26 12 30 10 02 26 12 30 4 30 4 30 10...

Page 21: ...10 10 4 30 4 30 1 1000 F3 9 2 0 AUTO WB AUTO ISO 100 0004 10 02 26 12 30 P N M 14M 960hPa 0m Normal Detailed No information Reading a histogram p 18 Playing back panorama images Panorama images that were combined together using AUTO or MANUAL can be scrolled for viewing Creating panoramic images p mode p 25 1 Select a panorama image during playback Viewing images p 18 10 02 26 10 02 26 12 30 4 30 ...

Page 22: ...amera History Message OK SET EXIT Search Search Submenu 2 Application Search Functions or operating methods can be searched from a term or shooting objective Learn about the camera Information is shown about recommended functions and basic operating methods for the camera History Searches can be performed from the search history Message Messages from the camera can be viewed 2 Use FG to select the...

Page 23: ... using the function menu Using the Menu p 4 Shooting with automatic settings M mode The camera will automatically select the optimal shooting mode for the scene This is a fully automatic mode that allows you to take a picture suited to the scene by simply pressing the shutter button In M mode set ings in the shooting menu can be selected but the changed setting is not re ected in the actual shot 1...

Page 24: ...ce is automatically xed to approx 5 0 m 16 4 ft Important information about water and shock resistant features p 69 To lock the focus distance for underwater shoots AF lock When T SNAPSHOT k WIDE1 or H MACRO is selected press the A button STYLUS TOUGH 8010 TOUGH 8010 and STYLUS TOUGH 6020 TOUGH 6020 only 14M 4 4 0 0 0 0 AUTO WB AUTO WB AFLOCK AFLOCK AF lock mark To cancel press the A button again ...

Page 25: ...a The user only composes the shots so that the target marks and pointers overlap and the camera automatically releases the shutter MANUAL Three frames are taken and combined by the camera The user composes the shots using the guide frame and manually releases the shutter PC The frames that were taken are combined into a panorama image using the PC software ib For details on installing the PC softw...

Page 26: ...with MANUAL 1 Use HI to specify at which edge the next picture is to be connected MANUAL MANUAL 1 2 MENU BACK Direction for combining the next frame 2 Press the shutter button to take he rst frame 1st frame MANUAL MANUAL 1 2 MANUAL MANUAL 1 2 MENU BACK MENU OK S VE CANC L Joint areas 3 Compose the next shot so that joint area 1 overlaps joint area 2 Composition of the 2nd frame MANUAL MANUAL 1 2 M...

Page 27: ...es Refer to the PC software ib help guide for details on how to make panorama images Smoothing out skin tone and texture Q mode The camera identi es a person s face and gives the skin a smoo h translucent look for taking the picture 1 Set the shooting mode to Q 14M 4 4 0 0 0 0 AUTO WB AUTO WB BEAUTY BEAUTY P P 2 Point the camera toward the subject Check the frame appearing around the face detected...

Page 28: ...s 1 Select the ash option in the shooting function menu 14M 4 4 P P 0 0 0 0 AUTO WB AUTO WB AUTO ISO AUTO ISO FLASH AUTO FLASH AUTO 2 Use HI to select the setting option and press the A button to set Option Description FLASH AUTO The ash res automatically in low light or backlight conditions REDEYE Pre ashes are emitted to reduce the occurrence of red eye in your photos F LL IN The ash res regardl...

Page 29: ...les the camera to shoot subjects at even closer distances This function enables shooting as close as the following distances STYLUS TOUGH 8010 TOUGH 8010 STYLUS TOUGH 6020 TOUGH 6020 STYLUS TOUGH 3000 TOUGH 3000 3 cm 1 2 in 2 cm 0 8 in Subjects at the following or farther distances cannot be brought into focus STYLUS TOUGH 8010 TOUGH 8010 STYLUS TOUGH 6020 TOUGH 6020 STYLUS TOUGH 3000 TOUGH 3000 6...

Page 30: ...ken Self timer shooting is automatically canceled after one shot To cancel the self timer after it starts Press he m button Adjusting the brightness Exposure compensation The standard brightness appropriate exposure set by the camera based on he shoo ing mode except for M can be adjusted brighter or darker to obtain a desired shot 1 Select the exposure compensation option in the shooting function ...

Page 31: ...he International Organization for Standardization ISO standards specify the sensitivity for digital cameras and lm thus codes such as ISO 100 are used to represent sensitivity In the ISO setting although smaller values result in less sensitivity sharp images can be taken under fully lit conditions Larger values result in higher sensitivity and images can be taken at fast shutter speeds even under ...

Page 32: ...et to W the ash is xed to FLASH OFF When set to W MAGE SIZE is limited to 3 or lower and the ISO sensitivity is xed to ISO AUTO Using the LED illuminator STYLUS TOUGH 8010 TOUGH 8010 and STYLUS TOUGH 6020 TOUGH 6020 only In a dark loca ion the LED illuminator can be used as an auxiliary light to see things or compose shots 1 Set LED ILLUMINATOR p 52 to ON 2 Press and hold F down until the LED illu...

Page 33: ...1 3968 2232 2 Suitable for playing pictures on a widescreen TV and for printing on A3 or 11 17 16 9F 1920 1080 Suitable for playing pictures on a widescreen TV and for printing on A5 or 5 7 COMPRESSION FINE Shooting at high quality NORMAL Shooting at normal quality 1 STYLUS TOUGH 8010 TOUGH 8010 and STYLUS TOUGH 6020 TOUGH 6020 only 2 STYLUS TOUGH 3000 TOUGH 3000 only Number of storable pictures s...

Page 34: ...r some subjects the frame may not appear or may take some time to appear 2 If the frame blinks in red the camera cannot focus Try refocusing on the subject To focus on a moving subject continuously AF Tracking 1 Hold he camera to align the AF target mark on the subject and press the A button 2 When the camera recognizes the subject the AF target mark automatically tracks the subject movement to fo...

Page 35: ...g at higher magni cations than optical zoom DIGITAL ZOOM I Shoo ing menu 1 X DIGITAL ZOOM Available shooting modes P M s P p Q Submenu 2 Application OFF Only optical zoom is used to zoom in for shooting ON Optical zoom and digital zoom are combined to zoom in for shooting 1 1 STYLUS TOUGH 8010 TOUGH 8010 STYLUS TOUGH 6020 TOUGH 6020 Approx 25 max STYLUS TOUGH 3000 TOUGH 3000 Approx 18 max The sett...

Page 36: ...or other stable surface ON The image stabilizer is activated The camera s default settings are IMAGE STAB LIZER still images to ON and IS MOVIE MODE movies to OFF There may be a noise coming from inside the camera when the shutter button is pressed with IMAGE STAB LIZER still images set to ON Images may not be stabilized if camera shake is too severe When the shutter speed is extremely slow such a...

Page 37: ...matically rotated during playback Displaying icon guides ICON GUIDE J Shooting menu 2 X ICON GUIDE Available shooting modes P M s P p Q Submenu 2 Application OFF No icon guide is displayed ON The explanation of the selected icon will be displayed when a shooting mode or shooting function menu icon is selected position the cursor on the icon for a while to display the explanation Icon guide 14M 4 4...

Page 38: ...ition effect used between slides START Starts the slideshow Single frame advance rewind During a slideshow press I to skip ahead one frame or press H to go back one frame Searching for images and playing back the related images PHOTO SURFING PHOTO SURFING In PHOTO SURFING images can be searched and related images can be played back by selecting he related items To start PHOTO SURFING Press the A b...

Page 39: ...s been created with the PC software ib and imported back from a computer To start COLLECTION q Press the A button and hen use FGHI to select he desired collection Press he A button again to start playback of the selected collection Use HI to advance or rewind by one frame To stop COLLECTION q press the m button COLLECTION MENU OK SET BACK Using a PC software ib and importing data back to the camer...

Page 40: ...mage When CLEAR SKIN is selected Use FG to select the retouching level and press the A button CLEAR SKIN MENU OK SET BACK AVG SOFT SOFT HARD Changing the image size Q EDIT X Q Submenu 2 Application C 640 480 This saves a high resolution image as a separate image with a smaller size for use in e mail attachments and other applications E 320 240 1 Use HI to select an image 2 Use FG to select an imag...

Page 41: ...lect an image and press the A button 2 Use HI to select a calendar Use FG to select the image orientation and then press the A button 3 Use FG to select the Year of he calendar and press I 4 Use FG to select the Month of the calendar and press he A button The edited image is saved as a separate image Brightening areas that are dark due to backlight or other reasons SHADOW ADJ EDIT X SHADOW ADJ 1 U...

Page 42: ...an index view Images can be quickly selected using the FGHI buttons Press the T button to return to the single frame display MENU OK SEL IMAGE ERASE CANCEL R mark 3 Repeat Step 2 to select the images to be erased and hen press the m button to erase the selected images 4 Use FG to select YES and press the A button The images with a R mark are erased To erase all images ALL ERASE 1 Use FG to select ...

Page 43: ...the m button The new picture orientations will be saved even after the power is turned off Adding sound to still images R q Playback menu X R 1 Use HI to select an image 2 Aim the microphone toward the sound source STYLUS TOUGH 8010 TOUGH 8010 Microphone STYLUS TOUGH 6020 TOUGH 6020 Microphone STYLUS TOUGH 3000 TOUGH 3000 Microphone 3 Press he A button Recording starts The camera adds records soun...

Page 44: ...vice INTERNAL SD r Settings 1 X INTERNAL SD Submenu 2 Application AUTO If a card is inserted the card is automatically selected If no card is inserted internal memory is used IN 1 Internal memory is selected 1 Internal memory is used even if a card is inserted Erasing data completely MEMORY FORMAT FORMAT r Settings 1 X MEMORY FORMAT FORMAT Before formatting check that no important data is left in ...

Page 45: ...ista Windows 7 Macintosh Mac OS X v10 3 or later When using another system other than Windows XP SP2 or later Windows Vista Windows 7 set to STORAGE Even if a computer has USB ports proper operation is not guaranteed in the following cases Computers with USB ports installed using an expansion card etc Computers without a factory installed OS and home built computers Turning on the camera with the ...

Page 46: ...s ON FG can be used to adjust volume during playback 2 Even when SILENT MODE is ON sound is played when images are displayed on a television Resetting the le names of pictures FILE NAME s Settings 2 X FILE NAME Month 1 to C A October B November C December Day 01 to 31 Pmdd Folder name Folder name File name DC M 100OLYMP 999OLYMP Pmdd0001 jpg Pmdd9999 jpg Automatic numbering Automatic numbering Sub...

Page 47: ...o perform it again To adjust the CCD and the image processing function Press the A button when START Submenu 2 is displayed The camera checks and adjusts the CCD and the image processing function at the same time Adjusting the brightness of the monitor s s Settings 2 X s To adjust the monitor brightness 1 Use FG to adjust the brightness while viewing he screen and then press the A button MENU OK S...

Page 48: ... zone and the home time zone x to display the time in the travel destination time zone y Playing back images on a TV TV OUT t Settings 3 X TV OUT The TV video signal system varies depending on the countries and regions Before viewing camera images on your TV select the video output according to your TV s video signal type Submenu 2 Submenu 3 Application VIDEO OUT NTSC Connecting the camera to a TV...

Page 49: ...l When the camera is connected to the computer or other device via USB cable do not connect the HDMI cable to the camera Connect to the HDMI connector on the TV HDMI mini connector HDMI cable type C commercially available Open the battery card connector cover in the direction of the arrow 3 Turn on the TV and change INPUT to VIDEO an input jack connected to he camera For details on changing the in...

Page 50: ... POWER SAVE ON When the camera is not being used for approx 10 seconds the monitor automatically turns off to save battery power To resume standby mode Press any button Displaying the current altitude water depth atmospheric hydraulic pressure MANOMETER STYLUS TOUGH 8010 TOUGH 8010 only t Settings 3 X MANOMETER The readings may have a margin of error depending on meteorological conditions Use the ...

Page 51: ...f the camera body once Then tap the top side of the camera once The ash mode selection screen is displayed 2 Tap the right or left side of the camera body to select a function 3 Tap the back of the camera body twice to con rm your selection 14M 4 4 P P 0 0 0 0 AUTO WB AUTO WB AUTO SO AUTO SO FLASH AUTO FLASH AUTO Tap the camera rmly using the pad of your nger When the camera is stabilized on a tri...

Page 52: ...Select he STR setting with FG and press the I button 4 Select he INTVL setting with FG and press the A button TOP MENU OK SET BACK STR INTVL NORM AVG AVG Check the operation of the camera by tapping on the camera after making the settings Using the LED illuminator as an auxiliary light LED ILLUMINATOR STYLUS TOUGH 8010 TOUGH 8010 and STYLUS TOUGH 6020 TOUGH 6020 only t Settings 3 X LED ILLUMINATOR...

Page 53: ...computer To nd out if your printer supports PictBridge refer to the printer s instruction manual 1 PictBridge is a standard for connecting digital cameras and printers of different makers and printing out pictures directly The printing modes paper sizes and other parameters that can be set with the camera vary depending on the printer that is used For details refer to the printer s instruction man...

Page 54: ...EET are set to the printer s standard PRINTPAPER SIZE BORDERLESS STANDARD OK SET MENU BACK STANDARD STANDARD 5 Use FG to select the BORDERLESS or PICS SHEET settings and press the A button Submenu 4 Application OFF ON 1 The image is printed with a border around it OFF The image is printed to ll the entire paper ON The number of images per sheet varies depending on the printer The number of images ...

Page 55: ...OK SET 2 Use FG to select OK and press the A button MENU OK P CANCEL OK OK SET BACK 8 If necessary repeat Steps 6 and 7 to select the image to be printed make the detailed settings and set SINGLEPRINT 9 Press the A button PRINT MENU OK CANCEL SET BACK PRINT PRINT 10Use FG to select PRINT and press the A button Printing starts When OPTION SET is selected in ALL PR NT mode PRINT INFO screen is displ...

Page 56: ...al device Making new DPOF reservations with this camera will erase the reservations made by the other device DPOF print reservations can be made for up to 999 images per card Single frame print reservations 1 Display the SETUP menu Using the Menu p 4 2 From the playback menu q select PRINT ORDER and then press the A button PRINT ORDER U MENU OK SET EXIT 3 Use FG to select and press the A button NO...

Page 57: ...ss the A button Resetting the print reservation data for selected images 1 Follow Steps 1 and 2 in p 56 2 Use FG to select and press the A button 3 Use FG to select KEEP and press the A button 4 Use HI to select the image with the print reservation you want to cancel Use FG to set the print quantity to 0 5 If necessary repeat Step 4 and then press the A button when nished 6 Use FG to select the X ...

Page 58: ...se the internal temperature may increase resulting in automatic shutdown If this occurs remove the battery from the camera and wait until the camera has suf ciently cooled The camera s external temperature may also increase during use however this is normal and does not indicate malfunction Monitor Dif cult to see Condensation 1 may have occurred Turn off the power and wait for the camera body to ...

Page 59: ...the image on a computer If the image still cannot be viewed the image le is corrupted THE IMAGE CANNOT BE EDITED Problem with selected image Use photo retouch software etc to edit the image on a computer BATTERY EMPTY Battery problem Charge the battery NO CONNECTION Connection problem Connect the camera and computer or printer correctly NO PAPER Printer problem Load paper into the printer Error me...

Page 60: ...h no vertical lines 1 1 t is also effective to compose the shot by holding the camera vertically to focus and then returning to the horizontal position to take the picture When objects are at different distances Fast moving object The subject is not in the center of the frame Camera shake Taking pictures without camera shake Taking pictures using IMAGE STABILIZER p 36 When a picture is taken of a ...

Page 61: ... shade as they appear Taking pictures by selecting white balance p 30 Best results in most environments can normally be obtained with the WB AUTO setting but for some subjects you should try experimenting with different settings This is especially true for sunshade under a clear sky mixed natural and arti cial light settings and so on Taking pictures using FILL IN p 28 ash Use of the ash is also e...

Page 62: ...y card sold separately p 15 Selecting a storage device INTERNAL SD p 44 Viewing images with high picture quality on a high de nition TV Connect the camera to the TV using an HDMI cable commercially available To play back camera images on a TV p 48 Editing Erasing the sound recorded to a still image Record over the sound with silence when playing back the image Adding sound to still images R p 43 ...

Page 63: ... or charge it using the included USB AC adapter F 2AC a separately sold AC adapter F 1AC D 7AC or charger STYLUS TOUGH 8010 TOUGH 8010 STYLUS TOUGH 6020 TOUGH 6020 LI 50C STYLUS TOUGH 3000 TOUGH 3000 LI 41C LI 40C Camera care Exterior Wipe gently with a soft cloth If he camera is very dirty soak the cloth in mild soapy water and wring well Wipe the camera with the damp cloth and then dry it with a...

Page 64: ... any other AC adapter with his camera Using a separately sold charger A charger sold separately can be used to charge the battery In this case remove the battery from the camera and set he battery to he charger STYLUS TOUGH 8010 TOUGH 8010 STYLUS TOUGH 6020 TOUGH 6020 LI 50C STYLUS TOUGH 3000 TOUGH 3000 LI 41C LI 40C Using your charger and USB AC adapter abroad The charger and USB AC adapter can b...

Page 65: ...layback mode Shooting mode 10 02 26 10 02 26 12 30 30 30 4 4 P P 0 0 0 0 AUTO WB AUTO WB AUTO ISO AUTO ISO 14M 00 34 00 34 Even if MEMORY FORMAT FORMAT ERASE ERASE EVENT SEL IMAGE or ALL ERASE is performed the data in the card is not completely erased When disposing of the card damage the card to prevent the disclosure of personal data Readout recording process of the card During shoo ing he curre...

Page 66: ...pictures IMAGE SIZE COMPRESSION Number of storable still pictures Internal memory SD SDHC memory card 1GB With sound Without sound With sound Without sound 6 4288 3216 L 225 237 133 140 M 423 466 251 276 4 3264 2448 L 373 406 220 240 M 677 793 400 469 n 2560 1920 L 570 651 337 385 M 1 036 1 337 613 790 3 2048 1536 L 819 996 484 589 M 1 411 2 032 846 1 226 2 1600 1200 L 1 239 1 693 732 1 001 M 1 88...

Page 67: ...84 1 540 M 963 2 022 1 430 3 004 7 640 480 L 1 189 3 370 1 820 5 461 M 1 444 6 741 2 145 10 013 K 4288 2416 L 117 125 175 187 M 217 246 324 368 0 1920 1080 L 459 612 690 924 M 722 1 189 1 092 1 820 Movies IMAGE SIZE IMAGE QUALITY Continuous recording length Internal memory SD SDHC memory card 1GB With sound Without sound With sound Without sound L 1280 720 L 8 min 36 sec 8 min 43 sec 13 min 18 sec...

Page 68: ... 011 984 1 540 M 963 2 022 1 430 3 004 7 640 480 L 1 189 3 370 1 820 5 461 M 1 444 6 741 2 145 10 013 K 3968 2232 L 135 146 202 218 M 249 288 370 429 0 1920 1080 L 459 612 690 924 M 722 1 189 1 092 1 820 Movies IMAGE SIZE IMAGE QUALITY Continuous recording length Internal memory SD SDHC memory card 1GB With sound Without sound With sound Without sound L 1280 720 L 8 min 36 sec 8 min 43 sec 13 min ...

Page 69: ...e a test shot to check the operation of the ash and the resulting image Be sure to check the charge level of the camera and wireless ash before taking pictures Although there is no limit on the number of wireless ash units that are set up usage of a maximum of three units is recommended to prevent malfunction due to interference with each other When the camera ash is set to RC the camera built in ...

Page 70: ...the camera in a bucket containing fresh water for about 10 minutes with the battery card connector cover rmly closed After that dry the camera in the shade with good ventilation Water drops may be observed on the inner surface of the battery card connector cover after you open the cover If any water drops are found be sure to wipe them off before using the camera Notes after use Foreign materials ...

Page 71: ...oduct is used without observing the information given under this symbol minor personal injury damage to the equipment or loss of valuable data may result WARNING TO AVOID THE RISK OF FIRE OR ELECTRICAL SHOCK NEVER DISASSEMBLE EXPOSE THIS PRODUCT TO WATER OR OPERATE IN A HIGH HUMIDITY ENVIRONMENT General Precautions Read All Instructions Before you use the product read all operating instructions Sa...

Page 72: ... in this state a low temperature burn may be caused In places subject to extremely cold temperatures the temperature of the camera s body may be lower than the environmental temperature If possible wear gloves when handling the camera in cold temperatures Be careful with the strap Be careful with the strap when you carry the camera It could easily catch on stray objects and cause serious damage Do...

Page 73: ...voltage such as near a TV set microwave video game loud speakers large monitor unit TV radio tower or transmission towers In such cases turn the camera off and on again before further operation Always observe the operating environment restrictions described in the camera s manual Battery Handling Precautions This camera uses a lithium ion battery speci ed by Olympus Do not use any other type of ba...

Page 74: ...rein Olympus reserves the right to alter the features and contents of this publica ion or software without obliga ion or advance notice FCC Notice Radio and Television Interference Changes or modi cations not expressly approved by the manufacturer may void the user s authority to operate this equipment This equipment has been tested and found to comply with the limits for a Class B digital device ...

Page 75: ...ympus Service Center Olympus shall not be obligated to perform preventive maintenance installation deinstalla ion or maintenance Olympus reserves the right to i use reconditioned refurbished and or serviceable used parts that meet Olympus s quality assurance standards for warranty or any other repairs and ii make any internal or external design and or feature changes on or to its products without ...

Page 76: ...mpus This limited warranty is he complete and exclusive statement of warranty which Olympus agrees to provide with respect to the Products and it shall supersede all prior and contemporaneous oral or written agreements understandings proposals and communications pertaining to the subject matter hereof This limited warranty is exclusively for the bene t of the original customer and cannot be transf...

Page 77: ... risk and shall be responsible for any costs incurred in transporting the product Provisions of Guarantee 1 OLYMPUS IMAG NG CORP Shinjuku Monolith 2 3 1 Nishi Shinjuku Shinjuku ku Tokyo 163 0914 Japan grants a one year World Wide Guarantee This worldwide Guarantee must be presented at an Olympus authorized repair service station before any repair can be made under conditions of this Guarantee This...

Page 78: ...zed service station at his own risk and shall be responsible for any costs incurred in transporting the product 3 This warranty does not cover the following and the customer will be required to pay repair charge even for defects occurring within the one year period referred to above Any defect that occurs due to mishandling such as an operation performed that is not mentioned in the Handling Care ...

Page 79: ...any consequential incidental or indirect damages including but not limited to damages for loss of business pro ts business interruption and loss of business information arising from the use of inability to use these written materials or software Some states do not allow the exclusion or limitation of liability for consequential or incidental damages so he above limitations may not apply to you Tra...

Page 80: ...UGH 6020 TOUGH 6020 0 6 m 2 0 ft to normal 0 2 m 0 7 ft to W 0 5 m 1 6 ft to T macro mode 0 03 m 0 1 ft to 0 6 m 2 0 ft f 6 7 xed super macro mode STYLUS TOUGH 3000 TOUGH 3000 0 5 m 1 6 ft to normal 0 1 m 0 3 ft to W 0 3 m 1 0 ft to T macro mode 0 02 m 0 07 ft to 0 5 m 1 6 ft f 6 5 xed super macro mode Monitor 2 7 TFT color LCD display 230 000 dots Connector DC N jack USB connector A V OUT jack Mu...

Page 81: ...m ion rechargeable battery Standard voltage DC 3 7 V Standard capacity 740 mAh Battery life Approx 300 full charges varies on usage Operating environment Temperature 0 C to 40 C 32 F to 104 F charging 10 C to 60 C 14 F to 140 F operation 20 C to 35 C 4 F to 95 F storage Dimensions 31 5 mm W 39 5 mm H 6 0 mm D 1 2 1 5 0 2 in Weight Approx 15 g 0 5 oz Lithium ion battery LI 50B Product type Lithium ...

Page 82: ...z F 2AC 2B Design and speci cations subject to change without notice Using in low temperatures Low temperature operation of the Olympus lithium ion battery is guaranteed to 0 C 32 F However the Olympus lithium ion battery has been tested for use with this product in temperatures up to 10 C 14 F Olympus lithium ion battery STYLUS TOUGH 8010 TOUGH 8010 STYLUS TOUGH 6020 TOUGH 6020 LI 50B STYLUS TOUG...

Page 83: ...VN678203 ...

Page 84: ... chargement et à l af chage Assurez vous de ne pas utiliser la prise de vue alors que l adaptateur secteur est raccordé à l appareil photo Exemple Adaptateur secteur avec câble d alimentation 1 2 3 1 Connecteur multiple Prise de courant Câble USB fourni 2 3 1 Connecteur multiple Prise de courant Câble USB fourni 2 Fermez solidement le couvercle de la batterie carte connecteur jusqu au déclic Prend...

Page 85: ... des vibrations continues ATTENTION Avant sa mise en place toujours contrôler soigneusement la batterie pour des coulages décoloration gauchissement ou toutes autres anormalités La batterie peut devenir chaude pendant une utilisation prolongée Pour éviter des brûlures mineures ne pas la retirer immédiatement après avoir utilisé l appareil Toujours retirer la batterie de l appareil avant de le rang...

Page 86: ...0 ecra no seu idioma Aguarde Bemrerk angaende installering af PC programmet ib Den engelske hjaelpefunktion som kommer frem i begyndelsen af installeringen vii skifte til hjaelpefunktionen pit dit sprog Vent venligst Om installering av PC programvare ib Det engelske veiviserskjermbildet som vises nar installeringen begynner vii endres til et skjermbilde pa dill spritk Vent litt Nota sull installaz...

Page 87: ...chermata di impostazione di data e ora Pastaba apie foloaparalo paruosim l Pranesimas angl l kalba kuris pasirodo paspaudus fotoaparato mygtukq ON OFF Paspauskile mygluk OK kad pereitumete prie datos ir laiko nustatymo ekrano Piezime par kameras iestatisanu Nospiezo kameras ON OFF taustiQu paradas pazil ojums anglu valoda Nospiediel tausliQu OK lai parietu uz datuma un laika iestatisanas ekranu Op...

Page 88: ...OLYMPUS ...

Page 89: ...s dans Ie manuel de I utilisateur Lisez attentivement la page concernant les INFORMATIONS IMPORTANTES RELATIVES AUX FONCTIONS D ETANCHEITE AL EAU ET DE RESISTANCE AUX CHOCS Les illustrations de I appareil photo presentees dans ce manuel peuvent ne pas correspondre au produit reel mais I operation est la mame Es necesario actuar con el debido cuidado antes y despues de usar la camara para mantener ...

Page 90: ...rey areas in the illustrations If there are any foreign objects or water drops wipe them off with a soft lint free cloth Make sure that there are no cracks or tears in the water resistant sealants Verifiez qu il n y a aucun objet etranger comme des cheveux ou du sable ou des gouttes d eau aI interieur du couvercle de la batterie carte connecteur zones en gris sur les illustrations S il y a un obje...

Page 91: ...r Couvercle de I objectif La tapa del objetivo lI 7i j Rincez egalement autour de I objectif couvercie de I objectif et Ie couvercie de la batterie carte connecteur sous un robinet d eau ciaire Para modelos con una tapa de objetivo presione el bot6n ON OFF varias veces mientras la camara esta sumergida para eliminar cualquier resto de la tapa del objetivo Si no puede mover la tapa del objetivo col...

Page 92: ... INSTRUCTIONS DANGER TO REDUCE THE RISK OF FIRE OR ELECTRIC SHOCK CAREFULLY FOLLOW THESE INSTRUCTIONS For connection to a supply not in the U S A use an attachment plug adapter of the proper configuration for the power outlet if needed VN8409 4 165 612 02 ...

Page 93: ...22 6372 to attempt to determine the nature of the problem IF YOU HAVE QUESTIONS OR NEED HELP If you have questions about the use or performance of your Products or if you have any questions or comments regarding service performed in the United States which have not been resolved to your satisfaction write directly to Olympus Imaging America Inc 3500 Corporate Parkway P O Box 610 Center Valley PA 1...

Page 94: ...ica Inc 3500 Corporate Parkway P O Box 610 Center Valley PA 18034 0610 U S A Attn Customer Care Servicio al cliente No envie productos a esta direcci6n SERVICE CENTERS WHERE TO SEND PRODUCT FOR SERVICE Olympus Imaging America Inc 400 Rabro Drive Hauppauge NY 11788 4258 1 800 O CAMERA 622 6372 Olympus Imaging America Inc 10805 Holder Street Suite 170 Cypress CA 90630 5145 1 800 O CAMERA 622 6372 Ol...

Reviews: