18
19
1
2
3
4
5
None
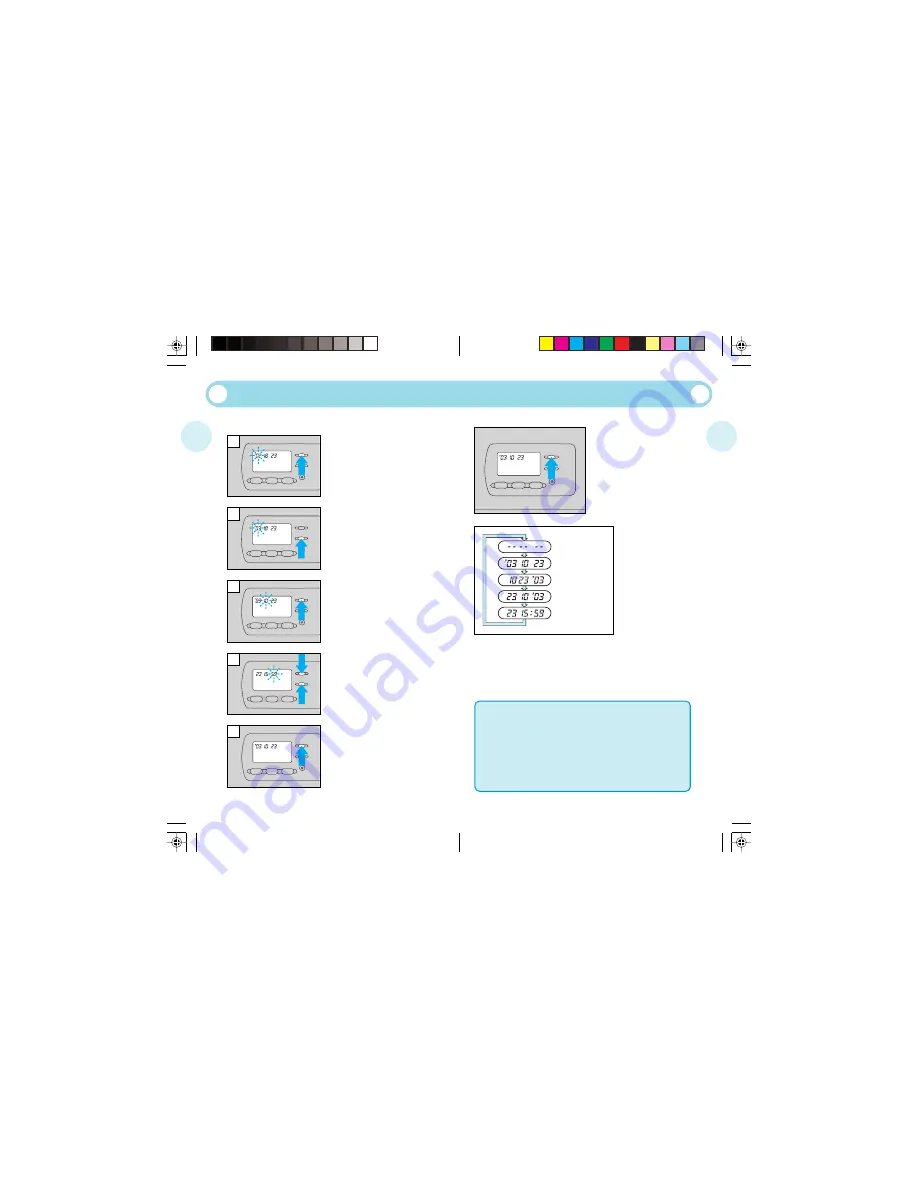
1. Keep the MODE button pressed
until the “year” indicator starts
blinking.
Be sure to correct the date and time after the batteries have
been inserted or replaced.
2. Press the SET button to adjust the
“year” indicator. If you press the
button once, the number on the
display will advance by 1. If you
keep the button pressed, the
numbers will run in rapid
succession. If you pass the
intended number, keep pressing to
return to that number.
3. Press the MODE button once more
to make the “month” indicator
blink. Press the SET button to
adjust the “month” indicator. As
you press the MODE button, the
blinking indicator changes in the
order of “year”, “month”, “day”,
“hour” and “minute”.
4. Repeat Steps 2 and 3 to set “hour”
and “minute”. Make sure the
“minute” indicator is blinking.
5. When “minute” has been set, press
the MODE button. None of the
indicators will be blinking and date/
time correction is now complete.
Press the MODE button. As you
press it, the mode will switch in
the order shown below.
Keep the mode you want to print
displayed.
First select the date/time mode you want to print.
• The date unit uses the same power source as the main unit.
• Be sure to correct the date and time after the batteries are replaced.
• The date/time is imprinted in the lower right corner of the picture.
• If the date/time is superimposed on a bright color like white,
orange, yellow, etc., it may be difficult to read.
• The date/time may not be imprinted correctly on the frame(s) after
the specified final exposure of the film.
• When black-and-white film is used, the date/time may not be
printed.
Year-month-day
Month-day-year
Day-month-year
Day-hour-minute
CORRECTING THE DATE AND TIME
(Quartzdate models only)
PRINTING THE DATE/TIME
(Quartzdate models only)


