DMTA-10040-01EN, Rev. E, February 2018
Chapter 5
214
32. Depending on your requirements, press the DISP menu key (
) again, and
then select your preferred
D ERASE
(A key) or
PERSIST
(B key) values.
33. Press the ALARM menu key (
), and then set the
ALARM 1
(A key) to
MIX
POS
.
34. Press the ALARM menu key (
) again, and then set the
BOTTOM
(C key) to
50 %, the
LEFT
(D key) to
−
10 %, and the
RIGHT
(E key) to 110 %.
35. Press the FULL NEXT key (
) to toggle to the full-screen mode.
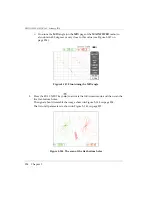
36. Place the probe on position 1, and then perform a final scan of both fastener rows
(see Figure 5-133 on page 214).
Figure 5
‑
133 The scan results for both fastener rows
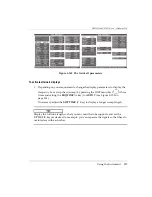
To fine-tune the instrument settings
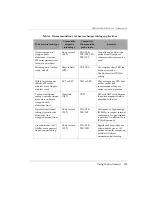
As desired, set the alarm box parameters, horn, or external horn (louder). For
more details about alarms, see “Alarm Menus” on page 292.
The list of all parameters is shown in Figure 5-134 on page 215.
Summary of Contents for nortec 600
Page 8: ...DMTA 10040 01EN Rev E February 2018 Table of Contents viii...
Page 16: ...DMTA 10040 01EN Rev E February 2018 Labels and Symbols 6...
Page 30: ...DMTA 10040 01EN Rev E February 2018 Introduction 20...
Page 58: ...DMTA 10040 01EN Rev E February 2018 Chapter 1 48...
Page 71: ...DMTA 10040 01EN Rev E February 2018 Software User Interface 61 Press the Return key to exit...
Page 72: ...DMTA 10040 01EN Rev E February 2018 Chapter 2 62...
Page 342: ...DMTA 10040 01EN Rev E February 2018 Chapter 7 332...
Page 356: ...DMTA 10040 01EN Rev E February 2018 Appendix B 346...
Page 366: ...DMTA 10040 01EN Rev E February 2018 List of Figures 356...
Page 368: ...DMTA 10040 01EN Rev E February 2018 List of Tables 358...


