

Printed in CHINA
NG043002
a
c
buttons
9
button
Turn the printer
on in advance.
STORE ONLY
EXIT
20SEC. TILL AUTO STORE
STORE PRINT ORDER
DOCK MODE
STORE SEL. PRINT
I
O
I
O
PC
DOCK
A
B
C
D
E
I
O
PAP
ER
RIB
BON
ACC
ESS
POWER
Set “Safety mode” of B’s CLiP6 software to on if you use DVD+RW or DVD-
RW discs to increase reliability. The default setting of safety mode is on when
installing. For details, refer to the B’s CLiP6’s help.
Tip
d
Select the desired store option on the digital camera.
1) If a blank disk is inserted, select whether to format or print only.
To format, select “FORMAT DISK” with the
a
button and press the
9
button. When the “YES”/“NO” selection screen appears, selecting
“YES” and pressing the
9
button starts formatting (Formatting will
take some time depending on the type of disks). After formatting is
complete, the “Dock&Done” menu screen appears.
To conduct printing only, select “NOT STORE” and press the
9
button.
The “Dock&Done” menu screen will appear in the digital camera LCD
monitor.
If a disk has not been set in the unit, or if an incompatible or
incompatibly-formatted disk has been inserted, a message appears for
3 seconds before the “Dock&Done” menu screen appears. In this case,
although saving cannot be conducted, printing will be possible.
2) Select the desired store setting using the digital camera’s
a
/
c
buttons. The items displayed in the “Dock&Done” menu screen will
differ depending on the model of the digital camera or its settings and
reservation conditions.
Share disk creation
a
Turn the power switch on.
Check that the power indicator (green) and the
Q
DOCK-side indicator
(green) are illuminated.
b
From the top menu in the digital camera’s playback mode,
select “MODE MENU” and then “CREATE SHARE DISK.”
For details on digital camera menu operations, refer to the advanced
manual supplied with the digital camera.
c
Insert a blank disk into the unit.
a
Connect the AC adapter and power cord, and connect the
unit to a PC using the USB cable.
Using in the PC mode
Connecting with a PC
b
Set the Dock&Done mode/PC mode switch to “PC,” then
turn the power switch on.
Be sure to use the OLYMPUS Master software to store the image fi les on the
PC, and browse, edit, print, or manage image fi les on the disk when the unit
is connected to the PC. For details on using the OLYMPUS Master software,
refer to the OLYMPUS Master’s help and the on-line manual.
• Do not switch to the PC mode while the unit is processing in the Dock&Done
mode. The unit does not switch from PC mode to Dock&Done mode until the
unit is writing the data ends.
• Do not turn off the unit, or disconnect its cable while the ACCESS indicator
(blue) is blinking, otherwise a store or print error may result. The status of
storing/printing or error messages are displayed on the LCD screen of the
camera.
• Do not remove the camera while the ACCESS indicator (blue) is blinking. In
this case, operate from the camera to cancel the process before removing it
from the cradle.
Notes
Make sure the power switch of the unit is off before connecting with other
components or AC adapter..
Note
• Be sure to use the OLYMPUS Master software supplied with the unit. The
OLYMPUS Master software supplied with the digital camera may not work
properly, depending on its version.
• Before you use OLYMPUS Master software, you need to install B’s CLiP6
software on your PC. You cannot use B’s CLiP6 with any other packet-writing
software at the same time. Be sure to uninstall any other packet-writing
software on your PC before you install B’s CLiP6 software.
• While the unit is processing in the PC mode, do not change the setting of the
Dock&Done/PC mode switch or disconnect the USB cable or AC adaptor. This
may cause data loss while recording from your PC to the unit, or a system
error on the PC rendering it inoperable. In this case, shut down your PC,
power off the unit, and restart your PC and then the unit.
• Be sure to install B’s CLiP6 software before you use OLYMPUS Master
software.
• When writing data to a disk using a PC, writing may sometimes fail. Be sure
to confi rm that the writing was successful each time.
Notes
Notes
Insert the power
cord plug into the
power outlet.
Tips
• The data is deleted automatically after storing, when “ERASE” is set in the
“STORE AND” menu of a Dock&Done compatible digital camera.
• When the “PRINT AND” setting on the digital camera is set to “CANCEL,”
the printing reservations will be automatically canceled after printing ends. If
“CANCEL” is not set, cancel printing reservations, manually.
• If the unit is in the Dock&Done mode, the connected digital camera and the
printer are not accessible from the connected PC.
You can charge a battery of a Dock&Done-compatible digital camera even while
the power is turned off.
Tip
Conducting automatic storing, playing back, and
printing
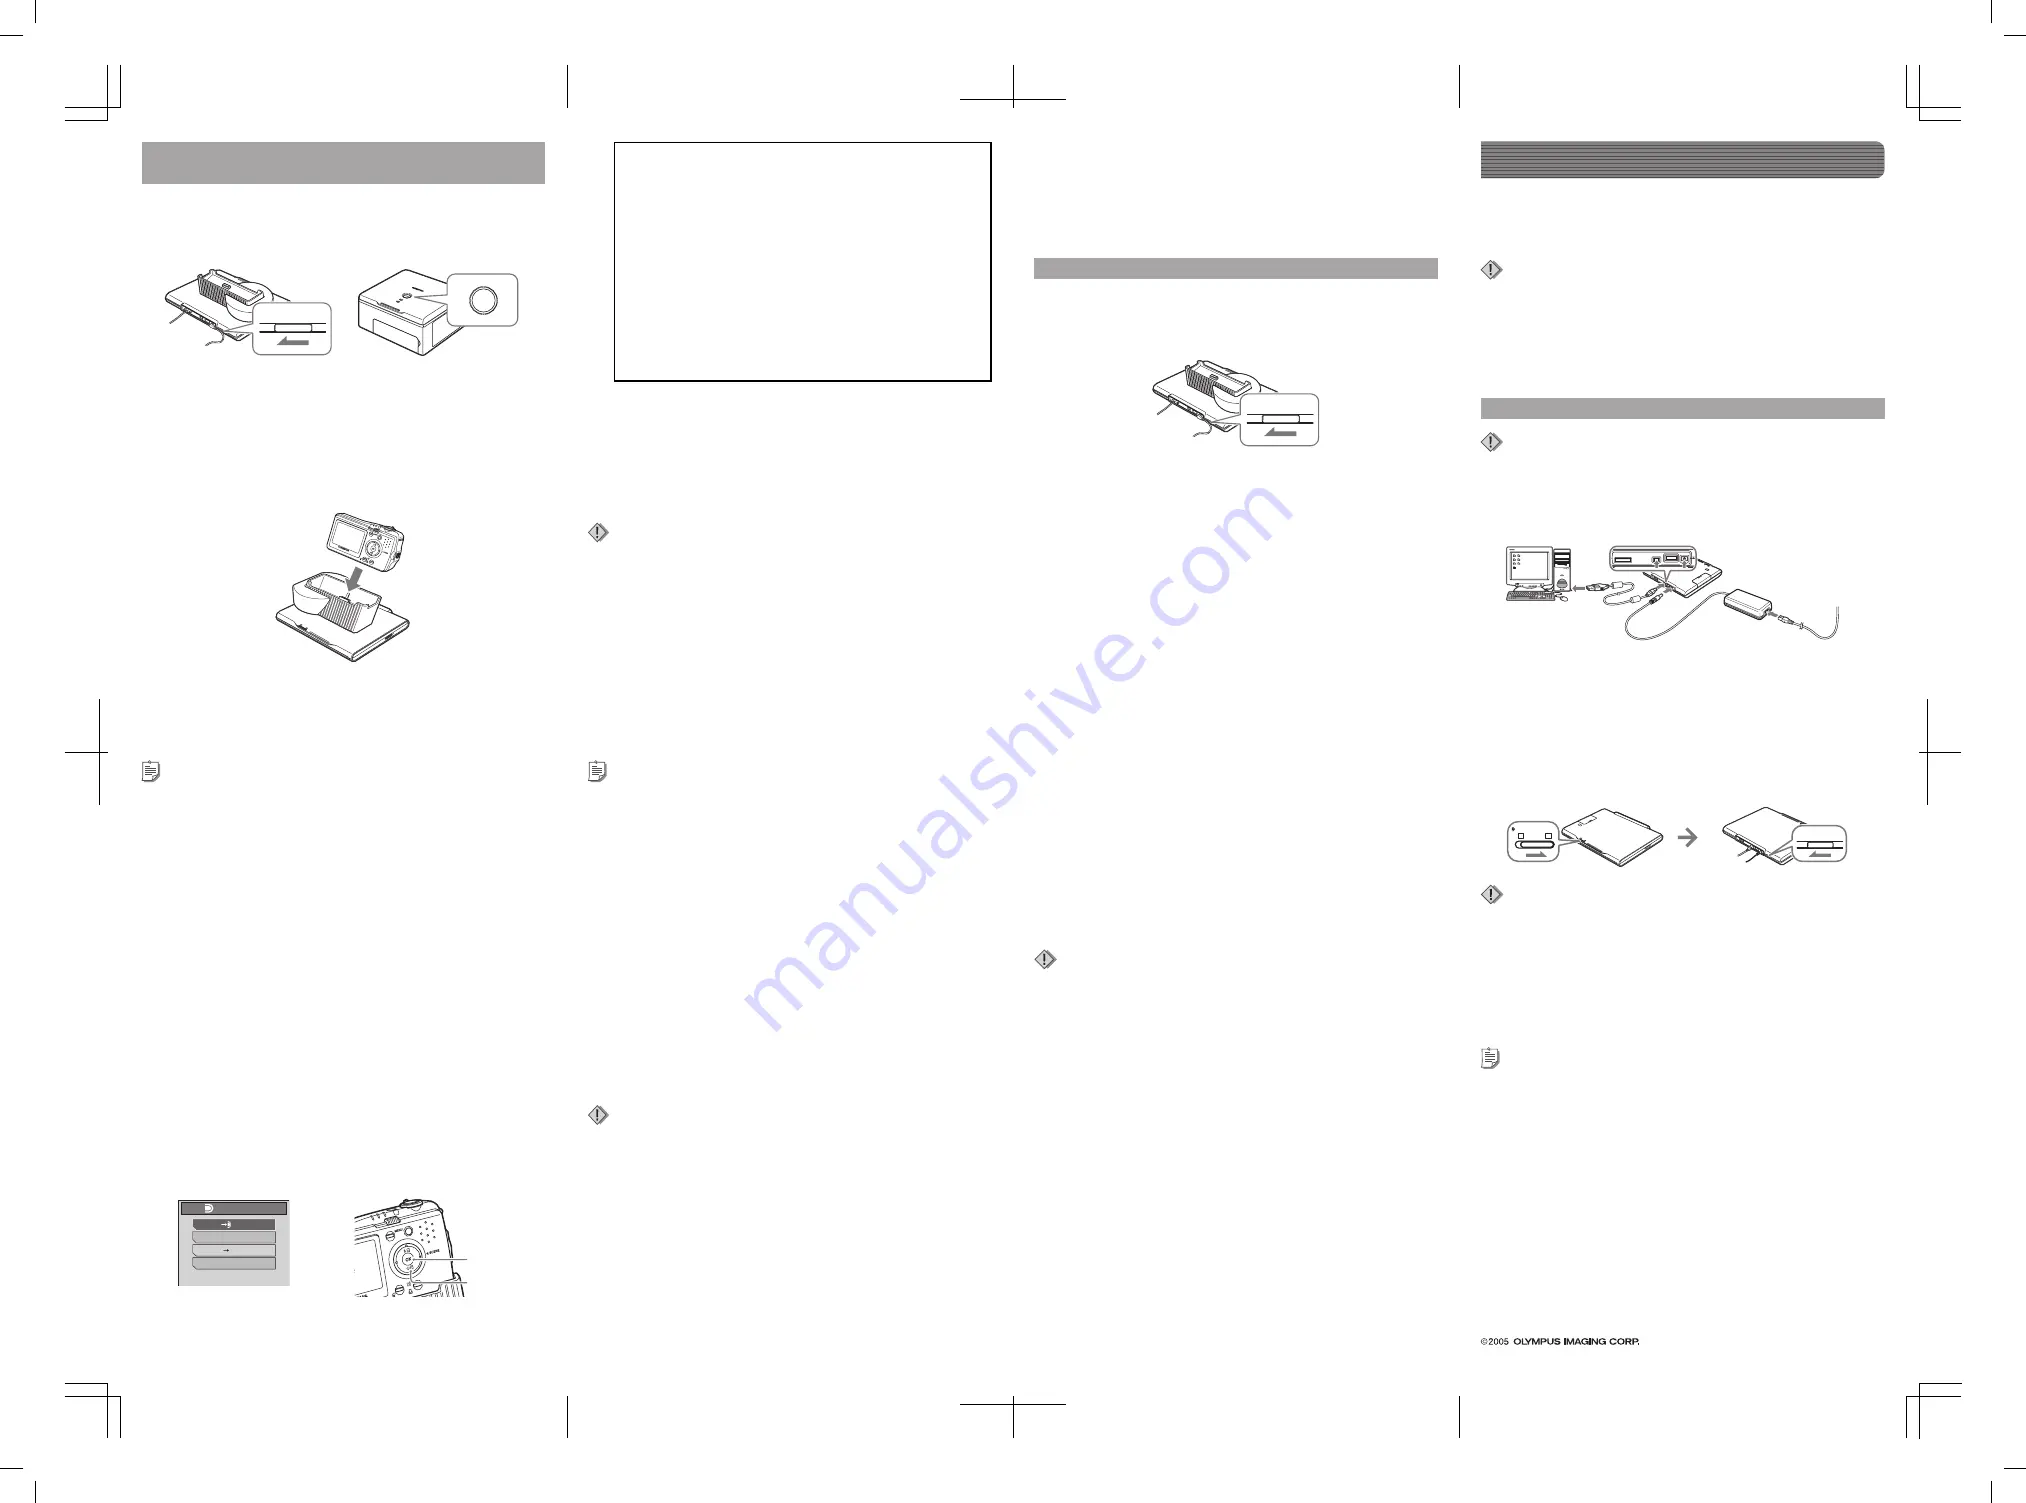
a
Turn the power switch on.
Check that the power indicator (green) and the
Q
DOCK-side indicator
(green) are illuminated.
b
To automatically store image fi les, set a disk into the unit.
Use a disk formatted by the unit, a disk formatted to UDF1.5 format
using B’s CLiP6 software, or a blank disk. We recommended using a
blank DVD+RW, or DVD-RW disk for auto storing.
c
Wait until the ACCESS indicator (blue) goes off, then dock
the digital camera onto the cradle.
The menu screen will be displayed in the digital camera LCD monitor.
“STORE
:
NEW ALL PRINT”: New image fi les are stored and
printed.
“STORE
:
Q
PRINT ORDER”: Store new image fi les and then print
images which have been reserved for printing.
“STORE ONLY”: Conduct only storing of new image fi les.
“STORE
:
SEL. PRINT”: Store new image fi les and proceed to the
print setting screen.
“NEW ALL PRINT”: Print new image fi les.
“
Q
PRINT ORDER”: Print images which have been reserved for
printing.
“SEL. PRINT”: Proceed to the print setting screen.
“EXIT”: Exit Dock&Done mode and returns to camera’s playback
mode without storing or printing image fi les.
e
Play back the stored images by operating the digital
camera.
If you turn on the power again while the digital camera remains
docked on the cradle, the digital camera enters playback mode. You
can display the disk contents on the digital camera’s LCD monitor by
selecting “STORAGE” from the menu.
For details on the operating the storage function, refer to the advanced
manual supplied with the digital camera.
The available operations of the storage function vary depending on the
disk.
• Occasionally, image playback or display time may be delayed if there is a
signifi cant increase in fi les added to the disk.
• If you perform “STORAGE” for a large movie/sound fi le, the movie or sound
may be played intermittently or not smoothly depending on the digital
camera.
• Erasing an image using the storage function is only possible on these disks:
DVD-RW/DVD+RW/CD-RW. The unit is only compatible with “ERASE,” so
even if you select “ALL ERASE,” only the fi rst image will be erased.
If you execute “All ERASE,” the next image may take a long time to display,
which may cause malfunction
• In Dock&Done mode, you cannot rotate, protect, or delete the image fi les on
CD-R/DVD-R/ DVD+R disks.
• If you select “ALL” in the slideshow, the oldest image may be delayed
when switching from the newest. We recommend to playing back images by
selecting “SELECT ALL FROM DATE.”
Notes
When no menu is selected for 20 seconds, processing such as storing is
performed automatically.
3) Press the
9
button.
The ACCESS indicator (blue) blinks while images are storing (the
printer’s indicator blinks while printing).
When storing and/or printing are complete, the digital camera’s power
will automatically turn off.
d
Wait until the ACCESS indicator (blue) goes off, then dock
the digital camera on the cradle.
Formatting of the blank disk will commence. After formatting is
complete, image fi le copying and disk fi nalizing will automatically be
conducted.
If a disk has not been inserted in the unit, or if an incompatible disk
or a disk other than a blank disk has been inserted, an error message
will appear. After removing the digital camera from the cradle and
pressing the
b
button to return to the mode menu, inserted a blank
disk compatible with the unit, and repeat from step 2.
• When closing the storage function, select “EXIT” from the menu on the digital
camera. If you disconnect the digital camera from the cradle without exiting
from the menu of the camera, the data in the disk may be corrupted (the
ACCESS indicator blinks red).
• To play back images from another disk, fi rst close the storage function on the
menu of the digital camera. Then, after disconnecting the digital camera from
the cradle, change the disk and operate the storage function again.
• Do not switch to the PC mode while the unit is processing in the Dock&Done
mode. The unit does not switch from PC mode to Dock&Done mode until the
unit is writing the data ends.
• When you store an image with sound recording with the digital camera onto a
disk, a sound fi le will also be created and stored. Even though the image and
sound fi les are separate, you cannot playback the sound fi le on the image.
Notes


