


13
Printing pictures
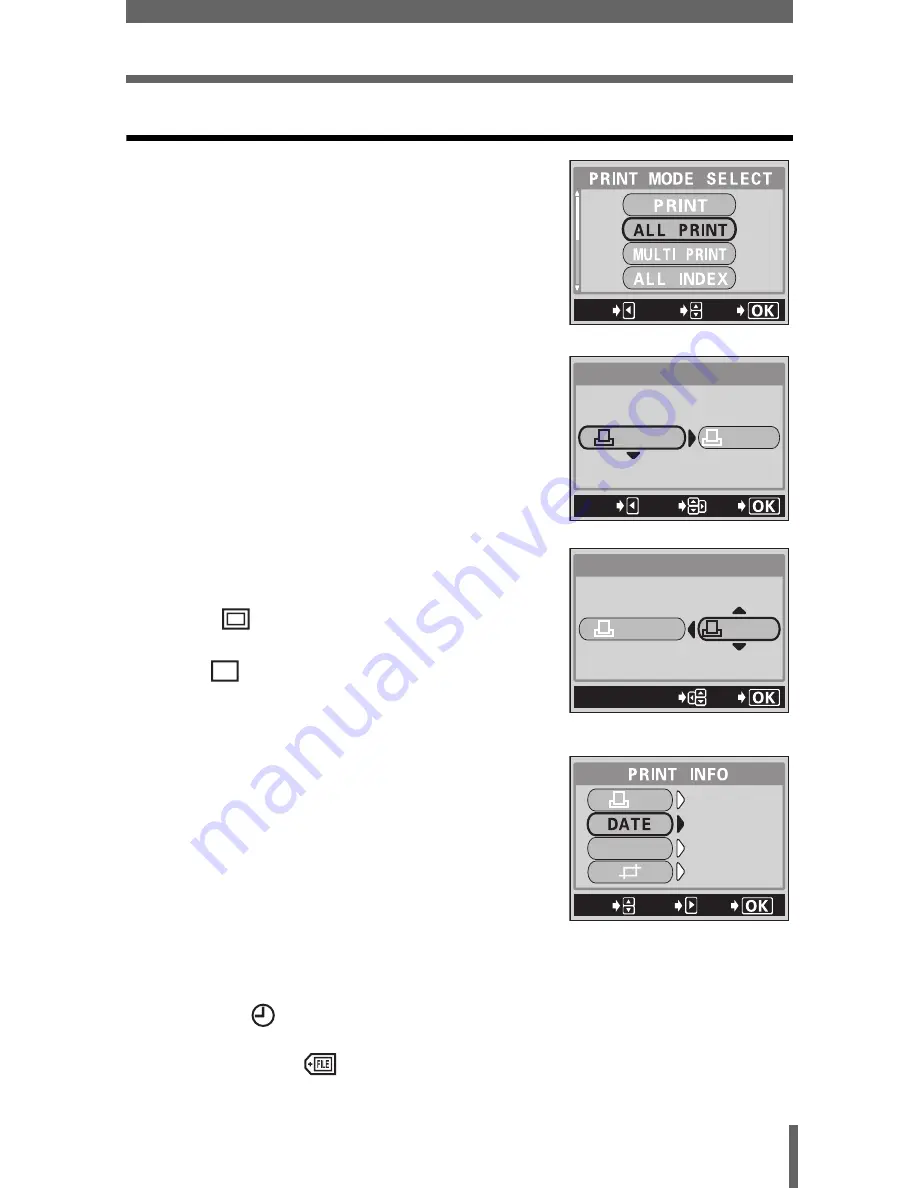
ALL PRINT mode
1
In the PRINT MODE SELECT
screen, press
ac
to select ALL
PRINT, then press
e
.
• The print size settings screen is
displayed.
2
Press
ac
to select the paper
size, then press
d
.
• The available paper size settings vary
depending on the type of printer.
• When the PRINT PAPER screen is not
displayed, SIZE and BORDERLESS are
set to
<
STANDARD. Go to Step 4.
3
Use
ac
to select framed or
unframed, then press
e
.
OFF
(
)
The image is printed inside
a blank frame.
ON
(
)
The image is printed filling
the entire page.
• The print size settings screen is displayed.
4
Press
ac
to select the item you
want to set, then press
d
.
• Press
ac
to select the item, then press
e
.
• If PRINT INFO cannot be set with your
printer, go to Step 6.
• The available options vary depending on
the type of printer. Items outside the
capability of the printer are not available.
• Only one print of each image can be made at a time.
DATE (
)
If you select WITH, pictures are printed
with the date and time.
FILE NAME (
)
If you select WITH, pictures are printed
with the file name.
GO
SELECt
EXIt
PRINt PAPER
SIZE
BORDERLESS
CANCEL
GO
SELECt
StANDARD
StANDARD
PRINt PAPER
SIZE
BORDERLESS
StANDARD
StANDARD
GO
SELECt
GO
SELECt
SEt
1
X
FILE NAME
WItHOUt
WItHOUt
WItHOUt
WItHOUt
NO
NO