background image

T W O   C O R P O R A T E   C E N T E R   D R I V E

M E L V I L L E ,   N Y     1 1 7 4 7 - 3 1 5 7

D I G I T A L   T E C H N I C A L   S U P P O R T

C O N S U M E R   P R O D U C T S   G R O U P

( 8 8 8 )   5 5 3 - 4 4 4 8

h t t p : / / s u p p o r t . o l y m p u s a m e r i c a . c o m

Olympus America Inc.

Page 2 of 9

Last updated on 11/20/02

Preparing to download pictures to your computer

1)


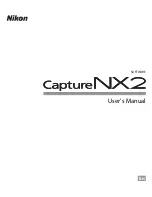
Connect the camera to the USB port of the computer using the provided USB cable.  Refer to
your camera documentation for specific details on your camera model.

2)


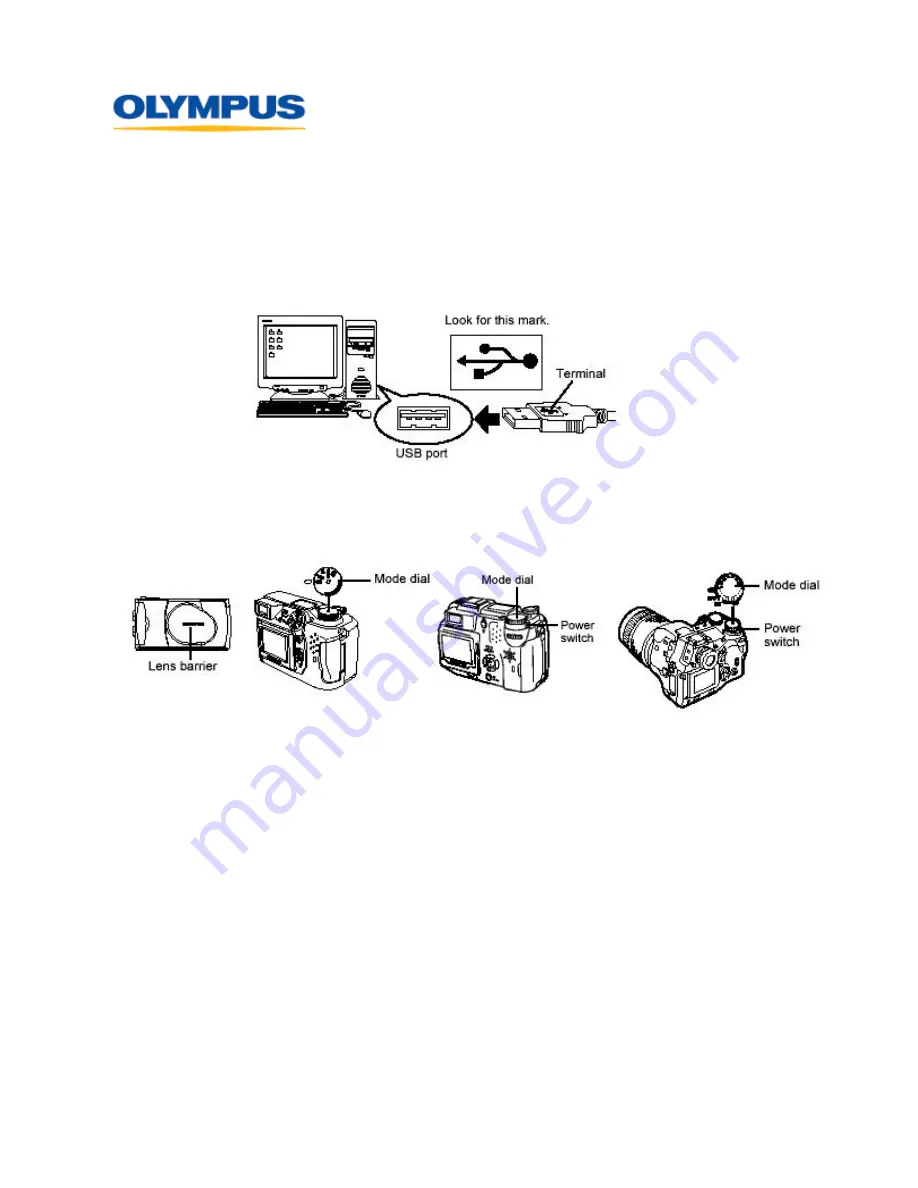
Turn the camera ON.  For an Olympus digital camera that have a front lens barrier, open the
cover.  For digital cameras models with a mode dial, choose any selection.   If you have the
E-10 or the E-20N camera turn the mode dial to Setup/Connection mode.

How to transfer pictures with a USB Auto Connect digital camera

To discover the drive that represents the Olympus digital camera, follow the outlined procedures
below:

1)


Turn the camera off and connect the camera’s USB download cable.  For a Windows-based
PC, open “My Computer” on the desktop; for a Macintosh computer, start on the desktop.

2)


Turn the camera on and then carefully watch the computer screen (for detailed instructions,
please refer to the camera’s users guide).  For Windows, a new “Removable Disk” drive
letter should appear (see fig. A below).  

Make note of the drive letter of this disk

.  For

Mac, an “Untitled” drive should appear on the desktop (see to fig. B below).

Summary of Contents for Auto-Connect

Page 1: ...ctures to your computer For camera software installation procedures please refer to the Software Installation Guide document included with the camera package Installing the USB Driver for Windows 98 N...

Page 2: ...For digital cameras models with a mode dial choose any selection If you have the E 10 or the E 20N camera turn the mode dial to Setup Connection mode How to transfer pictures with a USB Auto Connect d...

Page 3: ...on the desired filename To select multiple pictures hold down the Ctrl key or the Shift key on a Macintosh and click on the desired filenames To select all pictures go to Edit Select All 4 Drag and d...

Page 4: ...S U M E R P R O D U C T S G R O U P 8 8 8 5 5 3 4 4 4 8 h t t p s u p p o r t o l y m p u s a m e r i c a c o m Olympus America Inc Page 4 of 9 Last updated on 11 20 02 2 If you would like to save ima...

Page 5: ...America Inc Page 5 of 9 Last updated on 11 20 02 3 Navigate to the folder where you would like to save your pictures to and then single click to highlight it If you want to create a new folder click...

Page 6: ...4 8 h t t p s u p p o r t o l y m p u s a m e r i c a c o m Olympus America Inc Page 6 of 9 Last updated on 11 20 02 5 A progress bar will be displayed while the images download to your computer Click...

Page 7: ...d procedures below 1 In the Olympus Camedia Master program look at the directory tree in the upper left pane a For Windows find the Removable Disk drive letter under My Computer that represents the ca...

Page 8: ...le New Folder NOTE The following menus features in Camedia Master 2 5 do not apply to USB Auto Connect cameras These features were designed to for serial or standard USB connected cameras that do not...

Page 9: ...cable from the camera You may also remove the USB cable from your computer but this is not usually necessary For Macintosh 1 Verify that media card access indicator is not blinking Some camera models...

Reviews: