background image

http://www.olympus.com/

Premises:

Goods delivery:
Letters:

Wendenstrasse 14 – 18, 20097 Hamburg, Germany
Tel.: +49 40 - 23 77 3-0 / Fax: +49 40 - 23 07 61
Bredowstrasse 20, 22113 Hamburg, Germany
Postfach 10 49 08, 20034 Hamburg, Germany

European Technical Customer Support:

Please visit our homepage 

http://www.olympus-europa.com

or call our TOLL FREE NUMBER*: 

00800 - 67 10 83 00

for Austria, Belgium, Denmark, Finland, France, Germany, Luxemburg, Netherlands, 
Norway, Portugal, Spain, Sweden, Switzerland, United Kingdom.
* Please note some (mobile) phone services / provider do not permit access or request an 

additional prefix to +800 numbers.

For all not listed European Countries and in case that you can’t get connected
to the above mentioned number please make use of the following
CHARGED NUMBERS: 

+49 180 5 - 67 10 83

 or 

+49 40 - 237 73 48 99.

Our Technical Customer Support is available from 9 am to 6 pm MET (Monday to Friday).

Authorized Distributors

United Kingdom:
/ Eire

Olympus Service Department

P.O. Box 222
Southall Middlesex UB2 4SH
Tel.: (0207) 2530513

South Africa: City Square Trading 197 (PTY) Ltd.

Unit A, The Meadows
Meadowbrooke Business Estate
Jacaranda Avenue, Olivedale Ext. 17
Johannesburg, 
Tel.: +27 11 7042021

Egypt:

Optoscient M. Nagui & Co

10. 26th July St., Cairo
Tel.: +20 2 391 4883

©

 2008 

Printed in Germany · OIME · 20 · 3/2008 · Hab. · E0460758

z

Before you start to use your new camera, please read the “Safety Precautions” section in this 
manual.

z

We recommend that you take test shots to get accustomed to your camera before taking important 
photographs.

z

The screen and camera illustrations shown in this manual were produced during the development 
stages and may differ from the actual product.

z

The contents in this manual are based on firmware version 1.0 for this camera. If there are addition 
and/or modification of functions due to firmware update for the camera, the contents will differ. For 
the latest information, please visit the Olympus website.
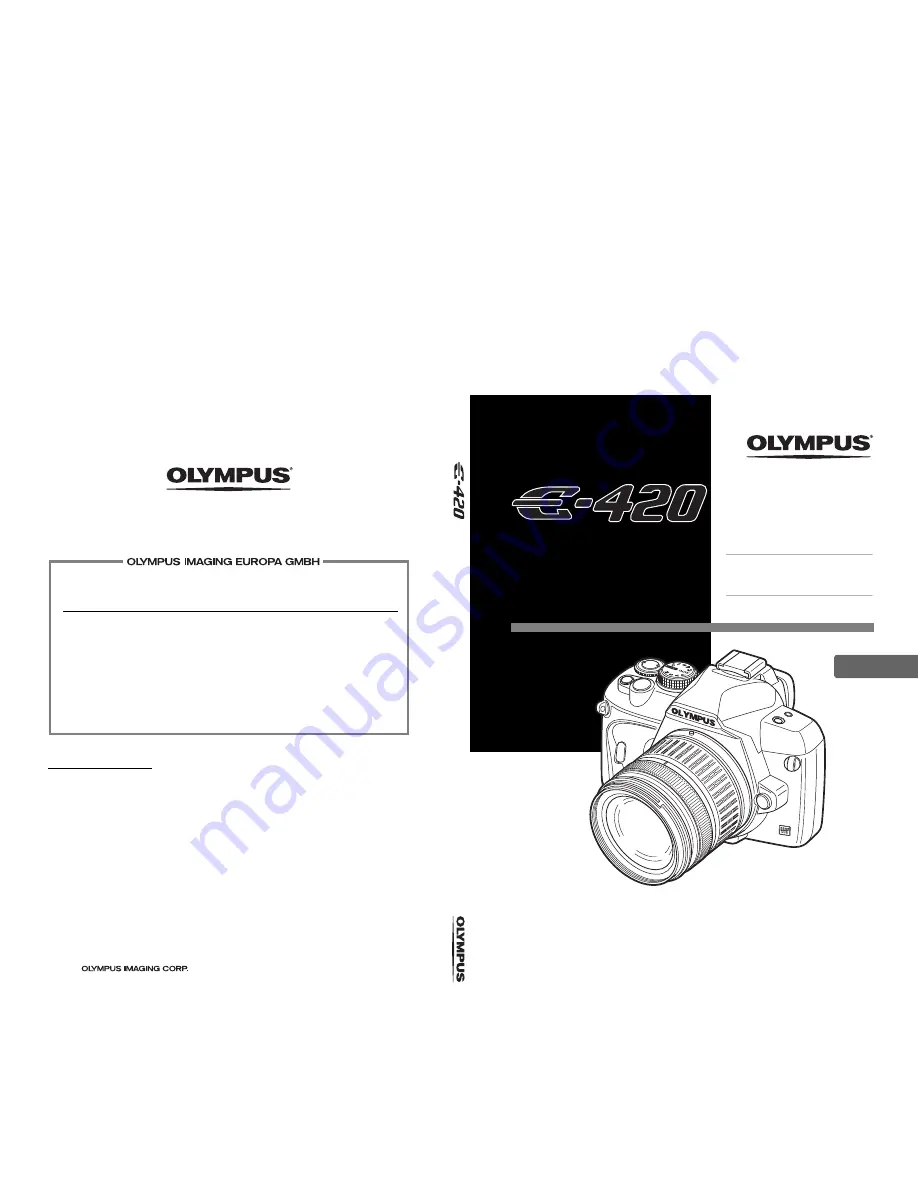
DIGITAL CAMERA

INSTRUCTION 
MANUAL

EN

INSTRUCTION MA

NUAL

Basic guide

P.   2

Review the camera part names and the 
basic steps for shooting and playback.

Table of Contents

P. 20

Summary of Contents for 262081

Page 1: ...ervice Department P O Box 222 Southall Middlesex UB2 4SH Tel 0207 2530513 South Africa City Square Trading 197 PTY Ltd Unit A The Meadows Meadowbrooke Business Estate Jacaranda Avenue Olivedale Ext 17 Johannesburg Tel 27 11 7042021 Egypt Optoscient M Nagui Co 10 26th July St Cairo Tel 20 2 391 4883 2008 Printed in Germany OIME 20 3 2008 Hab E0460758 z Before you start to use your new camera please...

Page 2: ...er gP 59 60 Lens attachment mark gP 12 Hot shoe gP 74 Mirror gP 38 Lens release button gP 12 Lens lock pin Built in flash gP 73 Y j Remote control Self timer Sequential shooting button gP 58 61 90 COPY Copy Print button gP 84 98 Flash button gP 73 Mount Attach the lens after removing the body cap from the camera to prevent dust and dirt from entering the camera body Strap eyelet gP 10 ...

Page 3: ...button gP 85 i button gP 29 Arrow pad acbd gP 29 90 Card cover gP 13 CF card slot gP 13 Eject button gP 13 Multi connector gP 82 99 103 Connector cover xD Picture Card slot gP 13 Diopter adjustment dial gP 14 Eyecup gP 59 Power switch gP 14 Tripod socket Battery compartment lock gP 11 Battery compartment cover gP 11 u Live view button gP 37 Card access lamp gP 13 16 105 Names of parts and function...

Page 4: ...table for shooting landscapes and other outdoor scenes MACRO Suitable for taking close up pictures j SPORT Suitable for capturing fast moving action without blurring NIGHT PORTRAIT Suitable for shooting both the main subject and background at night g Scene mode When you select a mode to suit the shooting situation the camera optimizes the settings for the shooting conditions Unlike the mode dial s...

Page 5: ...era sets the shutter speed automatically gP 46 S Shutter priority shooting Allows you to set the shutter speed manually The camera sets the aperture automatically gP 47 M Manual shooting Allows you to set the aperture and shutter speed manually gP 48 Types of scene modes Icon Mode Icon Mode I 1 PORTRAIT q 10 DIS MODE L 2 LANDSCAPE J 11 MACRO K 3 LANDSCAPE PORTRAIT r 12 NATURE MACRO G 4 NIGHT SCENE...

Page 6: ...red Flash gP 70 blinks charging in progress lights up charging completed AE lock gP 52 Shutter speed gP 45 49 Metering mode gP 50 AF confirmation mark gP 16 39 45 57 White balance Displayed when set to a setting other than auto white balance gP 64 Exposure compensation value gP 51 Shooting mode gP 4 ...

Page 7: ...67 Saturation T gP 67 Gradation z gP 68 B W filter x gP 67 Picture tone y gP 67 Shooting mode gP 4 Super FP flash 1 gP 75 Noise reduction mO gP 69 Auto bracket 0 gP 52 RC mode m gP 76 AF illuminator T gP 87 Internal temperature warning m gP 115 White balance gP 64 White balance compensation gP 65 ISO sensitivity gP 53 Metering mode gP 50 AF mode gP 54 AF target gP 56 Record mode gP 62 Flash intens...

Page 8: ...ection g gP 41 Card gP 118 AF target gP 56 AF confirmation mark gP 16 39 45 57 Histogram gP 113 Flash gP 73 blinks charging in progress lights up charging completed Flash mode gP 70 Metering mode gP 50 Sequential shooting gP 58 Self timer gP 59 Remote control gP 60 White balance gP 64 ISO sensitivity gP 53 Record mode gP 62 Number of storable still pictures gP 125 Battery check gP 6 Shooting mode ...

Page 9: ...nt reservation Number of prints gP 96 Protect gP 85 Record mode gP 62 Date and time gP 15 File number gP 80 Picture mode gP 67 Color space gP 93 Shooting information Single frame playback information Record mode gP 62 Frame number gP 80 ISO sensitivity gP 53 Flash intensity control gP 74 White balance compensation gP 65 Aperture value gP 45 49 Shooting mode gP 4 Focal length gP 120 The focal lengt...

Page 10: ...ra Body cap Strap BLS 1 Lithium ion battery BCS 1 Lithium ion charger USB cable Video cable Warranty card Instruction manual OLYMPUS Master 2 CD ROM Eyepiece cover Thread the strap as indicated by the arrows 1 2 Lastly pull the strap tight making sure that it is fastened securely 3 Attaching the strap Attach the other end of the strap to the other eyelet in the same way ...

Page 11: ...1 Charging the battery 3 Close the battery compartment cover Close the battery compartment cover until you hear a click Press the battery lock to unlock the battery Direction indicating mark W Unloading the battery 2 Loading the battery Charging indicator Red light Charging in progress Green light Charging completed Charging time Approx 3 hours 30 minutes W Battery compartment cover Battery compar...

Page 12: ...o the camera Do not press the lens release button 3 Remove the lens cap 3 4 Removing the lens from the camera While pressing the lens release button 1 rotate the lens in the direction of the arrow 2 Align the lens attachment mark red on the camera with the alignment mark red on the lens then insert the lens into the camera s body 1 Rotate the lens in the direction indicated by the arrow until you ...

Page 13: ... slot Card cover CF card slot W mark Eject button Removing the card Never open the card cover while the card access lamp is blinking Press the eject button all the way in to make it pop out Press the eject button again all the way in to eject the card Pull out the card Press the inserted card lightly and it will be ejected Pull out the card xD Picture Card CompactFlash Microdrive Card access lamp ...

Page 14: ...h the viewfinder rotate the diopter adjustment dial little by little When you can see the AF target clearly adjustment is complete Adjusting the viewfinder s diopter Viewfinder Diopter adjustment dial AF target SSWF indicator When the camera is turned on the super control panel screen is displayed on the monitor If the super control panel screen does not appear press the INFO button Set the mode d...

Page 15: ...8 Y Y M D CANCEL M D TIME 2008 08 01 14 00 Y Y M D M D TIME GO CANCEL 2008 08 01 14 00 Y Y M D M D TIME GO CANCEL CF 5SEC CF xD REC VIEW ENG NTSC VIDEO OUT CANCEL SELECT GO j 0k 0 08 08 01 14 01 1 Press the MENU button 2 Use ac to select Z then press d 3 Use ac to select X then press d 4 Use ac to select Y then press d 5 Repeat this procedure until the date and time are completely set 6 Use ac to ...

Page 16: ...r Press the shutter button all the way fully Never remove the battery or card while the card access lamp is blinking Doing so could destroy stored pictures and prevent storage of pictures you have just taken The focus is locked when a beep tone is output The AF confirmation mark and the AF target in focus light up in the viewfinder The shutter speed and aperture value that have been set automatica...

Page 17: ...s while the camera is on the monitor backlight turns off to save battery power when the super control panel is lit If no operations are performed for approximately one minute thereafter the camera enters the sleep mode stand by and stops operating The camera activates again when you touch any button the shutter button q button etc g BACKLIT LCD Backlight timer P 91 SLEEP P 90 The subject is displa...

Page 18: ...ck Each time you turn the control dial towards U the image is incrementally enlarged from 2x to 14x Control dial S button Playing back images Pressing the q button displays the last picture taken Close up playback Erasing images Play back the image you want to erase and press the S button Use ac to select YES and press the i button to erase Arrow pad ERASE YES NO CANCEL SELECT GO ...

Page 19: ...ing conditions and to find the desired information For information on the possible shooting functions g Shooting guides P 31 For information on how to operate the camera g Using the direct buttons P 27 Using the super control panel P 28 Using the menu P 29 Functions available during live view g Using live view P 37 To search for a function from a list g Menu directory P 127 Index P 145 x Notes Imp...

Page 20: ...the super control panel 28 Using the menu 29 Resetting to the factory default settings 30 Basic function guides 31 Focus Operating the shutter button 31 Brightness Exposure compensation 32 Color White balance 32 A guide to functions for different subjects 33 Taking landscape pictures 33 Taking flower pictures 34 Taking night scene pictures 35 Basic guide 2 Identifies the camera part names and desc...

Page 21: ...sitivity setting 53 AF mode selection 54 S AF single AF 54 C AF continuous AF 55 MF manual focus 55 Simultaneous use of S AF mode and MF mode S AF MF 55 Simultaneous use of C AF mode and MF mode C AF MF 56 AF target selection 56 Focus lock If correct focus cannot be obtained 57 Sequential shooting 58 Self timer shooting 59 Remote control shooting 60 Anti shock 61 3 Using live view 37 Functions and...

Page 22: ...74 Shooting with the Olympus wireless RC flash system 76 Using commercially available flashes 77 Single frame Close up playback 78 Index display Calendar display 79 Information display 80 Slideshow 81 Rotating images 81 Playback on TV 82 Editing still images 82 Copying images 84 Protecting images 85 Erasing images 86 6 Record mode white balance and picture mode 62 Describes image adjustment functi...

Page 23: ... FACE DETECT 91 FRAME ASSIST Ruled lines display 92 d EXP e ISO 92 ISO AUTO SET 92 ISO AUTO 92 AEL Metering 92 BULB TIMER 92 e CUSTOM 92 w F 92 AUTO POP UP 92 f K COLOR WB 93 ALL 93 COLOR SPACE 93 K SET 93 PIXEL COUNT 93 g RECORD ERASE 93 RAW JPEG ERASE 93 FILE NAME 94 dpi SETTING 94 Custom Menu 2 94 CF xD 94 s Monitor brightness adjustment 95 W Changing the display language 95 VIDEO OUT 95 REC VI...

Page 24: ...ill images 106 To increase the number of languages 106 Transferring images to your computer without using OLYMPUS Master 107 Shooting tips and information 108 Tips before you start taking pictures 108 Shooting tips 109 Additional shooting tips and information 111 Playback tips 113 Viewing pictures on a computer 113 Error codes 114 Camera maintenance 116 Cleaning and storing the camera 116 Cleaning...

Page 25: ...ng display 123 Flash modes that can be set by shooting mode 124 White balance color temperature 125 Record mode and file size number of storable still pictures 125 Functions that can be registered in Custom Reset Settings 126 Menu directory 127 Glossary 130 Specifications 133 E System Chart 136 SAFETY PRECAUTIONS 138 Index 145 13 Information 118 Refer to this section for information on optional ac...

Page 26: ...the super control panel on the LCD monitor You can use the super control panel to view the current settings and directly change the settings 3 Setting on the menu P 29 You can use the menu to set shooting and playback settings and customize camera functions Descriptions in this manual The operating instructions of the direct buttons super control panel and menu are described as follows in this man...

Page 27: ...n be set with direct buttons j You can also assign frequently used functions to the b and Y j buttons g 7 FUNCTION P 90 j FUNCTION P 90 Using the direct buttons No Direct buttons Function Ref page 1 Y j Remote control Self timer Sequential shooting button Remote control Self timer Sequential shooting P 58 61 2 F Exposure compensation button Exposure compensation P 51 3 u Live view button Turns liv...

Page 28: ...u to change the setting After changing the setting press the i button to confirm your setting If no operation is made within a few seconds your setting is confirmed and the super control panel is displayed Using the super control panel 2 Press the i button The cursor on the super control panel lights 3 Use p to move the cursor to the function you want to set For details on the functions that can b...

Page 29: ... displayed on the LCD monitor correspond to the arrow pad shown below t a u c 8 d 7 b Press the i button to confirm your settings MENU CANCEL SELECT OK GO Tab The current setting is displayed METERING S AF 0 0 OFF OFF RC MODE AF MODE AF AREA ANTI SHOCK z AUTO CANCEL SELECT GO S AF AUTO 0 0 METERING OFF OFF RC MODE AF MODE AF AREA ANTI SHOCK z CANCEL SELECT GO Function METERING RC MODE AF MODE AF A...

Page 30: ...ister and press d If settings have already been registered SET is displayed next to RESET1 RESET2 Selecting SET again overwrites the registered setting To cancel the registration select RESET 2 Select SET and press the i button Using reset settings You can reset the camera to RESET1 or RESET2 setting or restore the factory default settings RESET Resets to the factory default settings For the defau...

Page 31: ...own full press Once you are able to operate the shutter button effectively you can focus accurately even on moving subjects g Shooting P 16 Focus lock If correct focus cannot be obtained P 57 Even when the subject is in focus the picture can become blurred if you move the camera while the shutter button is being pressed This is called camera shake Make sure how to properly hold the camera The came...

Page 32: ...hen compare the pictures g Exposure compensation P 51 AE bracketing P 52 Color White balance Besides sunlight there are other sources for illuminating the subject such as tungsten and fluorescent lighting These types of lighting contain particular colors therefore the same white object shot under different lighting has slightly different colors Even under the same sunlight the colors in the pictur...

Page 33: ...hite balance The color of water in pictures appears different depending on whether it is a lake reflecting nearby trees or a seashore surrounded by a coral reef To capture the subtle difference in color try changing the white balance setting Change the setting for different situations such as by using 55300 K for sunny days and 27500 K for outdoor shaded areas on sunny days Changing metering mode ...

Page 34: ...f blooming flowers a deep red rose or the light color of a sweet pea Changing white balance There are many colors of flowers ranging from light to vivid ones Depending on the colors of the flowers subtle color shades may not be captured as seen In this case you can check the light conditions and change the white balance setting At AUTO the camera automatically determines the type of light and shoo...

Page 35: ...th the live view function of this camera however you can use the monitor to display and check the subject you want to capture Changing lenses When the blooming flowers are few and sparse take the picture using a telephoto lens With a telephoto lens you take pictures in which subjects at different distances appear closer together giving the impression of a more densely blooming flower field Using t...

Page 36: ... Image noise can easily occur when shooting at slow shutter speeds In this case set NOISE REDUCT to ON to reduce noise Using manual focus In cases where you cannot use AF auto focus to focus on the subject because the subject is too dark or you cannot focus in time to take pictures such as during a fireworks display set the AF mode to MF manual focus and focus manually To take pictures of night sc...

Page 37: ...ocus by enlarging the zone to be focused gP 43 Taking a picture while checking the effect Taking a picture after comparing the effect of exposure compensation or white balance gP 43 Taking a panoramic picture gP 44 Switching the indications on the LCD monitor Turning off the information display Displaying the histogram or ruled lines gP 42 Checking the subject on the monitor even in low light situ...

Page 38: ...LCD monitor during live view the mirror is raised and the shutter is open Therefore you will not be able to check the subject in the viewfinder Correct metering may not be possible if strong light is coming in through the viewfinder In such case attach the eyepiece cover g Eyepiece cover P 59 Taking pictures using the viewfinder Taking pictures using live view The light coming in through the lens ...

Page 39: ... a picture Taking a picture using live view Menu MENU Y a LIVE VIEW AF MODE LIVE VIEW AF MODE Using the shutter button Focus lock Restrictions on use AF AREA Halfway down All the way down IMAGER AF factory default setting AF operation using the imager Shooting Press the shutter button halfway or press the AEL AFL button Only possible with compatible lenses 11 AF targets AF SENSOR k AF operation us...

Page 40: ...R AF When you press the shutter button halfway AF is performed by the image pickup device 11 available AF targets allow you to focus on a subject even if it does not appear in the center of the picture AF SENSOR When you press the shutter button all the way the AF is activated and the picture is taken in the same way as when taking pictures using the viewfinder AF is not activated on pressing the ...

Page 41: ...r taking pictures of people Imager AF AF Sensor AF is performed by the image pickup device The mirror is lowered and AF is performed by the AF sensor The mirror is down so the image display on the monitor freezes just before pressing the shutter button all the way Using the face detection function Direct button b The setting changes each time the button is pressed Super control panel i p g FACE DE...

Page 42: ...ode to S AF MF or MF g AF mode selection P 54 2 Adjust the focus by rotating the focus ring In S AF MF mode after pressing the shutter button halfway or pressing the AEL AFL button you can rotate the focus ring to finely adjust the focus before taking the picture Using the enlarged display can be very convenient when adjusting the focus manually g Enlarged display operation P 43 You can switch the...

Page 43: ...ge during MF makes focus confirmation and adjustment easier 1 Press the INFO button repeatedly to display the enlarged display g Switching the information display P 42 The enlargement frame will be displayed 2 Use p to move the frame and press the i button The area inside the frame is enlarged and displayed Press and hold the i button to return the enlargement frame to the center after it was move...

Page 44: ...to the bottom Shoot while changing the composition such that the subject overlaps The focus exposure etc will be determined at the first shot The g warning mark will be displayed after you have finished taking 10 shots Pressing the i button before shooting the first frame returns to the scene mode selection menu Pressing the i button in the midst of shooting ends the sequence of panorama shooting ...

Page 45: ... shutter speed while maintaining the optimum exposure g Program line diagram P mode P 122 The program shift setting will not be canceled after shooting To cancel program shift setting turn the control dial until the shooting mode indication on the viewfinder or super control panel changes to P or turn off the power Program shift is not available when you are using a flash The shutter speed and ape...

Page 46: ...ing you can use the preview function to check how the background will look in your picture g Preview function P 49 Set the mode dial to A and turn the control dial to set the aperture value To check the depth of field with the selected aperture value j See Preview function gP 49 Shutter speed is blinking j The optimum exposure cannot be obtained For details see Exposure warning display gP 123 Aper...

Page 47: ...urred j The possibility of camera shake spoiling your picture increases greatly during macro or ultra telephoto shooting Raise the shutter speed or use a monopod or tripod to stabilize the camera The aperture value is blinking j The optimum exposure cannot be obtained For details see Exposure warning display gP 123 Shutter priority shooting TIPS A fast shutter speed can freeze a fast action scene ...

Page 48: ...e ranging from 3 EV to 3 EV between the exposure value calculated by the currently selected aperture and shutter speed and the exposure value considered optimum by the camera If the difference exceeds 3 EV vw will appear in red on both sides of the indicator Noise in images During shooting at slow shutter speeds noise may appear on screen These phenomena are caused when current is generated in tho...

Page 49: ...nel To automatically end bulb shooting after a specified period of time j You can set the maximum time for bulb shooting g BULB TIMER P 92 To fix the focus during manual focus shooting j You can fix the focus so the focus does not change even if the focus ring is turned during exposure g BULB FOCUSING P 87 x Notes The following functions are not available during bulb shooting Sequential shooing se...

Page 50: ...a meters a very small area around the center of the subject defined by the spot metering area mark in the viewfinder Use this mode when there is very strong backlight nHI Spot metering highlight control When the overall background is bright white areas of the image will come out gray if you use the camera s automatic exposure Using this mode enables the camera to shift to over exposure allowing ac...

Page 51: ...played The exposure compensation indicator will not be displayed when the exposure is compensated by 0 If the exposure compensation value exceeds the scale of the exposure compensation indicator a red vw is displayed on the left and right edges of the indicator To adjust the exposure compensation using only the control dial j You can set the exposure compensation value without pressing F button g ...

Page 52: ... the exposure j You can lock the metering result so that it is not canceled when the AEL AFL button is released g AEL AFL MEMO P 89 To activate AE lock with a set metering mode j You can set the metering mode for locking the exposure with the AE lock g AEL Metering P 92 The camera automatically shoots a number of pictures at different exposure values for each frame Even in conditions where correct...

Page 53: ...re value then use the AE bracketing feature AE bracketing is applied to the exposure value you have compensated The higher the ISO value the greater the camera s light sensitivity and the better its ability to shoot in low light conditions However higher values may give pictures a grainy appearance AUTO The sensitivity is set automatically according to the shooting conditions With the ISO AUTO SET...

Page 54: ...de is suitable for taking pictures of still subjects or subjects with limited movement Press the shutter button halfway When the focus is locked the AF confirmation mark lights up A beep sound is output when the subject is in focus When it is difficult to focus in the AF mode in low light conditions j The built in flash can function as an AF illuminator This helps with focusing in low light condit...

Page 55: ...llows you to manually focus on any subject Adjust the focus using the focus ring To change the rotational direction of the focus ring j You can select the rotational direction of the focus ring to suit your preference for how the lens adjusts to the focusing point g FOCUS RING P 87 For information on whether the subject is in focus Focus aid j When you focus the lens on a subject manually by turni...

Page 56: ...a has 3 AF targets for focusing on the subject with auto focus You can select only one of the AF targets When LIVE VIEW AF MODE is set to IMAGER AF 11 AF targets will be available during live view g Taking a picture using live view P 39 AUTO or P Focuses using the 3 AF targets Q Focuses using the left AF target R Focuses using the center AF target S Focuses using the right AF target With the IMAGE...

Page 57: ...ess the shutter button halfway again While the shutter button is being pressed the super control panel disappears 2 While pressing the shutter button halfway move to the desired composition and press the button all the way The card access lamp blinks while the picture is being stored on the card If the subject has lower contrast than its surroundings If the contrast of the subject is weak such as ...

Page 58: ...quential shooting if the battery check blinks due to low battery the camera stops shooting and starts saving the pictures you have taken on the card The camera may not save all of the pictures depending on how much battery power remains Setting method Setting display Anti shock display gP 61 The D symbol displayed next to the icon on the super control panel indicates that anti shock is activated S...

Page 59: ... self timer lamp blinks for approximately 2 seconds and then the picture is taken To cancel the activated self timer press the Y j button x Notes Do not press the shutter button while standing in front of the camera this could result in the subject being out of focus since focusing is performed when the shutter button is pressed halfway Eyepiece cover When shooting without looking through the view...

Page 60: ...t or devices emitting electrical or radio waves are nearby it could narrow the effective area The remote control lamp does not blink after the shutter button on the remote control is pressed j The transmitted signal may not be effective if the remote control receiver is exposed to powerful lighting Move the remote control closer to the camera and press the shutter button on the remote control agai...

Page 61: ... when the mirror moves This feature can be useful in astrophotography and microscope photography or other photographic situations where a very slow shutter speed is used and camera vibration needs to be kept to a minimum 1 MENU X ANTI SHOCKz 2 Select the time delay after the mirror is raised and until the shutter is released from 1 to 30 seconds and press the i button 3 Anti shock is added to the ...

Page 62: ... high pixel count the file size amount of data will be larger and the number of storable still pictures will be lower The higher the compression the smaller the file size However the image will have less clarity when played back Selecting the record mode Image becomes clearer Application Number of pixels Pixel count Compression rate SF Super Fine 1 2 7 F Fine 1 4 N Normal 1 8 B Basic 1 12 Select f...

Page 63: ...s Y X W and compression rates SF F N B from the 12 total combinations available g K SET P 93 When you select the X or W image size you can further select the pixel size g PIXEL COUNT P 93 RAW JPEG Records both a JPEG and RAW image at the same time each time you take a picture RAW Records the image in RAW data format e g The following 9 record modes are available when YF YN XN WN are registered RAW...

Page 64: ...erature refer to White balance color temperature gP 125 g Setting the auto preset custom white balance P 65 One touch white balance V You can set the optimum white balance for the shooting conditions by pointing the camera at a white object like a sheet of white paper The white balance achieved with this setting is saved as one of the preset WB settings g Setting the one touch white balance P 66 S...

Page 65: ...the white balance will not be correctly determined In such a case try preset WB or one touch WB settings WB compensation This function lets you make fine changes to the auto WB and preset WB settings Select the white balance to adjust and press d Adjusting the white balance in the A direction Amber Blue Depending on the original WB conditions the image will become more amber when adjusted toward a...

Page 66: ...termine the white balance The optimum white balance for the current shooting conditions can be saved in the camera This is useful when shooting a subject under natural light as well as under various light sources with different color temperatures Set 7 FUNCTION to V beforehand gP 90 1 Point the camera at a sheet of white paper Position the paper so that it fills the viewfinder Make sure there are ...

Page 67: ...r is brightened and the complementary color is darkened N NEUTRAL Creates a normal black and white image Ye YELLOW Reproduces clearly defined white cloud with natural blue sky Or ORANGE Slightly emphasizes colors in blue skies and sunsets R RED Strongly emphasizes colors in blue skies and brightness of crimson foliage G GREEN Strongly emphasizes colors in red lips and green leaves PICT TONE Colors...

Page 68: ...justs the brightness separately for each region This is effective for images with areas of large contrast in which the whites appear too bright or the blacks appear too dark NORMAL Use NORMAL mode for general uses x Notes Contrast adjustment does not work when set to HIGH KEY LOW KEY or AUTO Gradation Super control panel i p GRADATION Menu MENU W GRADATION HIGH KEY Suitable for a subject that is m...

Page 69: ...e usual time to take a picture The noise reduction process is activated after shooting The card access lamp blinks during the noise reduction process You cannot take more pictures until the card access lamp turns off busy is displayed on the viewfinder while noise reduction is operating x Notes When the g mode is set to X NOISE REDUCT is fixed to ON During sequential shooting NOISE REDUCT is OFF a...

Page 70: ...leased Hold the camera firmly to avoid camera shake Effectiveness may be limited if the subject is not looking directly at pre flashes or if the shooting range is too far Individual physical characteristics may also limit effectiveness Slow synchronization 1st curtain SLOW The slow synchronization flash is designed for slow shutter speeds Normally when shooting with a flash shutter speeds cannot g...

Page 71: ...ronization it is difficult to achieve red eye reduction Hence only 1st curtain synchronization setting is available Fill in flash The flash fires regardless of the light conditions This mode is useful for eliminating shadows on the subject s face such as shadows from tree leaves in a backlight situation or for correcting the color shift produced by artificial lighting especially fluorescent light ...

Page 72: ... on the shooting mode For details refer to Flash modes that can be set by shooting mode gP 124 Ratio of amount of light GN Guide number Equivalent to ISO 100 FULL 1 1 12 1 4 6 1 16 3 1 64 1 5 ISO value 100 200 400 800 1600 ISO sensitivity 1 0 1 4 2 0 2 8 4 0 Direct button j Super control panel i p FLASH MODE Calculate the f number on the lens using the following formula Aperture f number GN x ISO ...

Page 73: ...s under the following modes AUTO i B U G J r g 2 Press the shutter button halfway The flash stand by mark lights when the flash is ready to fire If the mark is blinking the flash is charging Wait until charging is complete 3 Press the shutter button all the way When you do not want the flash to pop up automatically j Set AUTO POP UP to OFF g AUTO POP UP P 92 x Notes When RC MODE is set to ON the b...

Page 74: ...e of a wider variety of flash shooting techniques to suit different shooting conditions The external flashes communicate with the camera allowing you to control the camera s flash modes with various available flash control modes such as TTL AUTO and Super FP flash An external flash unit specified for use with this camera can be mounted on the camera by attaching it to the camera s hot shoe Refer t...

Page 75: ...will be synchronized with the camera at a speed of 1 180 sec or less 4 Select a flash mode 5 Select the flash control mode TTL AUTO is recommended for normal use 6 Press the shutter button halfway Shooting information such as ISO sensitivity aperture value and shutter speed is communicated between the camera and flash 7 Press the shutter button all the way x Notes The built in flash cannot be used...

Page 76: ... RC mode and set the channel and group of the flash 3 Set RC mode on the camera to ON MENU X RC MODE ON The super control panel switches to RC mode You can press the INFO button to switch the super control panel display 4 Use the super control panel to set the flash mode and other settings for each group Shooting with the Olympus wireless RC flash system 5m 50 50 100 100 50 50 10m 30 30 30 30 60 6...

Page 77: ...an this commercially available flashes cannot be used A slower shutter speed may produce blurred images 3 Turn on the flash Be sure to turn on the flash after attaching the flash unit to the camera 4 Set the ISO sensitivity and aperture value on the camera to match the flash control mode on the flash Refer to the flash s manual for instructions on how to set its flash control mode x Notes The flas...

Page 78: ... up playback j INFO button p q button L N N 15 15 15 Press p to change the close up position Press p to move the display of the close up position When g FACE DETECT gP 41 is set to ON a frame is displayed around a detected face Press i to move the frame to another face Press bd to view frame by frame close ups When g FACE DETECT is set to ON press ac to move to another face in close up position Pr...

Page 79: ...e upper frame c Moves to the lower frame To return to single frame playback turn the control dial to U Calendar display With the calendar you can display images recorded on the card by date If more than one image was taken on a single date the image shot first on that date is displayed Use p to select a date and press the i button to play back images for the selected date in single frame display I...

Page 80: ...O WB AUTO G 0 G 0 NATURAL NATURAL s R G B s R G B L N N SHADOW HILIGHT Shadow Highlight display Image only Information 1 Information 2 Shadow Highlight display Histogram display Histogram Shooting information Displays the frame number print reservation protect record mode and file number Displays the frame number print reservation protect record mode number of pixels compression rate date and time...

Page 81: ... to stop the slideshow x Notes If the slideshow is left running for about 30 minutes the camera will turn off automatically This function lets you rotate images and display them vertically on the monitor during single frame playback This is useful when taking pictures with the camera held vertically The images will automatically be displayed in the correct direction even if the camera is rotated 1...

Page 82: ...f center depending on the TV screen Recorded images can be edited and saved as new images Available editing functions depend on the image format image record mode A JPEG file can be printed as is without modification A RAW file on the other hand cannot be printed as is To print a RAW file use the RAW edit function to convert the RAW data format to JPEG Editing images recorded in RAW data format Th...

Page 83: ...king you which data to edit 3 The setting screen varies with the image data format Select the item you want to edit and do the following steps The edited image is saved as another image apart from the original image To exit the edit mode press the MENU button x Notes Red eye correction may not work depending on the image Red eye correction may affect other parts of the image as well as the eyes Ed...

Page 84: ...es and copy them all at the same time during single frame playback or index display 1 Display the images you want to copy and press the i button The selected images will be shown with red frames To cancel your selection press the i button again 2 Press p to display the next images you want to copy and press the i button 3 After you have selected the images to copy press the COPY button 4 Use ac to...

Page 85: ...you want to protect and press the i button The selected images will be shown with red frames To cancel your selection press the i button again During index display press p to select the images you want to protect and press the i button 2 Press p to display the next images you want to protect and press the i button 3 After you have selected the images to protect press the 0 button Canceling all pro...

Page 86: ...e erase 1 Play back the image you want to erase and press the S button 2 Use ac to select YES then press the i button Erasing selected frames This function lets you erase selected images at one time during single frame playback or index display 1 Display the images you want to erase and press the i button The selected images will be shown with red frames To cancel your selection press the i button...

Page 87: ... the focal point by selecting the rotational direction of the focus ring RESET LENS When set to ON this resets the focus of the lens infinity each time the power is turned off BULB FOCUSING You can set the camera to enable focus adjustments during bulb shooting with MF ON During exposure you can turn the focus ring and adjust the focus OFF The focus is locked during exposure AF MF BUTTON DIAL DISP...

Page 88: ...ease or decrease Mode Setting j F button j P program shift Program shift Exposure compensation F Exposure compensation Program shift A FNo Aperture value Exposure compensation F Exposure compensation Aperture value S SHUTTER Shutter speed Exposure compensation F Exposure compensation Shutter speed M SHUTTER Shutter speed Aperture value FNo Aperture value Shutter speed Setting q rotational directio...

Page 89: ...the AEL AFL button instead of the shutter button mode4 Press the AEL AFL button to focus and press the shutter button fully to determine the exposure AEL AFL MEMO You can lock and maintain the exposure by pressing the AEL AFL button ON Press the AEL AFL button to lock and maintain the exposure Press again to cancel the maintaining of the exposure OFF The exposure will be locked only while the AEL ...

Page 90: ...FUNCTION Other functions can be assigned to the Y j button j Y g Sequential shooting P 58 Self timer shooting P 59 Remote control shooting P 60 AF AREA g AF target selection P 56 AF MODE g AF mode selection P 54 WB g Selecting the white balance P 64 METERING g Changing the metering mode P 50 ISO g ISO sensitivity setting P 53 Custom Menu 1 c DISP 8 PC 8 You can turn off the beep sound that is emit...

Page 91: ...a computer running Windows Vista without using the OLYMPUS Master software CONTROL Allows you to control the camera from a PC using the optional OLYMPUS Studio EASY Can be set when connecting the camera to a PictBridge compatible printer Pictures can be printed directly without using a PC g Connecting the camera to a printer P 99 CUSTOM Can be set when connecting the camera to a PictBridge compati...

Page 92: ...setting is activated in all shooting modes except M mode When AUTO is selected in M mode ISO 100 is set ALL The AUTO setting is activated for all shooting modes The ISO is automatically selected to obtain the optimal ISO even in M mode AEL Metering You can set the metering mode when pressing the AEL AFL button to lock the exposure AUTO performs metering in the mode selected under METERING BULB TIM...

Page 93: ...ET 1 Use ac to select YES COLOR SPACE You can select how colors are reproduced on the monitor or printer The first character in image file names indicates the current color space g FILE NAME P 94 K SET You can combine 3 image sizes and 4 compression rates and register 4 combinations Select the registered setting with K g Selecting the record mode P 62 PIXEL COUNT You can set the pixel size for the...

Page 94: ...start at the number following the highest number on the previous card RESET When a new card is inserted folder numbers start at 100 and file numbers start at 0001 If a card containing images is inserted the file numbers start at the number following the highest file number on the card When both the Folder and File No reach their respective maximum number 999 9999 it is not possible to store additi...

Page 95: ...rong video signal type recorded pictures will not play back properly on your TV TV video signal types in major countries and regions Check the video signal type before connecting the camera to your TV REC VIEW You can display the picture you have just taken on the monitor while it is being recorded to the card and to select how long the picture is displayed This is useful for making a brief check ...

Page 96: ... a PC For more details refer to the printer s manual A PC card adapter may also be necessary x Notes DPOF reservations set by another device cannot be changed by this camera Make changes using the original device Moreover setting new DPOF reservations using this camera will erase the previous reservations set by another device Not all functions may be available on all printers or at all photo labs...

Page 97: ...inted with the shooting date TIME The pictures are printed with the shooting time 6 Select SET and press the i button All frame reservation Applies print reservation to all the pictures stored in the card The number of prints is fixed at 1 1 MENU q 2 Select U and press the i button 3 Select the date and time format and press the i button NO The pictures are printed without the date and time DATE T...

Page 98: ... directly To find out if your printer is compatible with PictBridge refer to the printer s manual PictBridge The standard that enables digital cameras and printers made by different manufacturers to be connected and also allows pictures to be printed directly from the camera STANDARD All printers that support PictBridge have standard print settings By selecting STANDARD on the settings screens gP ...

Page 99: ...nd the camera and printer are connected Go to Custom printing gP 100 x Notes If the screen is not displayed after a few minutes disconnect the USB Cable and start again from Step 1 Easy printing 1 Use bd to display the pictures you want to print on the camera Display the image you want to print on the camera and connect the camera with a printer using a USB cable The screen on the right appears sh...

Page 100: ... PICS SHEET Selects the number of pictures per sheet Displayed when you have selected MULTI PRINT Selecting pictures you want to print Select pictures you want to print The selected pictures can be printed later single frame reservation or the picture you are displaying can be printed right away PRINT f Prints the currently displayed picture If there is a picture that SINGLE PRINT reservation has ...

Page 101: ...pad 2 Once you have set the pictures for printing and printing data select PRINT then press the i button PRINT Transfers images you print to the printer CANCEL Resets the settings All print reservation data will be lost If you want to keep the print reservation data and make other settings press b This returns you to the previous setting To stop and cancel printing press the i button CONTINUE Cont...

Page 102: ...r to the OLYMPUS Master installation guide Installing OLYMPUS Master Refer to the installation guide included with the OLYMPUS Master Connecting the camera with your computer using the provided USB cable gP 103 Starting OLYMPUS Master gP 104 Saving pictures to your computer gP 104 Disconnecting the camera from your computer gP 105 Using the provided OLYMPUS Master software z Transferring images fr...

Page 103: ...ou connect the camera to the computer for the first time the computer automatically recognizes the camera Click OK when the message saying that the installation is completed appears The computer recognizes the camera as a Removable Disk Macintosh iPhoto is the default image management application for Mac OS When you connect your Olympus digital camera for the first time iPhoto will start up automa...

Page 104: ...uctions To exit OLYMPUS Master 1 Click Exit on any window OLYMPUS Master is exited Downloading and saving images 1 Click Transfer Images on the browse window and then click From Camera The window for selecting the pictures you want to transfer from the camera is displayed All the images in the camera are displayed 2 Select New Album and enter an album name 3 Select the image files and click Transf...

Page 105: ... trash icon changes to the eject icon when the Untitled or NO_NAME icon on the desktop is dragged Drag and drop it on the eject icon 3 Unplug the USB cable from the camera x Notes For Windows users When you click Unplug or Eject Hardware a warning message may be displayed In such case make sure that no image data is being downloaded from the camera and that there are no applications open that were...

Page 106: ...matically The monitor turns on and the selection screen for the USB connection is displayed 4 Select STORAGE and press the i button 5 In the browse window select Camera then Update Camera Add Display Language The confirmation window for updating is displayed 6 Click OK The updating the camera window is displayed 7 Click Add Language in the updating camera display The Add Display Language of Camera...

Page 107: ...n Windows 2000 Professional XP Home Edition XP Professional Vista Macintosh Mac OS X v10 3 or later x Notes If your computer is running Windows Vista select MTP in Step 3 on page 103 to use Windows Photo Gallery Data transfer is not guaranteed in the following environments even if your computer is equipped with a USB port Computers with a USB port added by means of an extension card etc Computers ...

Page 108: ... panel or the viewfinder indicates that the flash is charging Wait for the blinking to stop then press the shutter button Unable to focus When the AF confirmation mark in the viewfinder is blinking it indicates that the camera is unable to focus using AF Press the shutter button again Noise reduction is activated When shooting night scenes shutter speeds are slower and noise tends to appear in ima...

Page 109: ...d g Built in flash shooting P 73 AF ILLUMINAT P 87 Subjects that are difficult to focus on It may be difficult to focus with auto focus in the following situations In any situation focus on something with high contrast that is at the same distance as the subject determine the composition and shoot the picture Taking pictures without blurring There are several factors that can cause the picture to ...

Page 110: ...ge taken appears whitish This may occur when the picture is taken in backlight or semi backlight conditions This is due to a phenomenon called flare or ghosting As far as possible consider a composition where strong light source is not taken in the picture Flare may occur even when a light source is not present in the picture Use a lens hood to shade the lens from the light source If a lens hood d...

Page 111: ...klight and under fluorescent and other artificial lighting g Flash mode setting P 70 Image turns out too bright or too dark When taking pictures in S mode or A mode the displayed shutter speed or aperture setting may blink A blinking display means that the correct exposure cannot be obtained If you take the picture as is the picture will appear too bright or too dark If that happens change the ape...

Page 112: ...modes are divided into 2 main types RAW and JPEG RAW records without reflecting the settings for white balance contrast etc on the images themselves JPEG records as images that reflect these settings JPEG also compresses images to reduce the file size when recording them For JPEG you can register four combinations of images sizes Y X W and compression rates SF F N B from the 12 total combinations ...

Page 113: ...f information displayed g Information display P 80 Viewing pictures on a computer Viewing the entire picture on a computer screen The size of the picture displayed on a computer screen changes depending on the computer settings When the monitor setting is 1024 x 768 and you are using Internet Explorer to view a picture with an image size of 2048 x 1536 at 100 the entire picture cannot be viewed wi...

Page 114: ...uch as print reservation can be recorded Replace the card or erase unwanted pictures Before erasing download important images to a PC There is no space in the card and print reservation or new images cannot be recorded Replace the card or erase unwanted pictures Before erasing download important images to a PC No indication xD Picture Cards cannot be read or is not formatted Select xD CARD CLEAN p...

Page 115: ...urn off automatically Allow the internal temperature of the camera to cool before resuming operations CARD COVER OPEN The card cover is open Close the card cover No indication BATTERY EMPTY The battery is drained Charge the battery No indication NO CONNECTION The camera is not connected to the computer or printer correctly Disconnect the camera and connect it again correctly No indication NO PAPER...

Page 116: ...duction is activated when the power switch is set to ON and when starting and stopping live view The dust reduction function operates at the same time as the pixel mapping which checks the image pickup device and image processing circuitry Since dust reduction is activated every time the camera s power is turned on the camera should be held upright for the dust reduction function to be effective T...

Page 117: ... the power off to finish cleaning If the camera turns off the shutter curtain closes causing the mirror to fall x Notes Be careful not to let the mechanical blower commercially available touch the image pickup device If the blower touches the image pickup device the image pickup device will be damaged Never put the mechanical blower behind the lens mount If the power turns off the shutter closes b...

Page 118: ...ot take a Microdrive close to areas where it may be exposed to strong magnetism The Microdrive may not function correctly under low air pressure conditions like in altitudes of 3 000 m 9 843 ft and higher x Notes The data in the card will not be erased completely even after formatting the card or deleting the data When discarding destroy the card to prevent leakage of personal information Formatti...

Page 119: ...ime of the provided rechargeable battery is approximately 3 hours 30 minutes estimated z Do not use chargers other than the one designated z The charger can be used in most home electrical sources within the range of 100 V to 240 V AC 50 60 Hz around the world However depending on the country or area you are in the AC wall outlet may be shaped differently and the charger may require a plug adapter...

Page 120: ...e a depth of field equivalent to two times deeper than that of a 35 mm camera This enables more light to enter through the aperture A Four Thirds system lens with f2 0 brightness for example is equivalent to f4 0 when converted to the aperture of a 35 mm camera You can achieve the same amount of background blur as if you were using a 35 mm camera x Notes When you attach or remove the body cap and ...

Page 121: ...14 42 mm 40 150 mm 25 mm Max aperture f3 5 5 6 f3 5 5 6 f4 0 5 6 f2 8 Image angle 63 27 75 29 30 8 2 47 Lens configuration 7 groups 7 lenses 8 groups 10 lenses 9 groups 12 lenses 4 groups 5 lenses Multilayer film coating partially single layered Iris control f3 5 22 f3 5 22 f4 0 22 f2 8 22 Shooting range 0 28 m 0 25 m 0 9 m 0 2 m Focus adjustment AF MF switching Weight excluding hood and cap 210 g...

Page 122: ... line diagram varies with the type of lens mounted Lens focal length Shooting range Magnification Calculated based on 35 mm film camera 17 5 45 mm 17 5 mm Shooting is not possible since subjects cannot be brought into focus at this focal length 28 mm 15 1 cm 15 9 cm 0 89 1 16x 1 78 2 32x 45 mm 18 4 cm 22 4 cm 0 57 0 91x 1 14 1 82x 14 42 mm 14 mm Shooting is not possible since subjects cannot be br...

Page 123: ... the flash The subject is too bright Decrease the ISO sensitivity Use a commercially available ND filter for adjusting the amount of light A The subject is underexposed Decrease the aperture value Increase the ISO sensitivity The subject is overexposed Increase the aperture value Decrease the ISO sensitivity or use a commercially available ND filter for adjusting the amount of light S The subject ...

Page 124: ...ec 1 180 sec Auto flash red eye reduction Fill in flash Always fires 60 sec 1 180 sec Flash off k k k SLOW Slow synchronization red eye reduction 1st curtain Fires automatically in dark backlit 1 conditions 60 sec 1 180 sec SLOW Slow synchronization 1st curtain SLOW2 Slow synchronization 2nd curtain 2nd curtain FULL Manual flash FULL 1st curtain Always fires 1 4 Manual flash 1 4 1 16 Manual flash ...

Page 125: ...trictly as color temperatures Use these settings for shooting conditions under fluorescent lights The file size in the table is approximate White balance color temperature Record mode and file size number of storable still pictures Record mode Number of pixels PIXEL COUNT Compression File format File size MB Number of storable still pictures with 1 GB xD Picture Card RAW 3648 x 2736 Loss less comp...

Page 126: ... WB 1 12 Approx 0 1 12793 Functions that can be registered in Custom Reset Settings Function Custom reset setting registration Function Custom reset setting registration Shooting mode k 8 9 F 9 SLEEP 9 Y j 9 BACKLIT LCD 9 AF MODE 9 USB MODE k AF AREA 9 LIVE VIEW BOOST 9 AE BKT 9 g FACE DETECT 9 PICTURE MODE 9 FRAME ASSIST 9 GRADATION 9 ISO AUTO SET 9 K 9 ISO AUTO 9 NOISE REDUCT 9 AEL Metering 9 WB...

Page 127: ...OW KEY P 68 K RAW YF YN XN WN RAW YF RAW YN RAW XN RAW WN P 62 WB AUTO A 7 7 G 7 7 P 64 5 5300 K A 7 7 G 7 7 2 7500 K A 7 7 G 7 7 3 6000 K A 7 7 G 7 7 1 3000 K A 7 7 G 7 7 w 4000 K A 7 7 G 7 7 x 4500 K A 7 7 G 7 7 y 6600 K A 7 7 G 7 7 n 5500 K A 7 7 G 7 7 V A 7 7 G 7 7 CWB 2000 K 14000 K ISO AUTO 100 1600 P 53 NOISE REDUCT OFF ON AUTO P 69 NOISE FILTER OFF LOW STANDARD HIGH P 69 METERING e ESP AF ...

Page 128: ...D AF IMAGER AF P 39 b BUTTON DIAL P 88 DIAL FUNCTION P F P 88 A FNo F S SHUTTER F M SHUTTER FNo DIAL DIRECTION DIAL1 DIAL2 P 88 AEL AFL S AF mode1 mode2 mode3 P 89 C AF mode1 mode2 mode3 mode4 MF mode1 mode2 mode3 AEL AFL MEMO OFF ON P 89 7 FUNCTION Fn FACE DETECT PREVIEW OFF V LIVE PREVIEW TEST PICTURE P 90 j FUNCTION j Y AF AREA AF MODE WB METERING ISO P 90 c DISP 8 PC P 90 8 OFF ON P 90 SLEEP O...

Page 129: ...00 x 2400 2560 x 1920 1600 x 1200 P 93 Wmall 1280 x 960 1024 x 768 640 x 480 g RECORD ERASE P 94 RAW JPEG ERASE JPEG RAW RAW JPEG P 94 FILE NAME AUTO RESET P 94 dpi SETTING AUTO CUSTOM P 94 h K UTILITY P 117 CLEANING MODE k P 117 Factory default setting Tab Function Setting Ref page X k P 15 CF xD CF xD P 95 s j 7 7 k 7 7 P 95 W 1 P 95 VIDEO OUT 1 P 95 REC VIEW OFF AUTO q 1 SEC 20 SEC 5 SEC P 95 P...

Page 130: ... digital ESP metering and spot metering Color space A model that describes colors using more than three coordinates Color spaces such as sRGB Adobe RGB are occasionally used for encoding reproducing colors Color temperature The spectral balance of different white light sources is rated numerically by color temperature a concept of theoretical physics that with incandescent lighting corresponds rou...

Page 131: ... passing through the lens into electrical signals On this camera light is picked up and converted into RGB signals to build a single image Imager contrast detection system Focusing method based on the contrast of the image of the subject captured on the image pickup device ISO International abbreviation for International Organization for Standardization The sensitivity setting used in digital came...

Page 132: ...ns so the image can be checked in the viewfinder There is no difference between the composition to be captured and the composition viewed on the viewfinder Sleep Mode A mode designed to save battery life The camera automatically enters the sleep mode if you do not operate it for a certain time To get out of the sleep mode use any button on the camera shutter button menu button etc Spot metering Th...

Page 133: ...registered with the b button Focusing screen Fixed Eyecup Interchangeable Live view Uses Live MOS sensor for shooting Field of view of 100 LCD monitor Product type 2 7 TFT color LCD Total no of pixels Approx 230 000 dots Shutter Product type Computerized focal plane shutter Shutter 1 4000 60 sec Bulb shooting Auto focus Product type TTL phase contrast detection system Imager contrast detection sys...

Page 134: ...isplay Information display Histogram display Drive Drive mode Single frame shooting Sequential shooting Self timer Remote control Sequential shooting 3 5 frames sec Max no of storable sequential pictures 8 frames in RAW Self timer Operation time 12 sec 2 sec Optical remote control Operation time 2 sec 0 sec instantaneous shooting RM 1 Remote Control optional Flash Synchronization Synchronized with...

Page 135: ... 8 mm H 1 4 x 2 2 x 0 5 Weight Approx 46 g 0 1 Ib BCS 1 Lithium ion charger MODEL NO PS BCS1 Rated input U S A CANADA AC 120 V 60 Hz Other countries AC 100 V 240 V 50 60 Hz Rated output DC 8 35 V 400 mA Charging time Approx 3 hours 30 minutes room temperature if using BLS 1 Ambient temperature 0 C 40 C 32 F 104 F operation 20 C 60 C 4 F 140 F storage Dimensions Approx 62 mm W x 83 mm D x 38 mm H 2...

Page 136: ...erter TF 22 Twin Flash with adapter ring 52mm to 67mm 72mm Compatible with EX 25 Extension Tube only at 50 180mm EC 14 EC 20 Tele Converter TF 22 Twin Flash with adapter ring 62mm to 67mm 72mm ZUIKO DIGITAL 25mm 1 2 8 Pancake Standard Lens ZUIKO DIGITAL 35mm 1 3 5 Macro Lens ZUIKO DIGITAL ED 70 300mm 1 4 0 5 6 Super Telephoto Zoom ZUIKO DIGITAL 11 22mm 1 2 8 3 5 Wide Zoom ZUIKO DIGITAL 14 54mm 1 2...

Page 137: ...hange without any notice or obligation on the part of the manufacturer Only with MF AF possible when using center frame Only with FR 1 FLRA 1 Flash Reflector Adapter incl with FL 50R FLST 1 Flash Stand incl with FL 50R and FL 36R FL CB05 Flash Cable FL 20 Flash FL 36R Wireless Flash FL 50R Wireless Flash FL CB02 Flash Cable FP 1 Flash Power Grip incl FL CB02 for FL 50R RF 11 TF 22 HV 1 High Voltag...

Page 138: ... near any heat source such as a radiator heat register stove or any type of equipment or appliance that generates heat including stereo amplifiers SAFETY PRECAUTIONS General Precautions CAUTION TO REDUCE THE RISK OF ELECTRICAL SHOCK DO NOT REMOVE COVER OR BACK NO USER SERVICEABLE PARTS INSIDE REFER SERVICING TO QUALIFIED OLYMPUS SERVICE PERSONNEL An exclamation mark enclosed in a triangle alerts y...

Page 139: ... burn When the camera contains metal parts overheating can result in a low temperature burn Pay attention to the following When used for a long period the camera will get hot If you hold on to the camera in this state a low temperature burn may be caused In places subject to extremely cold temperatures the temperature of the camera s body may be lower than the environmental temperature If possible...

Page 140: ...ow temperatures may be restored after it is warmed at room temperature The number of pictures you can take may vary depending on the shooting conditions or battery Before going on a long trip and especially before traveling abroad purchase extra batteries A recommended battery may be difficult to obtain while traveling Please recycle batteries to help save our planet s resources When you throw awa...

Page 141: ...pus makes no representations or warranties regarding any damages or any benefit expected by using this unit lawfully which are caused by erasing picture data Olympus makes no representations or warranties either expressed or implied by or concerning any content of these written materials or software and in no event shall be liable for any implied warranty of merchantability or fitness for any part...

Page 142: ...US supplied USB cable should be used to connect the camera to USB enabled personal computers PC Any unauthorized changes or modifications to this equipment would void the user s authority to operate it We strongly recommend that you use only the genuine Olympus dedicated rechargeable battery and battery charger with this camera Using a non genuine rechargeable battery and or battery charger may re...

Page 143: ...ct or damage that occurs due to fire earthquake flood damage thunderbolt other natural disasters environmental pollution and irregular voltage sources e Any defect that occurs due to careless or improper storage such as keeping the product under conditions of high temperature and humidity near insect repellents such as naphthalene or harmful drugs etc improper maintenance etc f Any defect that occ...

Page 144: ...ntained in it is incomplete or illegible 2 Since this Warranty Certificate will not be re issued keep it in a safe place Please refer to the list on the web site http www olympus com for the authorized international Olympus service network IBM is a registered trademark of International Business Machines Corporation Microsoft and Windows are registered trademarks of Microsoft Corporation Macintosh ...

Page 145: ...ash AUTO 70 Auto focus 57 109 AUTO POP UP 92 AUTO shooting AUTO 4 Auto white balance 64 65 B B Basic 62 112 B W FILTER 67 BACKLIT LCD 91 Battery 11 119 BEACH SNOW g 5 BLACK WHITE 83 BULB FOCUSING 87 Bulb shooting 49 61 BULB TIMER 92 C C AF continuous AF 55 C AF MF 56 Calendar display 79 CANDLE 5 CARD SETUP 86 119 Cards 13 118 Center weighted averaging metering J 50 CF xD 94 CHILDREN G 5 CLEANING M...

Page 146: ... 119 Lithium ion battery 11 119 Lithium ion charger 11 119 LIVE PREVIEW 49 90 Live view 39 LIVE VIEW AF MODE 41 LIVE VIEW BOOST 91 LOW KEY 68 M X Middle 62 112 MACRO J 5 Manual flash 72 Manual focus MF 42 55 Manual shooting M 48 Menu 30 METERING 50 90 MF manual focus 55 Microdrive 13 118 Monitor adjustment s 95 MONOTONE 67 MTP 91 107 N N Normal 62 112 NATURE MACRO r 5 NIGHT SCENE G 5 NIGHT PORTRAI...

Page 147: ... speed 45 Single AF S AF 54 Single frame copy 84 Single frame erase S 86 Single frame playback 78 Single frame protect 85 Single frame shooting o 58 SLEEP 90 Slideshow m 81 Slow synchronization SLOW 70 Slow synchronization SLOW2 2nd CURTAIN 71 SPORT J 5 Spot metering highlight control 5HI 50 Spot metering shadow control 5SH 50 Spot metering 5 50 sRGB 93 STORAGE 91 103 Strap 10 SUNSET 5 Super contr...

Reviews: