


21
EN
Using Shooting Modes
Using the best mode for the
shooting scene (
s
mode)
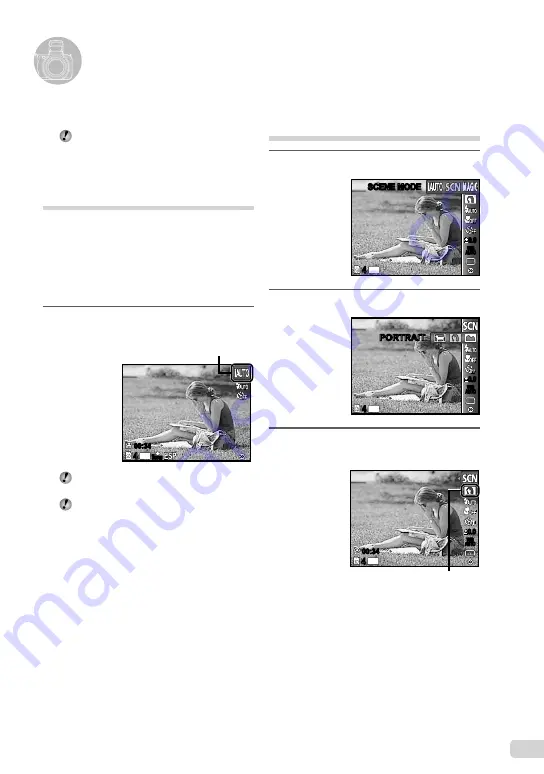
1
Set the shooting mode to
s
.
14
M
44
SCENE MODE
SCENE MODE
0.0
0.0
AUTO
WB
AUTO
WB
2
Press
G
to go to the submenu.
14
M
44
0.0
0.0
AUTO
WB
AUTO
WB
PORTRAIT
PORTRAIT
3
Use
HI
to select the mode and
then press the
A
button to set.
14
M
44
0.0
0.0
AUTO
WB
AUTO
WB
00:34
00:34
Icon indicating the scene mode
that is set
To change the shooting mode
The shooting mode (
P
,
M
,
s
,
P
,
A
,
Q
) can be changed with using the
function menu. “Using the Menu” (p. 4)
Shooting with automatic
settings (
M
mode)
The camera will automatically select the optimal
shooting mode for the scene. This is a fully
automatic mode that allows you to take a picture
suited to the scene by simply pressing the
shutter button. In
M
mode, settings in the
shooting menu can be selected, but the changed
setting is not re
fl
ected in the actual shot.
1
Set the shooting mode to
M
.
44
14
M
N
ORM
00:34
00:34
The icon changes depending on the scene
that the camera automatically selects.
In some cases, the camera may not select
the desired shooting mode.
When the camera cannot identify the
optimal mode,
P
mode will be selected.
Summary of Contents for 227665
Page 73: ...VN695901 ...


