background image

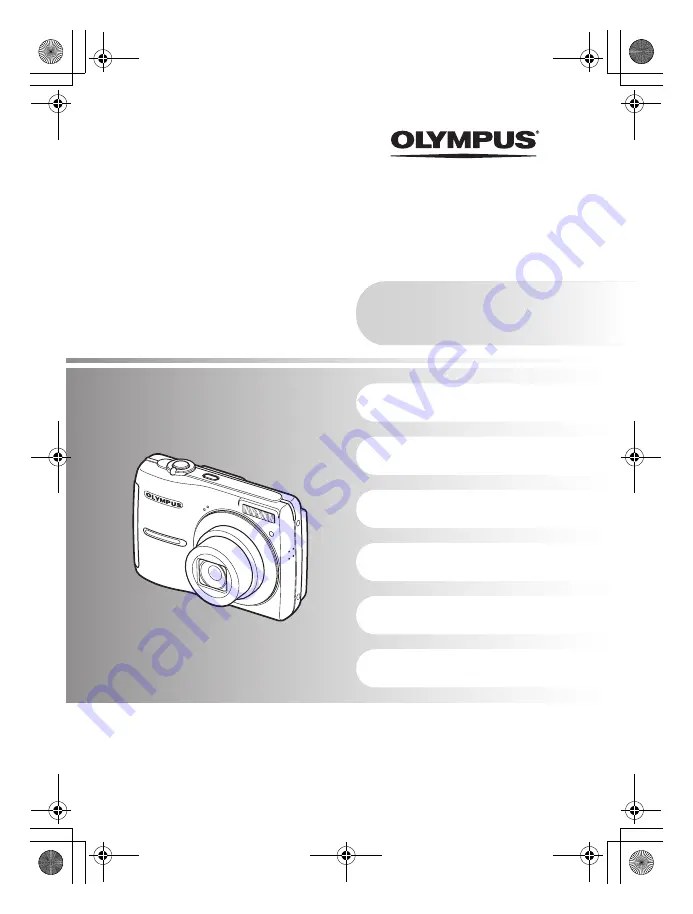
DIGITAL CAMERA

Instruction 

Manual

Getting to know your 

camera better

Quick Start Guide

Get started using your 
camera right away.

Button operations

Menu operations

Printing pictures

Using OLYMPUS Master

(

Thank you for purchasing an Olympus digital camera. Before you start to use your new camera, please 
read these instructions carefully to enjoy optimum performance and a longer service life. Keep this manual 
in a safe place for future reference.

(

We recommend that you take test shots to get accustomed to your camera before taking important 
photographs.

(

In the interest of continually improving products, Olympus reserves the right to update or modify 
information contained in this manual.

(

The screen and camera illustrations shown in this manual were produced during the development stages 
and may differ from the actual product.

Appendix

FE-310/X-840/C-530

d4368_e_0000_7.book  Page 1  Friday, November 30, 2007  3:16 PM

Summary of Contents for 226400

Page 1: ...ormance and a longer service life Keep this manual in a safe place for future reference We recommend that you take test shots to get accustomed to your camera before taking important photographs In the interest of continually improving products Olympus reserves the right to update or modify information contained in this manual The screen and camera illustrations shown in this manual were produced ...

Page 2: ...ns and how to take better pictures Read about convenient functions and safety precautions to use your camera more effectively Learn about the menus that control the functions and settings for basic operation Button operations Menu operations Printing pictures Getting to know your camera better P 10 P 18 P 29 P 38 Using OLYMPUS Master P 34 Quick Start Guide P 3 Appendix P 46 d4368_e_0000_7 book Pag...

Page 3: ...me loose Digital Camera Strap AA batteries 2 USB Cable AV Cable OLYMPUS Master 2 CD ROM Items not shown Instruction Manual this manual and the Warranty Card Contents may vary depending on purchase location Attach the strap Quick Start Guide d4368_e_0000_7 book Page 3 Friday November 30 2007 3 16 PM ...

Page 4: ...ke pictures without inserting the card the pictures will be stored in the internal memory For details on the card please refer to The card P 47 3 1 2 4 6 7 Orient the card as shown in the illustration and insert it straight into the card slot Insert the card until it clicks into place To remove the card push the card all the way in release slowly grasp the card and remove it 5 Notch d4368_e_0000_7...

Page 5: ... by a moving subject or camera shake when taking pictures B Suitable for taking pictures of people E Suitable for taking pictures of a landscape f Select from 11 available scene modes according to the shooting conditions R Use the shooting guide displayed on the screen to shoot pictures according to the situation When shooting movies When shooting still pictures o button X Y M Y M D D TIME MENU CA...

Page 6: ...he Y button c Press the OF and NY buttons to select M The date and time screen X Y M Y M D D TIME MENU CANCEL Y M D Cancels the setting Hour Date formats Y M D M D Y D M Y Minute OF button NY button 2008 X Y M Y M D D TIME MENU CANCEL Y button 2008 08 X Y M Y M D D TIME MENU CANCEL d4368_e_0000_7 book Page 6 Friday November 30 2007 3 16 PM ...

Page 7: ... Press the OF and NY buttons to select Y M D j After all settings have been set press For a more accurate setting press when the time signal hits 00 seconds 2008 08 26 X Y M Y M D D TIME MENU CANCEL 2008 08 26 12 30 OK X Y M Y M D D TIME MENU CANCEL SET 2008 08 26 12 30 OK X Y M D TIME MENU CANCEL SET Y Y M M D D button 8M 8M NORM NORM AUTO 4 4 IN The number of storable still pictures is displayed...

Page 8: ...en when the focus and exposure are locked The shutter speed and aperture value are also displayed If the AF target mark blinks in red the focus is not adjusted properly Try locking the focus again 1 1000 1 1000 F3 2 F3 2 AUTO AF target mark Place this mark over your subject Shutter Button Press Completely The card access lamp blinks d4368_e_0000_7 book Page 8 Friday November 30 2007 3 16 PM ...

Page 9: ...e OF button select YES and press Arrow pad Displays the next image Displays the previous image q button 2008 08 26 2008 08 26 12 30 12 30 4 4 100 0004 100 0004 IN 8M 8M NORM NORM Erase pictures S button ERASE ERASE OK IN NO NO YES SET CANCEL MENU OF button button IN ERASE ERASE NO YES YES OK SET CANCEL MENU d4368_e_0000_7 book Page 9 Friday November 30 2007 3 16 PM ...

Page 10: ...tton to shoot a picture If the AF target mark blinks red the focus is not adjusted properly Try locking the focus again Recording movies Set the mode dial to n and lightly press the shutter button to lock the focus Then press the shutter button completely to start recording Press the shutter button again to stop recording o button Turning the camera on and off Power on Camera turns on in shooting ...

Page 11: ...yback Operations during pause To resume the movie press To cancel the playback of the movie in the middle of it or during pause press m K button Shooting Selecting shooting mode Turning the camera on q button Playback Selecting playback mode Turning the camera on 3 4 2008 08 26 2008 08 26 12 30 12 30 100 0004 100 0004 4 4 IN MOVIE PLAY OK 2008 08 26 2008 08 26 12 30 12 30 100 0004 100 0004 00 12 0...

Page 12: ...settings will be changed to the default settings of each scene Follow the shooting guide displayed on the screen to set the target items Press m to display the shooting guide again To change the setting without using the shooting guide set the shooting mode to another one The content set using the shooting guide will change to the default setting by pressing m or changing the mode using the mode d...

Page 13: ...on displays 00 34 00 34 REC REC This icon lights during movie recording The remaining recording time is displayed When the remaining recording time reaches 0 recording stops 6 2008 08 26 2008 08 26 12 30 12 30 4 4 100 0004 100 0004 IN 8M 8M NORM NORM 8M 8M 2008 08 26 2008 08 26 12 30 12 30 4 4 100 0004 100 0004 2 0 2 0 F3 2 F3 2 1 1000 1 1000 IN ISO400 ISO400 NORM NORM 2 0 2 0 4 4 IN 8M 8M P NORM ...

Page 14: ...isplay a picture to print out in playback mode connect the camera to the printer and then press OF to print the picture g Direct printing PictBridge P 29 E Displaying the menu guide Arrow pad ONXY button OK FUNC OF button Changing picture brightness Exposure compensation Printing pictures W Sets the language for menus and error messages 7 8 8M 8M 8M 8M PICSLEFT PICSLEFT 4 4 ISO AUTO ISO AUTO 5M 3M...

Page 15: ...mode OFF Macro off Cancels macro mode Macro mode This mode lets you shoot from as close as 20 cm 7 9 in when the zoom is set for the zoom out angle and as close as 50 cm 13 8 in when the zoom is set for the zoom in angle to your subject Super macro mode This mode lets you shoot from as close as 5 cm 2 0 in to your subject The zoom position is fixed automatically and cannot be changed NY button Sel...

Page 16: ...r subject Optical zoom 5 Digital zoom 4 optical zoom digital zoom Max 20 S button Increasing the brightness of the monitor Backlight boost Erasing pictures Increasing the brightness of the monitor Backlight boost S Erasing pictures Zoom lever Zooming while shooting Close up playback d e Zoom out Turn the zoom lever to the W side Zoom in Turn the zoom lever to the T side The zoom bar appears white ...

Page 17: ...n and hold the zoom lever to the T side to incrementally zoom in up to 10 times the original size and to the W side to zoom out Press the arrow pad during close up playback to scroll the picture in the indicated direction When returning to the single frame playback press Index display Use the arrow pad to select a picture for playback and press to play back the single frame of the picture selected...

Page 18: ...ration guide m button Arrow pad ONXY K button Shooting mode q button Playback mode MENU IMAGE QUALITY IMAGE QUALITY CAMERA MENU CAMERA MENU CAMERA MENU CAMERA MENU SETUP SETUP SETUP SETUP RESET RESET SCENE SCENE SCENE SCENE SILENT MODE SILENT MODE SILENT MODE SILENT MODE SET OK EXIT R OFF CAMERA MENU SET OK OFF FACE DETECT PANORAMA AUTO ISO MENU EXIT Top menu Still picture shooting mode CAMERA MEN...

Page 19: ...revious menu is displayed Press m repeatedly to exit the menu To cancel any changes and continue operating the menus press m without pressing Using the menus MENU SET OK EXIT IMAGE QUALITY IMAGE QUALITY CAMERA MENU CAMERA MENU CAMERA MENU CAMERA MENU SETUP SETUP SETUP SETUP RESET RESET SCENE SCENE SCENE SCENE SILENT MODE SILENT MODE SILENT MODE SILENT MODE BACKUP NO SETUP SET OK ENGLISH PIXEL MAPP...

Page 20: ... in I 2048 1536 Suitable for printing pictures up to A4 8 11 in J 1600 1200 Suitable for printing pictures at A5 5 7 in K 1280 960 Suitable for printing pictures at postcard size C 0640 480 Suitable for viewing pictures on a TV or using pictures on emails and web sites D 1920 1080 Suitable for playing pictures at Wide screen TV COMPRESSION L FINE Shooting at high quality M NORMAL Shooting at norma...

Page 21: ...lt setting Ref Page f M NIGHT PORTRAIT P 12 g Normal display P 13 F 0 0 P 14 OFF P 15 Y OFF P 15 AUTO P 15 IMAGE SIZE Still picture Movie G E P 20 COMPRESSION M P 20 ISO AUTO P 21 R still picture OFF P 21 R movie ON P 22 FACE DETECT OFF P 22 f Scene Shooting pictures by selecting a scene according to the situation CAMERA MENU ISO Changing the ISO sensitivity AUTO Sensitivity is automatically adjus...

Page 22: ...een taken The camera searches for a face within the frame and focuses on it A face may not be detected depending on the subject R movie Recording movies with or without sound OFF ON When ON sound is recorded is selected the optical zoom cannot be used during movie recording Only the digital zoom can be used PANORAMA Creating a panoramic picture FACE DETECT Focusing on a face OFF ON SILENT MODE Mut...

Page 23: ...tures in My Favorite VIEW FAVORITE Viewing registered pictures ADD FAVORITE Adds pictures to My Favorite Select a picture with XY and press SLIDESHOW Plays back registered pictures automatically Press to exit the slideshow EXIT Reverts to normal playback mode YES NO Use the arrow pad to select the picture to be erased and press S Select YES and press Even if pictures registered in MY FAVORITE are ...

Page 24: ...ctures stored on the card g Print settings DPOF P 31 SET Registering favorite pictures EDIT Q Changing the size of pictures C 640 480 E 320 240 P Cropping a picture PRINT ORDER Making print reservations DPOF PLAYBACK MENU 0 Protecting pictures OFF ON Protected pictures cannot be erased using ERASE SEL IMAGE or ALL ERASE but they are all erased by formatting Select the picture with XY and protect i...

Page 25: ...cancel the selection press again When the selection is completed press S Select YES and press Select YES and press y Rotating pictures U 90 V 0 T 90 Pictures taken with the camera held vertically are displayed horizontally This function lets you turn such pictures so that they are displayed vertically New picture orientations are saved even when the power is turned off R Adding sound to still pict...

Page 26: ...vailable languages vary depending on the area where you purchased this camera SETUP menus MEMORY FORMAT FORMAT Formatting the internal memory or card BACKUP Copying pictures in the internal memory to the card W Selecting a display language MENU SET OK EXIT IMAGE QUALITY IMAGE QUALITY CAMERA MENU CAMERA MENU CAMERA MENU CAMERA MENU SETUP SETUP SETUP SETUP RESET RESET SCENE SCENE SCENE SCENE SILENT ...

Page 27: ... button SHUTTER SOUND Adjusting the volume of the camera warning sound 8 Adjusting the volume during playback q VOLUME You can set all the sounds muted at once by setting SILENT MODE g SILENT MODE Muting operational sounds P 22 PIXEL MAPPING Adjusting the image processing function K q Turning on the camera with the K or q button YES Pressing K turns on the camera and starts the camera in the shoot...

Page 28: ...oting mode the monitor automatically shuts off Pressing the zoom lever or other buttons restores the camera from power save mode X Y M Y M D D TIME 2008 08 26 12 30 MENU CANCEL Y M D Cancels the setting Hour Date formats Y M D M D Y D M Y Minute The first two digits of Y are fixed The time is displayed in the 24 hour format To set the time precisely with the cursor on either Minute or Y M D press ...

Page 29: ... setting items such as paper sizes and printer s specifications such as available types of paper how to install the papers and ink cassettes etc refer to the printer s instruction manual 1 In playback mode display the picture you want to print out on the monitor 2 Turn the printer on and plug the USB cable provided with the camera into the multi connector of the camera and the printer s USB port T...

Page 30: ... MULTI PRINT Prints one picture in multiple layout format ALL INDEX Prints an index of all the pictures stored in the internal memory or the card PRINT ORDER Prints the pictures according to the print reservation data on the card g Print settings DPOF P 31 Operation guide STANDARD STANDARD PRINTPAPER SET OK MENU BACK SIZE BORDERLESS SIZE Choose from the available paper sizes on your printer BORDER...

Page 31: ...e cannot be changed by this camera Make changes using the original device If a card contains DPOF reservations set by another device entering reservations using this camera may overwrite the previous reservations You can make DPOF print reservations for up to 999 images per card Not all functions may be available on all printers or at all photo stores Setting the number of prints and data to be pr...

Page 32: ...nt reservations press 5 Select the date and time setting and press NO The pictures are printed without the date and time DATE The selected pictures are printed with the shooting date TIME The selected pictures are printed with the shooting time 6 Select SET and press You can reset all the print reservation data or just for selected pictures 1 Select top menu PRINT ORDER and press To reset the prin...

Page 33: ...ou want to cancel and press N to decrease the number of prints to 0 Repeat Step 4 to cancel print reservations for other pictures 5 When you are finished canceling print reservations press 6 Select the date and time setting and press The setting is applied to the remaining pictures with print reservations 7 Select SET and press d4368_e_0000_7 book Page 33 Friday November 30 2007 3 16 PM ...

Page 34: ...ndows 2000 Professional XP Home Edition XP Professional Vista Mac OS X v10 3 or later CPU Pentium III 500 MHz or later Power PC G3 500 MHz or later Intel Core Solo Duo 1 5 GHz or later RAM 256 MB or more 256 MB or more Hard disk capacity 500 MB or more 500 MB or more Monitor 1 024 768 pixels or more 65 536 colors or more 16 77 million colors or more recommended 1 024 768 pixels or more 32 000 colo...

Page 35: ...cting the camera to the computer Turn off the camera Open the camera s battery card compartment cover 1 Make sure the camera is turned off The monitor is off The lens is retracted 2 Connect the multi connector on the camera to the USB port on the computer using the provided USB cable Refer to your computer s instruction manual to locate the position of the USB port The camera turns on automaticall...

Page 36: ... Step 3 Y is pressed and MTP is selected Windows 1 Double click the OLYMPUS Master 2 icon on the desktop Macintosh 1 Double click the OLYMPUS Master 2 icon in the OLYMPUS Master 2 folder The browse window is displayed When OLYMPUS Master is started up for the first time after installation the OLYMPUS Master initial setting screen and user registration screen are displayed before the browse window ...

Page 37: ...compatible with USB mass storage You can connect the camera to your computer using the USB cable provided with the camera to download and save images without using OLYMPUS Master The following environment is required to use the USB cable to connect the camera to your computer Windows Windows 2000 Professional XP Home Edition XP Professional Vista Macintosh Mac OS X v10 3 or later Note If your comp...

Page 38: ...ft for another 12 minutes it automatically turns off Press o to turn the camera on The mode dial is in the position of R No pictures can be taken when the shooting guide is being displayed Take pictures after selecting the settings by following the shooting guide or turn the mode dial and set it to a shooting mode other than R The flash is charging Wait until the flash charge mark stops blinking b...

Page 39: ...s the camera using the focus lock function by pressing the shutter button halfway and then return the camera to the horizontal position while keeping the button pressed halfway and take the picture Hold the camera correctly and press the shutter button gently to shoot the picture In addition blurring is reduced when taking pictures in the h mode g h Shooting pictures using digital image stabilizat...

Page 40: ...ts using the above scene modes the picture may appear grainy g f Shooting pictures by selecting a scene mode according to the situation P 12 Often bright subjects such as snow turn out darker than their natural colors Adjusting OF toward makes the subject closer to their real shades Conversely when you are shooting dark subjects it can be effective to adjust toward Sometimes using the flash may no...

Page 41: ...tures in the internal memory to the card P 26 The card P 47 Number of storable still pictures and recording length of movies Still pictures Movies Additional shooting tips and information Increasing the number of pictures that can be taken IMAGE SIZE COMPRES SION Number of storable still pictures Internal memory Using a 1GB card With sound Without sound With sound Without sound G 3264 2448 L 4 4 2...

Page 42: ...enu items displayed in gray cannot be selected Items that cannot be set with the current shooting mode Items that cannot be set because of an item that has already been set and etc Some functions cannot be used when there is no card in the camera PANORAMA PRINT ORDER FORMAT BACKUP When the mode dial is set to R functions cannot be changed To return the changed shooting settings to default settings...

Page 43: ...e on the computer screen View the picture using image browsing software Install the OLYMPUS Master 2 software from the provided CD ROM Change the monitor setting The icons on the computer desktop may be rearranged For details of changing the settings on your computer refer to the computer s instruction manual Playback tips Playing back pictures in the internal memory Viewing picture information Qu...

Page 44: ...nd press Remove the card and wipe the contact area with a soft dry cloth Select FORMAT YES and press All data on the card is erased There is an error in the internal memory Select MEMORY FORMAT YES and press All data in the internal memory is erased NO CONNECTION The camera is not connected to the computer or the printer correctly Disconnect the camera and connect it again correctly NO PAPER There...

Page 45: ...g modes and scenes Shooting mode h P h i l A f Ref Page Function M C N V W P d R S X i F 9 9 9 9 9 9 9 9 9 9 9 9 P 14 9 9 9 9 9 9 1 P 15 9 9 9 9 9 9 P 15 Y 9 9 9 9 9 9 9 9 9 9 9 9 P 15 9 9 9 9 2 9 9 2 9 2 2 2 P 15 Zoom 9 9 9 9 9 9 9 9 9 9 9 P 16 IMAGE QUALITY 9 9 9 9 9 9 9 9 9 9 9 3 P 20 ISO 9 P 21 R still picture 9 9 9 9 9 9 9 9 9 P 21 R movie 9 P 22 PANORAMA 9 9 9 9 9 9 9 9 9 P 22 FACE DETECT 9 ...

Page 46: ... source best suited to the situation AA alkaline batteries Oxyride batteries The number of pictures that you can take may vary considerably depending on the battery manufacturer and shooting conditions AA NiMH batteries rechargeable batteries Olympus NiMH batteries are rechargeable and economical For details refer to the instruction manual for your charger Lithium battery packs CR V3 and AA mangan...

Page 47: ...ot touch this area directly Compatible cards xD Picture Card 16MB 2GB Type H M Standard Using the internal memory or card You can confirm on the monitor whether the internal memory or card is being used during shooting and playback operations Note Do not open the battery card compartment cover while the card access lamp is blinking as the lamp is indicating that it is reading or writing data Doing...

Page 48: ...adiator heat register stove or any type of equipment or appliance that generates heat including stereo amplifiers SAFETY PRECAUTIONS General Precautions CAUTION TO REDUCE THE RISK OF ELECTRICAL SHOCK DO NOT REMOVE COVER OR BACK NO USER SERVICEABLE PARTS INSIDE REFER SERVICING TO QUALIFIED OLYMPUS SERVICE PERSONNEL An exclamation mark enclosed in a triangle alerts you to important operating and mai...

Page 49: ... parts to deteriorate and in some circumstances cause the camera to catch fire Do not use the charger if it is covered such as a blanket This could cause overheating resulting in fire Handle the camera with care to avoid getting a low temperature burn When the camera contains metal parts overheating can result in a low temperature burn Pay attention to the following When used for a long period the...

Page 50: ...any other way during operation stop using the camera If a battery leaks fluid onto your clothing or skin remove the clothing and flush the affected area with clean running cold water immediately If the fluid burns your skin seek medical attention immediately Never subject batteries to strong shocks or continuous vibration Olympus NiMH batteries included in some areas are intended for use only with...

Page 51: ...g the camera for a long period remove the battery Select a cool dry location for storage to prevent condensation or mold from forming inside the camera After storage test the camera by turning it on and pressing the shutter release button to make sure that it is operating normally Always observe the operating environment restrictions described in the camera s manual Do not push the monitor forcibl...

Page 52: ...lympus reserves the right to alter the features and contents of this publication or software without obligation or advance notice Radio and Television Interference Changes or modifications not expressly approved by the manufacturer may void the user s authority to operate this equipment This equipment has been tested and found to comply with the limits for a Class B digital device pursuant to Part...

Page 53: ...ed warranty and not warranted by Olympus in any fashion either express implied or by statute are a products and accessories not manufactured by Olympus and or not bearing the OLYMPUS brand label the warranty coverage for products and accessories of other manufacturers which may be distributed by Olympus is the responsibility of the manufacturers of such products and accessories in accordance with ...

Page 54: ...NO EVENT SHALL OLYMPUS BE LIABLE FOR ANY INDIRECT INCIDENTAL CONSEQUENTIAL OR SPECIAL DAMAGES OF ANY KIND INCLUDING WITHOUT LIMITATION LOSS OF PROFITS OR LOSS OF USE WHETHER OR NOT OLYMPUS SHALL BE OR SHOULD BE AWARE OF THE POSSIBILITY OF SUCH POTENTIAL LOSS OR DAMAGE Representations and warranties made by any person including but not limited to dealers representatives salespersons or agents of Ol...

Page 55: ...and related to the problem When service is completed the Product will be returned to you postage prepaid WHERE TO SEND PRODUCT FOR SERVICE See WORLDWIDE WARRANTY for the nearest service center INTERNATIONAL WARRANTY SERVICE International warranty service is available under this warranty IBM is a registered trademark of International Business Machines Corporation Microsoft and Windows are registere...

Page 56: ...1 0 mm f3 2 to 4 8 equivalent to 37 to 185 mm on a 35 mm camera Photometric system Center weighted metering Shutter speed 4 to 1 2000 sec Shooting range 0 4 m 1 3 ft to W 0 7 m 2 3 ft to T normal 0 2 m 0 7 ft to W 0 5 m 1 6 ft to T macro mode 0 05 m 0 2 ft to super macro mode Monitor 2 5 TFT color LCD display 154 000 dots Outer connector USB connector A V OUT jack multi connector Automatic calenda...

Page 57: ...Zoom lever gP 16 Lens Connector cover Multi connector gP 28 29 35 Self timer lamp gP 15 Speaker Strap eyelet gP 3 Shutter button gP 10 Microphone gP 21 g E button gP 13 o button gP 10 OF button Exposure Compensation Print gP 14 NY button Self timer gP 15 S button Backlight boost Erase gP 16 m button gP 15 Y button Flash mode gP 15 button OK FUNC gP 14 Arrow pad ONXY gP 14 d4368_e_0000_7 book Page ...

Page 58: ...ng recording time 4 00 34 P 10 P 13 10 Current memory B Recording pictures to the internal memory No icon Recording pictures to the card P 47 11 Self timer Y P 15 12 Shutter speed Aperture value 1 1000 F3 2 etc P 8 13 Exposure compensation 2 0 2 0 P 14 14 Compression M NORMAL L FINE P 20 15 Image size G H D C etc P 20 16 ISO ISO100 ISO400 etc P 21 2 0 2 0 1 1000 1 1000 P 4 4 IN 8M 8M F3 2 F3 2 ISO...

Page 59: ...ding time 4 00 14 00 34 P 11 11 Current memory B Playing back the picture in the internal memory No icon Playing back the picture in the card P 47 12 Compression M NORMAL L FINE P 20 13 ISO ISO100 ISO400 etc P 21 14 Date and time 2008 08 26 12 30 P 28 2008 08 26 2008 08 26 12 30 12 30 100 0004 100 0004 00 14 00 34 00 14 00 34 IN VGA VGA 9 14 8 10 3 4 5 1 11 2008 08 26 2008 08 26 12 30 12 30 4 4 10...

Page 60: ... mode 15 Flash off 15 Focus 8 10 39 Focus lock 10 FORMAT 26 Function menu 14 G R Shooting guide 5 12 I IMAGE QUALITY 20 IMAGE SIZE 20 Index display G 17 INDOOR N 12 Information displays 13 Internal memory 26 41 43 47 ISO 21 M Macro mode 15 MEMORY FORMAT 26 Menu 18 MENU COLOR 27 Menu guide 14 Monitor 10 27 58 Monitor brightness adjustment s 27 MULTI PRINT 30 MY FAVORITE 23 N NIGHT PORTRAIT M 12 NiM...

Page 61: ...ing mode 10 11 13 16 45 58 Shooting movies n 10 13 Shooting still pictures 10 SHUTTER SOUND 27 Shutter speed 8 10 SILENT MODE U 22 Single frame playback 17 Single frame reservation 32 Sleep mode 38 SLIDESHOW 23 SOUND SETTINGS 27 SPORT j 12 Strap 3 SUNSET S 12 Super macro mode 15 T Top menu 18 U USB cable 3 29 34 35 37 V VIDEO OUT 28 q VOLUME 27 VOLUME 11 W Warning sound 8 27 X xD Picture Card 22 4...

Page 62: ...62 EN Memo d4368_e_0000_7 book Page 62 Friday November 30 2007 3 16 PM ...

Page 63: ...EN 63 Memo d4368_e_0000_7 book Page 63 Friday November 30 2007 3 16 PM ...

Page 64: ...64 EN Memo d4368_e_0000_7 book Page 64 Friday November 30 2007 3 16 PM ...

Page 65: ...EN 65 Memo d4368_e_0000_7 book Page 65 Friday November 30 2007 3 16 PM ...

Page 66: ...66 EN Memo d4368_e_0000_7 book Page 66 Friday November 30 2007 3 16 PM ...

Page 67: ...EN 67 Memo d4368_e_0000_7 book Page 67 Friday November 30 2007 3 16 PM ...

Page 68: ...Printed in China VS543401 d4368_e_0000_7 book Page 68 Friday November 30 2007 3 16 PM ...

Reviews: