R
Mobile Phone with Touch Screen
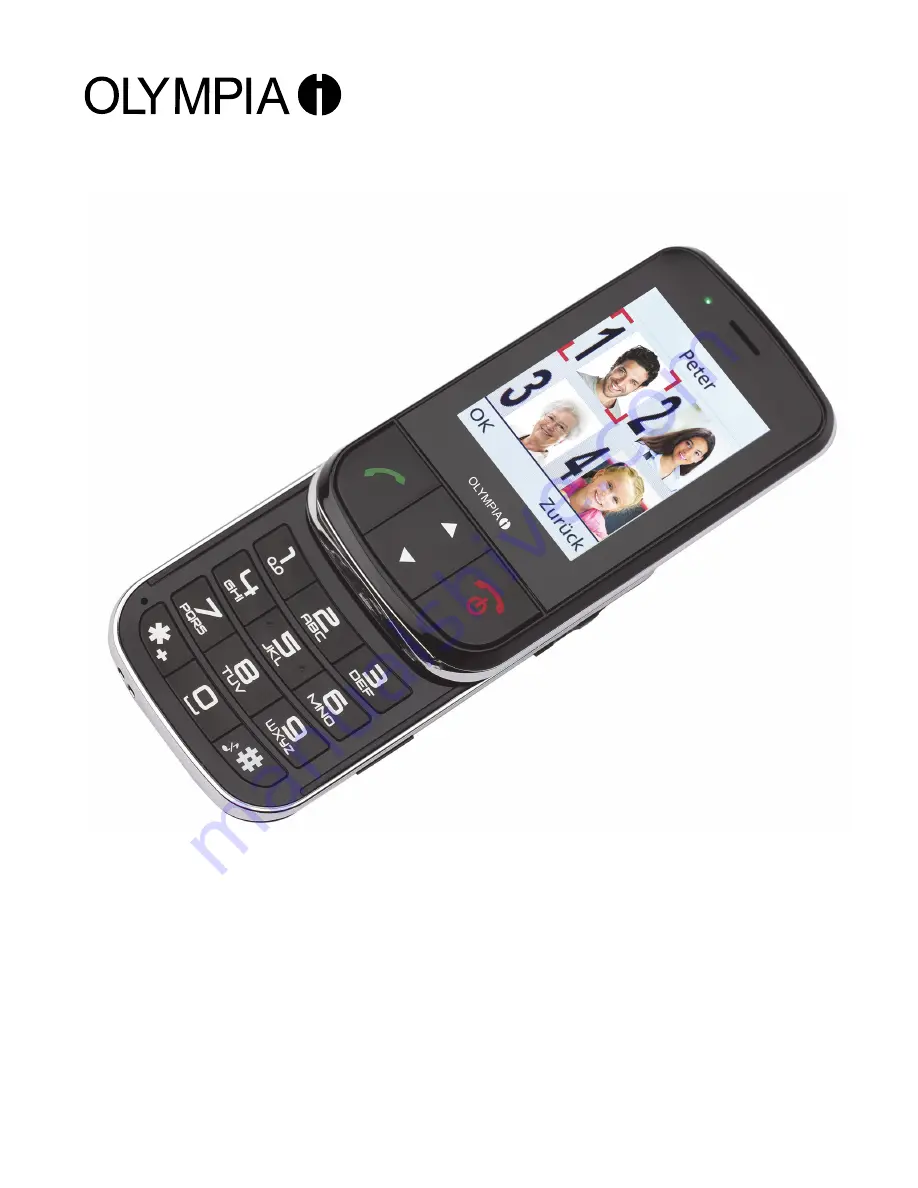
BRIO Touch
Operating Manual
24.10.2014 en/en
Olympia Business Systems Vertriebs GmbHZum Kraftwerk 145527 Hattingen
Page 1: ...R Mobile Phone with Touch Screen BRIO Touch Operating Manual 24 10 2014 en en Olympia Business Systems Vertriebs GmbH Zum Kraftwerk 1 45527 Hattingen ...
Page 2: ...BRIO Touch 2 BLANK PAGE ...
Page 3: ...serting the Battery 15 Charging the Battery 16 Switching the Mobile Phone On and Off 18 Calibrating the Touchscreen 18 Using the Mobile Phone 19 Information on Use 19 Methods of Entering text 21 Information on Navigation 22 Making and Taking Calls 23 Changing Settings During a Call 24 Text Messages SMS 25 Mobile Phone Menu 26 Phone Book 27 Speed Dialling 29 Text Messages 30 Settings 38 Reminder Di...
Page 4: ...h 4 Radio 62 Calculator 65 Calendar 66 Torch 69 File Manager 70 Other Important Information 71 Troubleshooting 71 Technical Data 72 Declaration of Conformity 73 SAR Information 74 Disposal 75 Maintenance 76 Guarantee 77 Index 78 ...
Page 5: ...from damage WARNING Pay attention to the information to prevent any personal injuries Risk of electric shock Never attempt to open and repair the device or accessories yourself Never touch bare con tacts with metallic objects Never plug in or unplug the charg ing adapter when your hands are wet Risk of suffocation Keep out of reach of children Keep packaging materials and protective foils out of r...
Page 6: ...adset in the case of longer calls Do not keep the mobile phone near your head With regard to emergencies do not rely on the mobile phone alone For technical reasons it is not possible to guarantee a reliable connection in every situation ATTENTION Avoid the risk of property damage to your device and observe the information Protect the device from moisture dust liquids chemicals vapours heat and di...
Page 7: ...battery power has decreased noticeably To prevent unnecessary power consumption via the power adapter plug disconnect the power adapter plug from the power socket when the battery is not being charged Intended Use This mobile phone is designed for telephoning when connected to a mobile phone network Any other use is considered unintended use Unauthorised modification or reconstruction is not permi...
Page 8: ...livery The following are enclosed with the mobile phone supplied 1 mobile phone 1 USB connection cable 1 lithium ion battery 1 charging cradle 1 quick reference manual 1 charging adapter 1 headset Keys and Operating Elements 1 2 3 4 5 6 7 8 1 Earpiece 2 Display 3 Call key 4 Keypad 5 Star key 6 Navigation keys up down 7 On hook key Reject call key 8 Hash key ...
Page 9: ...perating Elements BRIO Touch 9 12 11 10 13 16 15 14 17 10 Torch LED 11 USB connection port 12 SOS emergency call key 13 Volume key increase decrease 14 Battery compartment cover 15 Charge contacts 16 Shortcut key 17 Torch switch ...
Page 10: ...ndicates important additional information regarding the task currently being completed on the mobile phone This symbol indicates helpful information intended to simplify using the mobile phone Display Icons The table below indicates a series of display icons which frequent ly appear and indicate a specific status of the mobile phone Symbol Significance Battery charge Network availability SIM 1 SIM...
Page 11: ...nd network availability 1 are also displayed 1 2 3 4 5 Display of the network availability The current network availability is displayed graphically at the top left of the mobile phone screen Very good Poor The more bars in the display icon the better the reception quality Some mobile phone networks offer better coverage than others in different areas If you use the dual SIM function offered by th...
Page 12: ...e appears in the display NOTE In cases where the battery charge is extremely low it is possible that the back lighting for the screen no longer works and certain functions are no longer available Charge the battery in the mobile phone NOTE When the battery charge drops below a minimum status the mo bile phone switches off automatically Display of the time The time is displayed in the center of the...
Page 13: ... the mobile phone screen Set the date before using the phone for the first time NOTE If you reset the mobile phone settings to their factory settings the current date must be set again Display of the main menu icon Open the main menu by touching the main menu icon at the bot tom edge of the mobile phone screen ...
Page 14: ... you must insert your SIM card not included in the equipment supplied in the phone NOTE The emergency call SOS function of the phone is completed by SIM card 1 If you only use one SIM card it must be inserted in the slot for SIM card 1 1 Remove the battery compartment cover 1 NOTE Use the notch 3 on the underside of the mobile phone 2 Insert the SIM card 2 as illustrated 1 2 3 The battery compartm...
Page 15: ...stored on the mobile phone 1 Slide the microSD memory card with the contacts facing down in the open compartment as illustrated The shape of the compartment ensures the card cannot be insert ed incorrectly 1 Inserting the Battery Before you can use the mobile phone you must insert the battery in the mobile phone 1 Insert the battery 1 as illustrated The shape of the compartment ensures the battery...
Page 16: ... charge the battery check that it has been in stalled properly Do not remove the battery while the mobile phone is being charged This could damage the phone Charging the battery with the charging adapter 1 Connect the power plug 1 to a properly installed power socket 2 Connect the microUSB plug 2 to the USB connection port 3 on the mobile phone NOTE Make sure that the microUSB plug 2 is connected ...
Page 17: ...r plug 1 to a properly installed power socket 2 Connect the microUSB plug 2 to the USB connection port 3 on the charging cradle 3 Place the mobile phone in the charging cradle as illustrated 1 2 3 4 During the charging process the LED 4 to the left above the screen flashes red When the battery is fully charged it lights up red continually ...
Page 18: ... will require you to enter a PIN code Follow the instructions on the screen Calibrating the Touchscreen Calibrate the screen before using the phone for the first time 1 After switching on the mobile phone for the first time follow the instructions which appear on the screen NOTE If you reset the mobile phone settings to their factory settings you must calibrate the screen again ...
Page 19: ... mobile phone is made up of two sections 1 2 The front section 1 of the device contains the screen as well as the Call On hook and Navigation keys The rear section 2 of the device contains the phone keypad The two sections of the device 1 2 can be slid apart using a little force To do this place your thumb on the screen and slide the front section of the device 1 upwards 1 2 ...
Page 20: ... 1 of the device upwards to deactivate the key lock The start screen 2 appears in the display 1 2 Alternatively touch the icon on the screen for 2 seconds to de activate the key lock Slide the front section 1 of the device downwards to activate the key lock The screen display goes out NOTE Calls can still be taken in the normal way even when the key lock function is activated ...
Page 21: ...haracter of the group is required press the key once If the second character is required press it twice and so on To enter two characters assigned to the same key press the key the respective number of times to enter the first character Wait until the cursor skips to the next position and then enter the letter Punctuation and special characters Check that you are in Edit mode and the press key Pun...
Page 22: ...touching the screen or navigation by pressing the keys Navigation through touching the screen Touch and drag your fingers directly on the screen in order to navi gate through the menus and start functions on the mobile phone NOTE The touch screen of the mobile phone can be operated simply by using your fingers or other suitable input devices Navigation by pressing the keys Press the Call key On ho...
Page 23: ...s dialled When requested select the SIM card you want to use Taking calls using the key Press the Call key to take an incoming call Taking calls by sliding the phone open Slide the front section of the mobile phone up to take an incoming call Rejecting calls using a key Press the On hook key to reject an incoming call Ending calls using a key Press the On hook key to end a call in progress Taking ...
Page 24: ... progress Muting means that the call continues to be connected but the call er can no longer hear you 1 While a call is in progress touch Options Silent On The micro phone is switched off 2 Touch Options Silent Off to deactivate the muting function and resume the call Putting a call on hold You can select whether to put the call in progress on hold Putting a call on hold basically means keeping th...
Page 25: ... call touch Options Conference The conference call is made available and you can talk to both parties Text Messages SMS You can use the mobile phone to send and receive text messages SMS NOTE It is possible that not all functions described are supported by ev ery mobile service provider Therefore please contact your local mobile service provider for details Writing text messages Use the function t...
Page 26: ...ost important functions are explained below with the aid of texts illustrations and examples The main menu icon 1 on the start screen serves as the start ing point for all the submenus 2 Some texts in the menu appear as scrolling text Wait a moment for the respective selection in order to be able to read the scrolling text completely 1 2 ...
Page 27: ...ew contact Select and select the sto rage location To SIM1 To Phone required 2 Enter the name and phone number 3 Touch Options Save The setting is saved You can also assign a speed dialling number or picture to the con tacts saved Calling a contact You can call contacts stored in the phone book as follows 1 Touch Phonebook 2 Touch the contact required 3 Press the Call key The number is dialled NOT...
Page 28: ...ne Memory status You can request information regarding the number of contacts stored and storage locations available 1 Touch Phonebook Options Phonebook settings Memory status The storage locations still available are displayed Name display You can change the way in which phone book entries are dis played on the screen NOTE If you change the type of display it is possible that under certain circum...
Page 29: ... can only assign speed dialling numbers to contacts who are already stored in the phone book Adding contacts to the speed dialling list Add contacts to the speed dialling function in order to be able to dial them via the keys 1 Touch Phonebook Options Phonebook settings Speed dial Set numbers 2 Touch a key to which no contact number is assigned 3 Touch the contact required The setting is saved Cal...
Page 30: ...e short text messages 1 Touch Messaging Write message 2 Enter your text NOTE A standard text message contains 160 characters Extra costs may be incurred for texts in excess of 160 characters 3 Touch Options Send to Enter number 4 Enter the necessary phone number Alternatively touch Add from Phonebook and then the required phone book contact 5 Touch Options Send The text message is sent Inbox The t...
Page 31: ...d 1 Touch Messaging Inbox 2 Touch the text message required 3 Touch Reply 4 Enter your text NOTE A standard text message contains 160 characters Extra costs may be incurred for texts in excess of 160 characters 5 Touch Options Send to Options Send The text message is sent Call sender Call the sender of the text message received 1 Touch Messaging Inbox 2 Touch the text message required 3 Touch Call...
Page 32: ...mber 6 Enter a phone number Alternatively touch Add from Phonebook and then the required phone book contact 7 Touch Options Send The text message is sent NOTE A standard text message contains 160 characters Extra costs may be incurred for texts in excess of 160 characters Clear You can delete a text message you have received 1 Touch Messaging Inbox 2 Touch the text message required 3 Touch Clear a...
Page 33: ...e was received is stored as a phone book entry Filter by You can display the text messages already received on SIM card 1 or SIM card 2 This setting is useful if you have two SIM cards installed in your mobile phone and use the dual SIM function 1 Touch Messaging Inbox Options Filter by 2 Select the SIM card on which you want to view the text mes sages received Touch SIM1 or SIM2 The setting is sa...
Page 34: ...n send a text saved as a draft to a contact 1 Touch Messaging Drafts 2 Touch the draft text required 3 Touch Send Add from Phonebook 4 Touch the contact required Alternatively enter the required phone number manually 5 Touch Options Send The text message is sent Edit You can edit the text which you have already saved as a draft 1 Touch Messaging Drafts 2 Touch the draft text required 3 Touch Edit ...
Page 35: ...le phone are stored View You can open the text message to read the content 1 Touch Messaging Sent messages 2 Touch the text message required 3 Touch View The text message is opened Forward You can forward a text message already sent to another contact 1 Touch Messaging Sent messages 2 Touch the text message required 3 Touch Forward Options Send to Add from Phonebook 4 Touch the contact required Al...
Page 36: ...ast mes sages 1 Touch Messaging Broadcast messages SIM1 Receive mode On OK The service is activated Further information on Channel settings and Languages is available from your mobile phone provider Read broadcast messages You can read broadcast messages in exactly the same way as the text messages you have received or sent 1 Touch Messaging Broadcast messages SIM1 Read messages Touch the broadcas...
Page 37: ... the Hash or Star key NOTE When the default setting is set the text messages sent are saved Preferred storage This defines whether the text messages are stored on the mobile phone or SIM card The advantage of storage on the mobile phone is that it has a larg er capacity than that of the SIM card If you insert the SIM card in another phone the text messages from the phone are no longer available Th...
Page 38: ...etting required 3 Touch OK The setting is saved Calibration You can calibrate the screen 1 Touch Settings Pen calibration 2 Follow the instructions on the screen The screen display is then calibrated for further use Flight mode Change to flight mode when you want to switch off all transmission units in the device including all communication functions without deactivating the remaining functions su...
Page 39: ...ngs Time and date Set time date 2 Enter the current time and date using the keypad 3 Touch Save The settings are saved Adapt the settings for time zone and home city as well as the time and date format according to your needs Language The mobile phone can be operated in four different languages German English French and Dutch 1 Touch Settings Phone settings Language 2 Touch the language required 3...
Page 40: ...en 1 Touch Settings Phone settings Display 2 Touch the setting required 3 Then define which image you want to be displayed on the start screen If you have stored private pictures on the mobile phone you can also use one of them as the background image 4 Define whether the time and date should be displayed on the start screen 5 Touch OK The setting is saved Shortcut key At the side of the mobile ph...
Page 41: ...ch of a text message to any phone num bers informing you that the battery in your mobile phone is almost empty and must be recharged Status Switch the function on or off 1 Touch Settings Charge remind Switch 2 Touch the setting required 3 Touch OK The setting is saved Content of the text message Define the content of the text message which should be sent when the battery in the mobile phone is alm...
Page 42: ...tting required 3 Touch Activate To new number 4 Enter a phone number to which the calls should be diverted Alternatively touch Options Add from contacts and select a contact from the phone book 5 Touch Options Done The setting is saved NOTE If necessary deactivate all the call diversions you have set up Touch Settings Call settings SIM1 call settings Call divert Cancel all diverts Automatic repeat...
Page 43: ...l settings Advanced settings Answer mode 2 Touch the setting required 3 Touch Done The setting is saved Alarm Clock You can use the mobile phone as an alarm clock 1 Touch Settings Alarm You can set up to five different alarms 2 Select one of the alarm clocks 3 Touch Edit 4 Use the Hash or Star key to switch the alarm clock On The function is activated 5 Enter the wake up time 6 Touch Done The sett...
Page 44: ...rom the SIM card if so required The risk here is should you lose your mobile phone the data could be misused by third parties and subsequent costs could be charged to you When you change your PIN code or phone lock password we ur gently recommend that you note down the new PIN code or phone lock password and keep it where it cannot be accessed by third parties Switching the PIN prompt on off 1 Tou...
Page 45: ...formation on this is available from your mobile phone provider Switching the phone lock on off 1 Touch Settings Security settings Phone security Phone lock 2 Enter the phone lock password In its default setting the phone lock password is 0000 The phone lock is also active when there is no SIM card inserted in the mobile phone Changing the password 1 Touch Settings Security settings Phone security ...
Page 46: ...er Bluetooth ca pable devices 3 Touch Off The mobile phone is not visible for other Blue tooth capable devices My device Search for other Bluetooth capable devices in your environment with which you want to connect your mobile phone 1 Touch Settings Connectivity Bluetooth My device Search new device A search is made for other Bluetooth capable devices in the environment 2 Follow the instructions o...
Page 47: ...ter a name for the mobile phone 3 Touch Options Done The setting is saved Restore Factory Settings You should reset the phone settings to their default factory settings before transferring the device to third parties e g for repair or sale Make a copy of your personal data on your SIM card or microSD memory card prior to initiating a reset to the factory settings 1 Touch Settings Restore factory s...
Page 48: ...same options are available for all of the call lists Call You can call an entry 1 Touch Call center 2 Touch Missed calls Dialled calls or Received calls as necessary 3 Touch the required entry 4 Touch Call The entry selected is dialled View This option provides more detailed information e g time and date of the call and number of calls regarding the entry selected 1 Touch Call center 2 Touch Misse...
Page 49: ... Dialled calls or Received calls as necessary 3 Touch the required entry 4 Touch Save to Phonebook 5 Select a storage location for the new phone book entry Touch To SIM1 or To Phone 6 Enter a name for the phone book contact 7 Touch Options Save The phone number is saved as a phone book entry Clear You can delete an entry from the call lists 1 Touch Call center 2 Touch Missed calls Dialled calls or...
Page 50: ...lution of 48 x 55 pixels Otherwise pictures could be blurred or not shown at all Only pictures in jpeg format can be displayed In order to adapt your pictures use the image converter provided on our homepage at www olympia vertrieb de Transferring photos from computer 1 Connect the mobile phone to a computer using the USB ca ble 2 Touch Mass storage 3 Transfer the pictures required to the mobile p...
Page 51: ... dialling contact selected and can be viewed in the Pic menu Using a picture from the camera 1 Touch Pic 2 Touch the contact required 3 Touch Set Picture From camera The camera integrated in the mo bile phone is activated 4 Take a photo of the subject required 5 Confirm the prompt The picture is added to the picture di alling contact selected and can be viewed in the Pic menu Dialling via pictures...
Page 52: ...Touch the contact required 7 Touch Send The text message is sent Edit picture dialling contact 1 Touch Pic 2 Touch the contact required 3 Touch Edit 4 Edit the picture dialling contact according to your require ments 5 Touch OK The modifications are saved Deleting a picture dialling contact 1 Touch Pic 2 Touch the contact required 3 Touch Clear 4 Confirm the prompt The picture dialling contact is ...
Page 53: ... user profile 1 Touch User profiles 2 Touch the required user profile 3 Touch Activate The user profile selected is activated Customising a user profile Adapt your user profile according to your needs You can customise all user profiles However we recommend en tering your personalised settings in the user profile My style 1 Touch User profiles 2 Touch the required user profile 3 Touch Customize Al...
Page 54: ...g call Options Change 2 Use the navigation keys to select a ringing tone You can select a ringing tone and a short time later the selected tone is played briefly 3 Touch Select Volume for incoming calls You can set the volume of the ringing tone for incoming calls 1 Touch Ringtone volume 2 Adjust the setting using the key Ringing tone for incoming text messages You can select one of the 5 differen...
Page 55: ...can adjust the volume of the key tone 1 Touch Keytone volume 2 Adjust the setting using the key Power on tone You can select one of the 5 different power on tones available 1 Touch Power on Options Change 2 Use the navigation keys to select a ringing tone You can select a ringing tone and a short time later the selected tone is played briefly 3 Touch Select Power off tone You can select one of the...
Page 56: ...lect a ringing tone You can select a ringing tone and a short time later the selected tone is played briefly 3 Touch Select Tone on closing the mobile phone You can define whether the mobile phone should issue an acous tic signal when you slide the mobile phone shut 1 Touch cover close Options Change 2 Use the navigation keys to select a ringing tone You can select a ringing tone and a short time ...
Page 57: ...gn up to 4 phone numbers to the SOS key Switching the emergency call function on off Before using the emergency call function it must be activated 1 Touch SOS setting Status 2 Touch On The emergency call function is activated 3 Touch Off The emergency call function is deactivated Emergency call numbers You can save up to 4 phone numbers to which an emergency call and emergency text are sent after ...
Page 58: ... function is deacti vated Editing the text Enter a text from which it is clearly evident to the recipient that you are in an emergency situation and require help 1 Touch SOS setting SOS message SOS message Edit The content of the emergency text message in this case is limited to 140 characters 2 Enter the required text using the keypad When in its default setting the text for the emergency text me...
Page 59: ... of the camera lens appears on the mobile phone screen 3 Press the key The camera integrated in the mobile phone stores the photo You can adjust the quality of the photos taken activate various ef fects on the camera change the colour temperature and define a variety of other settings Some settings assume an in depth knowledge of photography Test the most convenient way of presenting photos for yo...
Page 60: ...a Bluetooth rename delete or sort them Camera settings Define the settings for shutter tone exposure value contrast self timer and serial exposure 1 Touch Camera 2 Press the Call key 3 Touch Camera settings and define the relevant settings Image settings Define the settings for image size and image quality 1 Touch Camera 2 Press the Call key 3 Touch Image settings and define the relevant settings ...
Page 61: ...various image effects diverse sepia tones inverse colouring etc 1 Touch Camera 2 Press the Call key 3 Touch Effect settings and make the necessary adjustments Resetting the camera You can reset the camera settings to their default factory settings 1 Touch Camera 2 Press the Call key 3 Touch Restore default 4 Confirm the prompt The camera settings are rest to their de fault factory values ...
Page 62: ...FM radio The user interface for the radio appears on the screen display 1 2 2 3 4 Operating the user interface You can operate the radio by means of the user interface The frequency 1 currently set is displayed in the upper section of the screen You can search for other radio stations on other trans mission frequencies Use the arrows 2 to the left and right of the set transmission frequency to do ...
Page 63: ...l input Enter the transmission frequency manually to access a radio sta tion directly 1 Touch FM radio Options Manual input 2 Enter the transmission frequency of the radio station 3 Touch OK You will hear the manually entered radio station Automatic station search The mobile phone can search for all the locally available radio sta tions over the entire frequency band automatically and save those f...
Page 64: ...lephone loudspeaker as well as the headset 1 Touch FM radio Settings Loudspeaker Change the On or Off status using the Hash or Star key 2 Touch Save The setting is saved The radio is played via the loudspeaker NOTE The radio only works when the headset is connected The headset must also be connected in order to play the radio via the mobile phone loudspeaker Exposure to the receiver earpiece at fu...
Page 65: ...ion and di vision You can use the mobile phone calculator to solve simple arithmetical problems 1 Touch Calculator 2 Enter the initial number using the keypad 3 Touch the relevant mathematical sign for addition for subtraction x for multiplication or for division 4 Enter the second number using the keypad 5 Touch the sign The result of the arithmetical process is displayed ...
Page 66: ...kdays appears 2 Use the Star and Hash keys to navigate horizontally and the navigation keys to move vertically 3 Touch Options You can now add view and delete events appointments or skip directly to a specific date View You can display the events appointments entered for the day se lected 1 Touch View The events appointments entered are dis played View all It is possible to display all the events ...
Page 67: ...ng Course Date Call or Anniversary to be entered 1 Touch Type 2 Touch the type of event Start Enter the starting time of the event appointment 1 Touch Start 2 Enter the respective date and time using the keypad End Enter the finishing time of the event appointment 1 Touch End 2 Enter the respective date and time using the keypad Subject Enter a key word as the subject for the event appointment 1 T...
Page 68: ...er the required text using the keypad 3 Touch Options Done Delete event You can delete a selected event appointment from the calendar 1 Touch Delete event 2 You can define whether you want to delete all or overdue events appointments or those within a specific period 3 Confirm the prompt The events appointments selected are deleted Jump to date You can skip directly to a date in the future or past...
Page 69: ...obile Phone Menu Torch BRIO Touch 69 Torch You can use the mobile phone as a torch An LED is provided at the top of the mobile phone which can be switched on 1 Slide the switch upwards The LED lights up ...
Page 70: ...le manager enables you to manage the memory of the mo bile phone and memory of a microSD card if inserted 1 Touch File manager 2 You can manage the files according to your needs You can create rename and delete folders sort existing files or format the entire memory ...
Page 71: ...age appears in the display for some functions indicating exe cution use is not possi ble Many functions can only be used af ter the respective service has been applied for Therefore please con tact your mobile service provider lo cally for more details Screen frozen or no re sponse when pressing keys Remove the battery for 3 minutes and try again No connection to the mobile telecommunica tion netw...
Page 72: ... Power supply Input 100 240 V 50 60 Hz 0 15 A Output 5 V 500 mA Battery 3 7 V 1000 mAh Charging time approx 4 hours Standby time Up to 288 hours Max talk time Up to 6 hours Display Touch LCD with back lighting Operating conditions 10 C to 40 C at 30 to 75 rel humidity SAR value 0 59 W kg NOTE Subject to change without notice 1 GSM Global System for Mobile Communications Standard for mobile phones ...
Page 73: ...irective 1999 5 EC directive on radio equipment and telecommunications terminal equipment and the mutual recognition of their conformity Conformity with the above mentioned directive is confirmed by the CE mark on the device To view the complete Declaration of Conformity please refer to the free download available on our website www olympia vertrieb de ...
Page 74: ...ning radio frequency emissions are based on a unit called SAR SAR values are established using standard methods in which the mobile phone is operated in all possible frequency bands with the highest power output Although the SAR values of various phone models can differ all the models were developed to maintain the relevant directives on radio frequency emissions The following information applies ...
Page 75: ...Risks to health and the environment from batteries Never open damage or swallow batteries or allow them to pollute the environment They may contain toxic ecologically hazardous heavy metals You are legally obliged to dispose of power packs and batteries at the point of sale or in the corresponding contain ers provided at collection points by local public waste authorities Disposal is free of charg...
Page 76: ...Other Important Information Maintenance BRIO Touch 76 Maintenance Clean the housing surfaces with a soft fluff free cloth Do not use and solvents or cleaning agents ...
Page 77: ...on Guarantee BRIO Touch 77 Guarantee Dear Customer we are pleased that you have chosen this equipment In the case of a defect please return the device together with the receipt and original packing material to the point of sale ...
Page 78: ...24 Making 23 Muting the microphone 24 Putting a call on hold 24 Receiver volume 21 Rejecting 23 Taking a call 23 Camera 59 Contacts See Phone book D Date See Settings Declaration of conformity 73 Display icons 10 Disposal 75 E Emergency call function 57 Emergency call numbers 57 Emergency text message 58 On Off 57 F Factory settings 47 File manager 70 G Getting started Calibrating the touchscreen ...
Page 79: ... 40 Dual SIM 38 Flight mode 38 Language 39 Network settings 44 Reminder function in the case of discharged battery 41 Time and date 39 SMS See Text messages SOS key See Emergency call function Speed dialling 29 Activating 29 Adding contacts 29 Calling contacts 29 Start screen 11 Starting up 14 Switching the mobile phone off See Getting started Switching the mobile phone on See Getting started T Te...
Page 80: ...operating instruction manual lies with Olympia and therefore may not be copied or sold The data and information in the operating instruction manual is only intended for personal use Subject to technical modifications and changes to the content ...