background image

Handset Settings

www.olympia.ag

OPERATING

INSTRUCTIONS

31

Page

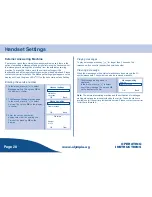
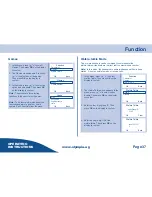
Factory Defaults

The handsets can be reset to the factory defaults. The function undoes all

user

defined settings and resets the options to their original default values.

The phone book entries are retained.

1. In the menu, press


 to select

Default

 Then press 

OK

 on the display

to confirm.

2. A security prompt is

displayed.

3. Press 

OK

 on the display to confirm the

entry.

                      ("

                        ,.  8


/   /


>;  #

   .

Note:  

The handset is reset to the factory defaults. 

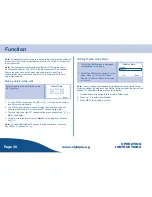
Key Assignment Overview

The numeric keys can be set to one of three levels of operation. The

current level is shown on the right

hand side of the display. To change

between levels, press

.

Level 1 = display mode 

abc

 is selected by default.

Press key 

.

This activates level 2 = display mode 

ABC

.

Press key 

 again.

This activates level 3 = display mode 

123

.

Press key 

 again.

This returns control to level 1 = display mode 

abc

.

K

Level 1

Level 2

Level 

3

Key

abc

ABC

123

space

space

0

, ; . : ! ? + 

, ; . : ! ? + 

1

abc

ABC

2

def

DEF

3

ghi

GHI

4

jkl

JKL

5

mno

MNO

6

pqrs

PQRS

7

!

tuv

TUV

8

"

wxyz

WXYZ

9

Summary of Contents for 681X Series

Page 1: ...R Digital Cordless Telephone with Colour Display 681x Series OPERATING INSTRUCTIONS 30 06 2005 en en ...

Page 2: ......

Page 3: ... Calls 10 Making External Calls 10 Direct dialling 10 On hook dialling 10 Hands free Mode 10 Direct dialling 10 Switching during a call 11 Answering calls 11 Handset is on the base station 11 Handset is not on the base station 11 Redialling 12 Prefix Dialling 12 Dialling from the phone book 12 Call Log Operations 13 Call log of Missed Calls browse call back delete save 13 Muting the Microphone 14 ...

Page 4: ...ndset Settings 24 Changing the Ringer Melody External Internal 24 Adjusting the Ringer Volume 25 Switching the Ring On Off 25 Prefix Dialling 26 Enabling disabling automatic prefixing 26 Saving editing a prefix 26 Restricted Dialling 27 Outgoing Call Bar Off External Call All 27 Restricting Prefixed Outgoing Calls 27 External Answering Machine 28 Entering the service number 28 Playing messages 28 ...

Page 5: ...Base Station 34 Changing the PIN Code 35 Changing the Flash Time 35 Factory Defaults 35 Function 36 Calculator 36 Key function assignment 36 Games 37 Walkie talkie Mode 37 Making walkie talkie calls 38 Quitting Walkie talkie Mode 38 Quick Reference Handset 39 Warranty 43 Technical Modifications 44 Conformity of the telephone to the EU directives is confirmed by the CE symbol The corresponding Decl...

Page 6: ......

Page 7: ...ng the equipment for unintended purposes Exemption from Liability We cannot guarantee the information which relates to the technical properties or that contained in this document is correct The product and its accessories described in this document are subject to constant improvement and further development For this reason we reserve the right to modify components accessories technical specificati...

Page 8: ... and Charging Stations Place the base station and charging stations in an easily accessible location Ensure that they are set down on stable level non slip surfaces In addition ensure that the equipment is set down where all the necessary cables can be laid in such a way that nobody can trip over them Do not place the base station and charging station in the direct vicinity of other electrical app...

Page 9: ...wer network Connecting the Charging Station Insert the power plug in the socket on the rear side of the charging station Insert the power plug at the other end in the power outlet The charging station is now ready to operate Inserting the Batteries Open the battery compartment by sliding the cover down Insert two AAA batteries in the compartment ensuring correct polarity The handset does not work ...

Page 10: ...nd lighting and menu icons S Choose from 2 backgrounds S Microphone muting function S Acoustic battery and range warning signals S Key lock S Key input tone on off S 10 incoming call ringing melodies 7 polyphone S Ringing volume control 5 levels and silent S Walkie talkie mode S Programmable number barring S Headset connector S Hands free function on handset S DTMF Pulse dialling S Adjustable Flas...

Page 11: ...ey 16 Key to view CALL LOG memory menu navigation 17 Headset socket 18 Paging key call handset 19 LED comes on when the handset is put back onto the base 20 LED flashes for incoming calls and lights up permanently while making external calls Indicates the battery charge status Indicates that an external call is being made Indicates that the microphone muting is active Notification new messages net...

Page 12: ...This figure illustrates the way in which the function keys are represented in the texts in this operating instruction manual Left arrow key Right arrow key The display keys control different functions depending on what they are currently needed for The current function appears on the display immediately above the display key concerned The texts in this operating instruction manual include the disp...

Page 13: ...d Calls Save External On Delete Internal On Off Internal Off Received Calls Save Internal On Delete Pre Fix Pre Fix On Off Off Dialed Calls Save On Delete Pre Fix Edit 123 Delete Missed Calls Received Calls Outgoing Call Bar PIN 0000 Off Dialed Calls External Call Delete All Pre Call 12345 All Timer Clock Date 2005 Time 12 Message waiting Service 123 Clear message Alarm On Off Off Once 123 Wallpap...

Page 14: ...edium Default Confirm Low Highest score Help Walkie Talkie Enable Input Group ID 1234 Input WT ID 1 Base settings Base Ring Tone Base Ring Tone 1 5 Disable Base Ring On Off Off On Priority Call Alert Handset 1 6 All Ringtones 2 4 6 Dial Mode DTMF PULSE Register Handset Base 1 4 System PIN 0000 De register System PIN 0000 Handset 1 6 Select Base Base 1 4 Auto Base System PIN Input Current PIN 0000 ...

Page 15: ...onds Ñ The telephone can also be switched on and off manually by pressing and holding key for 3 seconds Note Once the handset has been switched off by pressing key it is not automatically switched back on by putting it back onto the base station or charging unit To switch it back on press and hold key for 3 seconds Selecting the Language Ten different languages are available for selection for each...

Page 16: ...lling 1 Press and wait for the dialling tone 2 Dial the telephone number and complete the call 3 Press key to end the call Ñ On hook dialling Ñ 1 Dial the telephone number 2 Press display key Delete to delete and correct any typing errors 3 Press The number entered is dialled and a connection established Make the call 4 Press key to end the call Hands free Mode There are two ways to make calls in ...

Page 17: ...ber of the person calling network dependent If the caller is in your phone book the name appears instead of the number When an internal call is received the display shows Incoming Call Handset x When the Paging key on the base station is pressed the display shows Paging Handset is on the base station 1 Take the handset from the base station the set automatically connects if Auto Answer is ON Other...

Page 18: ...x for accessing a specific carrier network can be stored It will be automatically prefixed to the telephone number no matter whether the number is dialled manually or selected from the Phone Book Note The prefix must have been programmed beforehand Refer to Handset Settings Dialling from the phone book 1 Press display key Name the list of phone book entries is displayed 2 Press key to select a per...

Page 19: ...pressing key in standby mode Another option is to browse the menu for the call logs Note For detailed descriptions of the call logs refer to chapter Call Logs Call log of Missed Calls browse call back delete save 1 Press display key Details the list of Missed Calls is displayed 2 Press key to browse the memory and select an entry 0 0 1 Press display key Details to be shown all the details availabl...

Page 20: ...call through Note The above information can vary according to the PBX network used Therefore refer to the relevant information in the PBX network documents Working with Several Handsets If several phones are registered with the base station external calls may be put on hold to check back with another handset put the call through to another handset or use the three way conference function Holding c...

Page 21: ... been misplaced it is possible to call all the handsets The handsets ring at full volume either until 30 seconds are up or until any key is pressed The display lighting is switched on Briefly press base station key Ñ 5 Entering a Dialling Pause P If the Olympia telephone is connected to a PBX system it may be necessary to insert a dialling pause First enter the digit e g 0 that will seize the outs...

Page 22: ... every 30 seconds reminds you to recharge the battery Range If the handset is too far away from the base station the display shows Out of Range Using a Headset The Olympia telephone has a connector for a headset To attach the headset a three pin 2 5 mm phono jack is used Pin assignment 1 Microphone 2 Loudspeaker 3 Earth 2 1 3 Plug the phone jack into the socket on the right hand side of the handse...

Page 23: ...ss the relevant key the corresponding number of times 1 2 3 or 4 times according to the position on the key To make a L press key 5 three times To remove typing errors press Delete on the display Phone book 2 Save Successfully Phone book If all the memory segments are occupied a message appears in the display Note To make phone book entries appear at the top of the list e g FIRE enter a space befo...

Page 24: ...Option on the display A list of available menu items is shown Option 6 6 2 7 546 Ñ Edit Name 1 In the Phone Book menu press to select Edit Name then press OK on the display to confirm 2 The name entry is shown and can be edited Name 1 0 1 3 Press OK on the display to confirm the entry 4 An info screen appears confirming that the entry has been saved Option 6 6 2 7 546 Edit Number 1 In the Phone Bo...

Page 25: ...rked by different ringer melodies Note Switching from VIP entry to normal entry and vice versa from normal entry to VIP entry involves the same steps 1 In the Phone Book menu press to select Set VIP Normal then press OK on the display to confirm 2 A prompt appears on the display Set VIP Normal 2 7 5 8 3 Press OK on the display to acknowledge the prompt 4 An info screen appears confirming that the ...

Page 26: ... way to access the list of Missed Calls is to put the phone in standby mode and press Note The procedure for navigating selecting and editing is the same for menu items Missed Calls Received Calls and Dialed Calls To display sub menu Call Log 1 Press Menu on the display 2 Press key to select the Call Log icon 3 Press OK on the display 0 3 4 In the menu press to select any of the menu items Then pr...

Page 27: ...he display to confirm your selection Delete Removes the entry Save Enter a name Press OK on the display The entire entry is displayed for verification Note For detailed information about how to save entries refer to chapter Phone Book Save Entries 2 3 0123456789 0 1 4 0 0 1 0 3 Clearing call logs 1 In the menu press to select Delete Then press OK on the display to confirm 2 The Delete menu appears...

Page 28: ...e display 2 Press key to select the Timer icon 3 Press OK on the display 4 In the menu press to select any of the menu items Then press OK on the display to confirm Setting date and time 1 In the menu press to select the Timer item Then press OK on the display to confirm 2 The date editor screen is shown Use the numeric keys to enter the date Then press OK on the display to confirm 3 The time edit...

Page 29: ...screen for setting the alarm time is shown Use the numeric keys to enter the alarm time Then press OK on the display to confirm In standby mode a clock symbol is shown Setting the ring type 1 The Alarm menu is displayed In the menu press to select Ring Type Then press OK on the display to confirm 2 Press to select a melody Then press OK on the display to accept the seleted option 0 0 0 0 0 4 0 7 S...

Page 30: ...External Internal 1 In the menu press to select menu item Ring Type Then press OK on the display to confirm 2 The Ring Type menu appears In the menu press to select any of the menu items Then press OK on the display to run the function 3 Press to select the melodies which will be played as they are selected To opt for one of the melodies press OK on the display 7 5 Note There are three monophonic ...

Page 31: ... to accept the setting Note Five different volumes are available to choose from Note The procedure for adjusting the ringer volume is the same for all three menu items 0 7 5 0 0 4 7 5 Switching the Ring On Off 1 In the menu press to select item Ring On Off Then press OK on the display to confirm 2 The Ring On Off menu appears In the menu press to select any of the menu items Then press OK to confi...

Page 32: ... menu press to select item Pre Fix On Off Then press OK on the display to confirm 3 Press key to select a setting Then press OK on the display to confirm 5 5 4 0 7 5 0 0 4 Note When the prefix function is enabled please note that S no other prefix can be used S no numbers can be redialled or picked from any of the call logs if the numbers in these lists already have a prefix to them Saving editing...

Page 33: ...all Bar Then press OK on the display to confirm 2 Enter the PIN and press OK on the display to confirm 3 The Outgoing Call Bar menu appears In the menu press to select any of the menu items Then press OK to confirm 5 6 5 Outgoing Call Bar Off External Call All 1 In the menu press to select Off Then press OK on the display to confirm Note The procedure is the same for menu items Off External Call a...

Page 34: ...lay to confirm 2 The Message Waiting menu appears In the menu press to select Service Then press OK on the display to confirm 3 Enter the service number as appropriate or edit an existing one Finish off by pressing OK on the display 2 3 6 1 Playing messages To play a message press key for longer than 3 seconds The telephone will connect to the specified service number Clearing a message When the m...

Page 35: ...the effect 3 Accept the selected wallpaper by pressing OK on the display Selecting the Language Languageselection is described in chapter Using the Telephone Setting the Contrast 1 In the menu press to select Contrast Then press OK on the display to confirm 2 Press to adjust the contrast When the setting seems alright press OK on the display to accept it Switching the Key Tone On Off 1 In the menu...

Page 36: ... handset from the base station 1 Press key to select Auto Answer Then press OK on the display to confirm 2 In the menu press to select an option as appropriate Then press OK on the display to confirm Entering Changing a Handset Name Every handset can be assigned its own name which is displayed when the phone is in Standby mode 1 In the menu press to select Handset name Then press OK on the display...

Page 37: ...nfirm the entry 8 Note The handset is reset to the factory defaults Key Assignment Overview The numeric keys can be set to one of three levels of operation The current level is shown on the right hand side of the display To change between levels press Level 1 display mode abc is selected by default Press key This activates level 2 display mode ABC Press key again This activates level 3 display mod...

Page 38: ...r one of the melodies press OK on the display Note Five different melodies are available to choose from 0 0 0 0 0 4 0 5 Switching the Ring On Off 1 In the menu press to select item Base Ring On Off Then press OK on the display to confirm 2 The Base Ring On Off menu appears Press key to select a setting Then press OK on the display to confirm 0 4 0 5 Handset Priority If several handsets are registe...

Page 39: ...ons will not be available Note GAP Generic Access Profile Standard for the interoperation of handsets and base stations from other manufacturers First of all put the base station into Register mode Press and hold the base station s Paging key until 2 acoustic signals are sounded After that the base station will be in Register mode for 60 seconds LED flashes Pick up the handset to continue 1 In the...

Page 40: ... to confirm 0 0 2 5 6 2 5 6 0 2 Selecting a Base Station Handsets can be registered with several base stations If it is the preferred base station can be set 1 In the menu press to select menu item Select Base Then press OK on the display to confirm 2 The Select Base menu appears Press key to select a base station Then press OK on the display to confirm Note A double asterisk marks the base statio...

Page 41: ...he display to confirm Changing the Flash Time 1 In the menu press to select Flash Time Then press OK on the display to confirm 2 The Flash Time menu appears In the menu press to select a setting Then press OK on the display to confirm 0 Factory Defaults The base station can be reset to the factory defaults The function undoes all user defined settings and resets the options to their original defau...

Page 42: ...nu press to select Calculator Then press OK on the display to confirm Key function assignment S To enter numbers use numeric keys to S A comma is entered by pressing key S To change the sign press key S To select an operator press key S The left display key has function to it S Numbers entered can be deleted by pressing key Numbers are removed from right to left Pressing the right display key quit...

Page 43: ...ame or how to operate it pick item Help from the menu Walkie talkie Mode Two or more handsets can be combined to communicate like walkie talkies Handsets are in direct radio contact with each other Note In this mode the handsets are entirely independent from a base station It is not possible to make or receive calls 1 In the menu press to select Walkie Talkie Then press OK on the display to confir...

Page 44: ...handsets at the same time first press C 1 Quitting Walkie talkie Mode 1 The Walkie Talkie screen is displayed Press Back on the display 2 The Walkie Talkie menu appears In the menu press to select option Disable Then press OK on the display to confirm 1 1 Note In case the handset changes to standby mode while walkie talkie mode is enabled the display shows Walkie Talkie instead of the name of the ...

Page 45: ...all End call Redial to select entry or Dial from phone book Name to select entry or Mute microphone Mute Hold call extension 23 Forward call extension 23 Hold call handset Handset 1 6 Forward call handset Handset 1 6 Teleconference Handset 1 6 Receiver volume during a call Dialling pause Press and hold Key input lock on off Press and hold Save entries Menu OK Add OK Abc OK 0123 OK List entries Men...

Page 46: ... external Ring Type OK External Call OK Ring 1 10 OK Ring type VIP Ring Type OK VIP Call OK Ring 1 10 OK Ring type internal Ring Type OK Internal Call OK Ring 1 10 OK Ring volume external Ring Volume OK External Call OK level 1 5 OK Ring volume VIP Ring Volume OK VIP Call OK level 1 5 OK Ring volume internal Ring Volume OK Internal Call OK level 1 5 OK Ring on off external Ring On Off OK External ...

Page 47: ...Ring Tone OK Base Ring Tone 1 5 OK Ring on off Base Ring On Off OK Off or On OK Handset priority call alert Priority Call Alert OK Handset 1 6 or All OK Ring tones 2 4 6 OK Register handset Register Handset OK Base 1 4 OK System PIN 0000 OK De register handset De register OK System PIN 0000 Handset 1 6 OK Select base station Select Base OK Base 1 4 or Auto Base OK Change PIN code System PIN OK Inp...

Page 48: ...K Ring Type OK Ring 1 10 OK Set alarm ring volume Alarm OK Ring Volume OK level 1 5 OK Function Menu Function OK Play Snake Games OK Snake OK Play OK Play Guess Number Games OK Guess Number OK Start Game OK Walkie talkie function Walkie Talkie OK Enable OK Input Group ID 1123 OK Input WT ID 3 OK ...

Page 49: ...a ag OPERATING INSTRUCTIONS 43 Page Warranty Dear Customer thank you for purchasing our product In the case of a defect please return the device together with the receipt and original packing material to the point of sale ...

Page 50: ...fications This operating instruction manual serves purely for information purposes Its content is not part of any contract of sale All the data specified relates to nominal values The equipment and options described may differ from country to country according to national requirements ...

Page 51: ......

Page 52: ...All rights reserved ...

Reviews: