921300100_09_006
Page 2 from 3
duration by
disconnecting the mains power supply. Count the time that the
lamp lights and in case of less time than the minimum autonomous
duration the battery must be replaced. If the measured time is
considerably less than the minimum autonomous duration
t i
in battery recycling points.
contact
the installer. If the batteries must be replaced then use only
batteries of the same type and rating.
6.
I
s not allowed to discard batteries in to common trash
bins, they must be discarded only
1
4
5
6
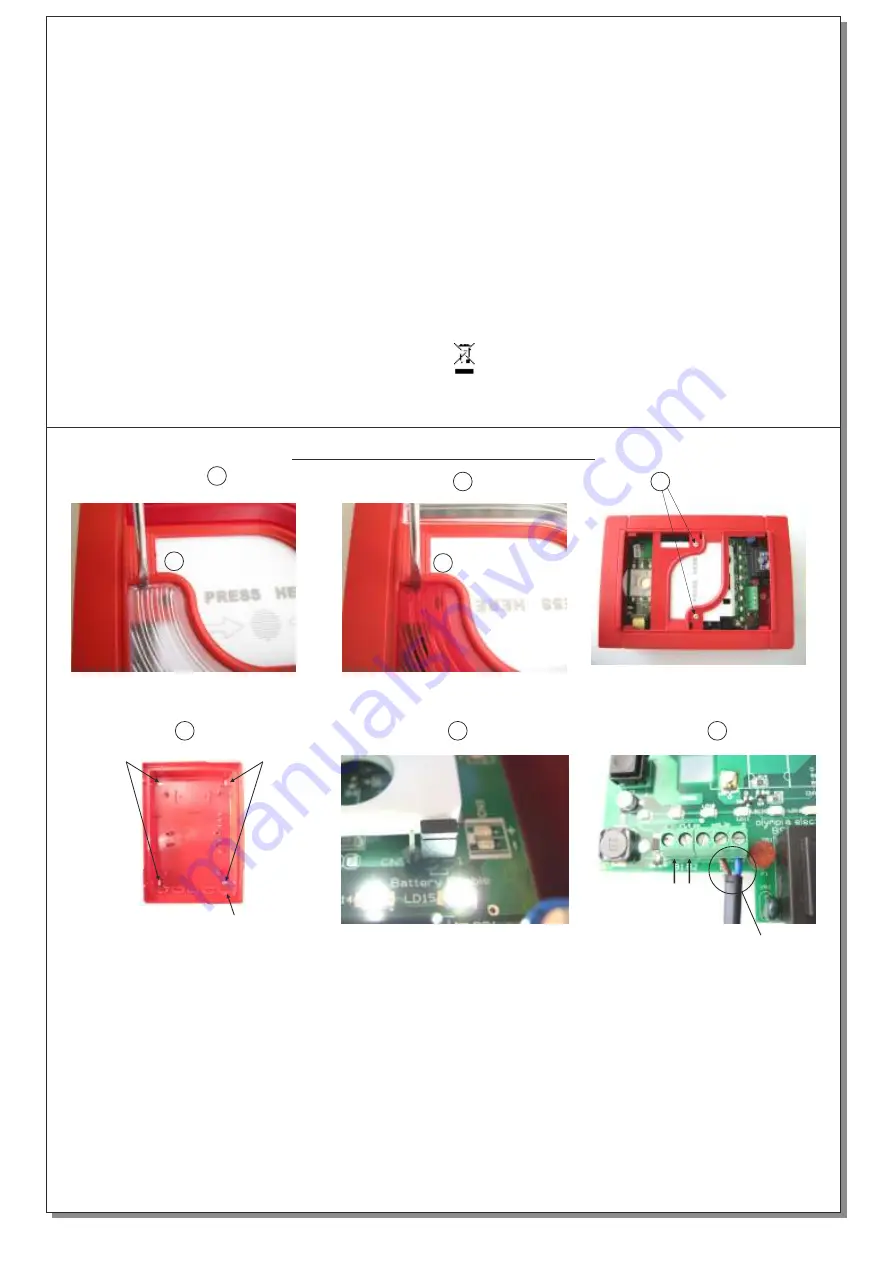
INSTALLATION PROCEDURE
2
Cable entry breakouts
Mounting holes
Connecting an
external call point
button
3
A
B
230V AC
1. In order to install the unit we must first remove the two diffusors. Place a flat blade screwdriver
into area
Α
and pry the plastic until the hook is disengaged.
2. Do the same with the other diffusor by placing a screwdriver in area
Β
and pry the plastic until
the plastic hook is disengaged.
3
.
After removing the two diffusors we must remove the two retaining screws that retain the
front cover.
4. Use the supplied mounting accessories to install the unit.
Pass the cables into the unit be breaking the appropriate breakout hole.
5. Install the “
battery enable” jumper as shown in photo 5
.


