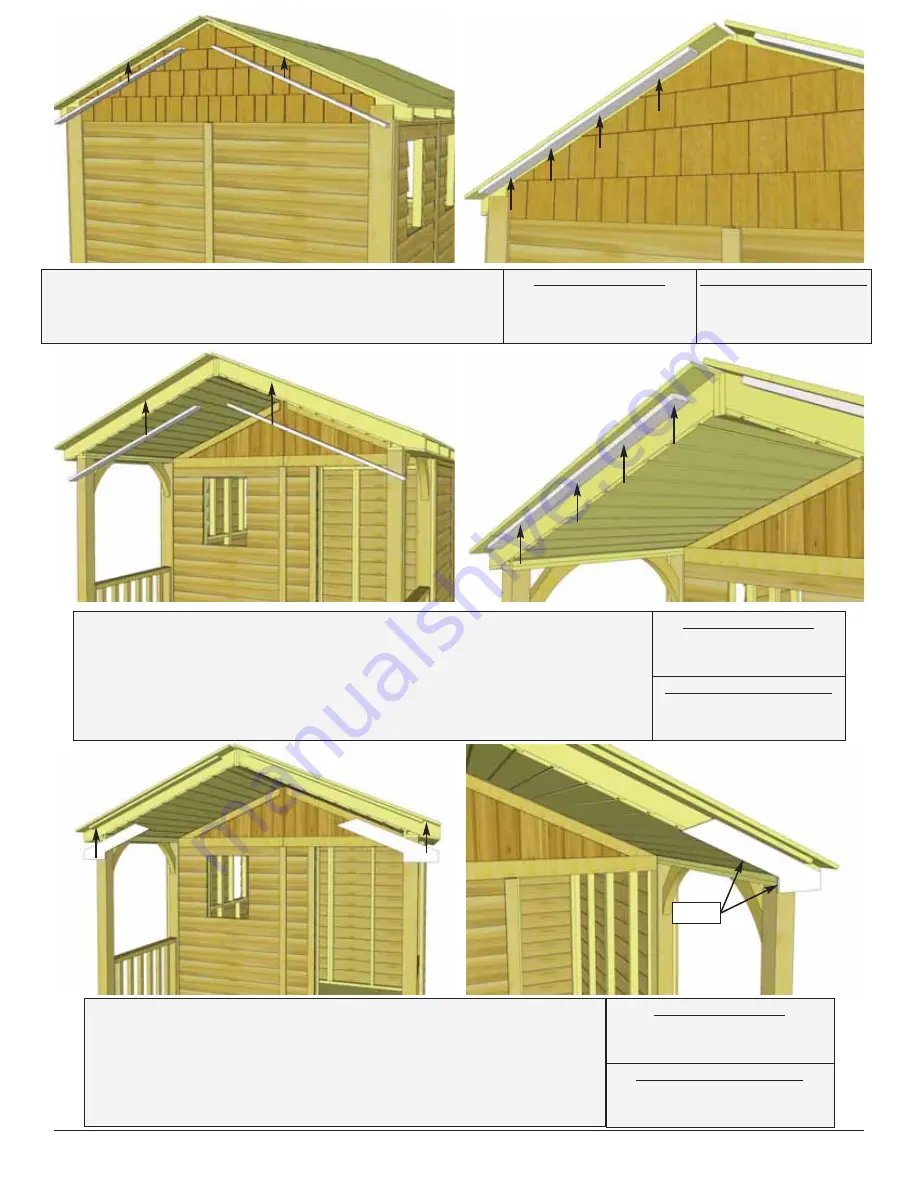
71.
Attach two
Roof Nailing Strips
to the underside of
the roof plywood on rear of shed. Align strips flush with
plywood ends. Fasten with
4 - 1 1/4” Screws
per piece.
Toll Free 1-888-658-1658 www.outdoorlivingtoday.com [email protected]
Page 40
72.
Attach remaining two
Roof Nailing Strips
to the underside of the
roof plywood on front of shed. These strips will be pushed tight against
the rafters unlike the Rear Nailing Strips. Fasten with
4 - 1 1/4” Screws
per piece.
73.
Position
Front Post Detail Covers
onto bottom corner of
rafters, tight underneath Facia Nailing Strips. Covers should be
approximately flush with the bottom of the Porch Roof, the inside
of the 4x4 Porch Post, and the Rafter ends. Attach with
4 - 1 1/2”
Finishing Nails
per piece.
Parts (Steps 71)
Roof Nailing Strips
(3/4” x 2 1/2” x 48”)
x 2
Hardware (Steps 71)
S2
- 1 1/4” Screws
x 8 total
Parts (Steps 72)
Roof Nailing Strips
(3/4” x 2 1/2” x 48”)
x 2
Hardware (Steps 72)
S2
- 1 1/4” Screws
x 8 total
Parts (Steps 73)
Front Post Detail Covers
(1/2” x 5 1/2” x 23 1/4”)
x 2
Hardware (Steps 73)
N1
- 1 1/2” Finishing Nails
x 8 total
Flush


