22
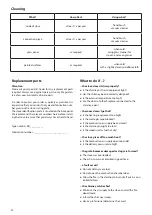
Cleaning
What?
How often?
Using what?
inside of stove
at least 1 x per year
hand brush,
vacuum cleaner
connection piece
at least 1 x per year
hand brush,
vacuum cleaner
glass panel
as required
when cold
using glass cleaner for
stoves- and oven glasses
painted surfaces
as required
when cold
with a slightly damp microfibre cloth
Replacement parts
Attention
:
Please ask your specialist trader for any replacement parts
required. Always use original spare parts only. We guaran-
tee a ten-year availability of spare parts.
In order to process your order as quickly as possible, it is
imperative that you send us the type and fabrication num-
ber given on the stove’s rating plate.
The stove identification plate is situated on the back panel.
We recommend the relevant numbers here before install-
ing the stove to ensure that you always have them to hand:
Type number: 28/__________
Fabrication number: __________________________
What to do if ...?
... the stove doesn’t draw properly?
●
Is the chimney or the stovepipe not tight?
●
Has the chimney been incorrectly designed?
●
Is the external temperature too high?
●
Are the doors of other fireplaces connected to the
chimney open?
... the room doesn’t get hot?
●
Is the heating requirement too high?
●
Is the waste gas pipe blocked?
●
Is the combustion air supply been closed?
●
Is the chimney draught too low?
●
Is the wood used as fuel not dry?
... the stove gives off too much heat?
●
Is the combustion air supply open too wide?
●
Is the delivery pressure too high?
... the grate becomes damaged or slags are formed?
●
The stove was overloaded.
●
The ash pan was not emptied in good time.
... a fault occurs?
●
Do not add any more fuel.
●
Do not open the combustion chamber door.
●
Allow the fire in the chimney to burn itself out in a con-
trolled fashion.
... the chimney catches fire?
●
Minimize the air supply to the stove and call the fire
department.
●
Inform the chimney sweep.
●
Have a professional determine the cause?
Summary of Contents for HKI Leo 28/9251
Page 6: ...6 Montage PowerBloc Bitte den Montageschritten folgen 1a 2a 3a 4a 1b 2b 3b 4b...
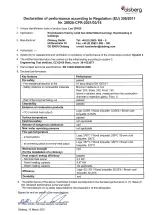
Page 13: ...13 Leistungserkl rung...
Page 18: ...18 Install PowerBloc Please follow the assembly steps 1a 2a 3a 4a 1b 2b 3b 4b...
Page 24: ...24 Leistungserkl rung...
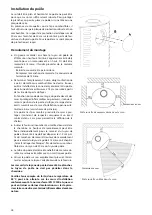
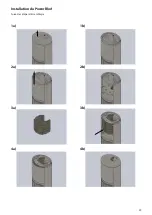
Page 29: ...29 Installation du PowerBloc Suivez les tapes d assemblage 1a 2a 3a 4a 1b 2b 3b 4b...
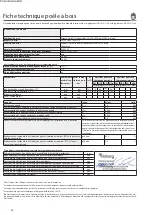
Page 35: ...35 Leistungserkl rung...


