background image


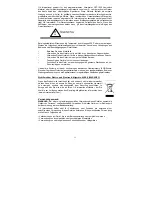
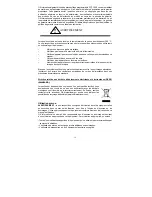
With power applied, the tip temperature can be > 300°C. Failure to observe the following 
precautions may lead to injury to users or damage the equipment: 
 
• 

Do not touch any metallic parts 

• 

Do not use near flammable items  

• 

Do not use unit for any function other than described in this manual  

• 

Use in a well ventilated area  

• 

Do not use the equipment with wet hands  

• 

Connect only to properly grounded outlets to prevent risk of electric shock. 

 
Although the systems offer superior EOS (Electrical Overstress) protection, periodic 
checks of the instrument cord should be incorporated into standard operator 
maintenance procedures. 


Waste Electrical and Electronic Equipment Directive - WEEE (2002/96/EC). 

 
When this product is no longer required, if it cannot be re-used, 
we ask our customers not to dispose of it as unsorted municipal 
waste but to appropriately recycle the product. In Europe, please 
contact your OK International distributor who can advise the 
recycling options available (www.okinternational.com). 


Intended Use:


WARNING:

 Use of this equipment in ways other than those described in this User Guide 

may result in injury to persons or damage to property. Use this equipment only as 
described in this User Guide.  
OK International cannot be responsible for injuries or damages resulting from unintended 
applications of its equipment. Unintended uses may result form taking the following 
actions: 
 
• Making changes to equipment that has not been recommended in the User Guide 
• Using incompatible or damaged replacement parts 
• Using unapproved accessories or auxiliary equipment 

WARNING


!


Summary of Contents for PCT-1000

Page 1: ...le Preheater Programmierbarer Vorw rmer Unit de pr chauffage programmable Preriscaldatore programmabile Precalentador programable PCT 1000 User Guide PCT 1000 Betriebsanleitung PCT 1000 Manuel d utili...

Page 2: ...Board holder ATH 1000 Adjustable Tool Holder and LM 1000 LED Light Magnifier CONTENTS Page 1 Specifications 1 2 Symbol Definitions 2 3 Connecting the Unit and Quick start 3 4 Operating Instructions 3...

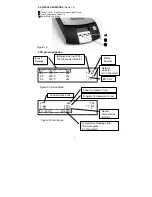
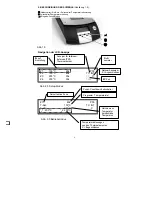
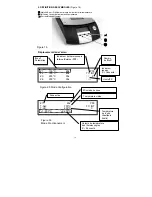
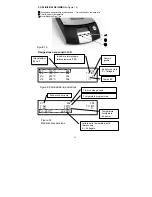
Page 3: ...C T C2 200o C Zone 1 Settings Figure 1 0 Z1 100o C 60s P05 Z2 150o C 45s TC INT Z3 200o C 30s ZC C Z4 250o C 30s 120s Internal External TC1 Thermocouple Indicator Profile Number ZC Time Network indica...

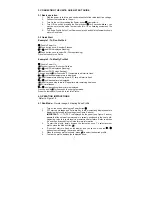
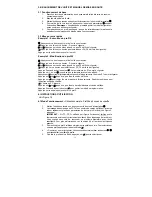
Page 4: ...ard Z1 time will start to flash or until desired time is displayed to set time and step forward Repeat for each remaining heat zone ZC time flashes or until desired cool down time is displayed Press a...

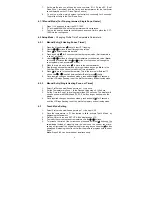
Page 5: ...modify the Time parameter 8 Press to move to the next parameter This is the Internal or External TC option Use or to switch between Int or Ext or press to skip 9 Once required changes have been made p...

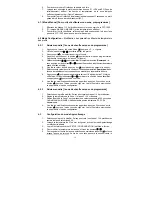
Page 6: ...thermocouple Ensure the thermocouple is firmly inserted into the correct TC connector Replace thermocouple if problem persists d Flashing zone and temperature parameters while in Run Mode Indicates th...

Page 7: ...C When this product is no longer required if it cannot be re used we ask our customers not to dispose of it as unsorted municipal waste but to appropriately recycle the product In Europe please contac...

Page 8: ...Leiterkartenhalter BH 1000 den verstellbaren Werkzeughalter ATH 1000 und die LED Leuchtlupe LM 1000 INHALT Seite 1 Technische Daten 7 2 Beschreibung der Symbole 8 3 Anschluss des Ger tes und Kurzanlei...

Page 9: ...2 200o C Zone 1 Einstellung Abb 1 0 Z1 100o C 60s P05 Z2 150o C 45s TC INT Z3 200o C 30s ZC C Z4 250o C 30s 120s Anzeiger f r Internes Externes TC1 Thermoelement Profil nummer ZC Zeit Netzwerk anzeige...

Page 10: ...ie Temperatur zu akzeptieren und zum n chsten Schritt zu gelangen Die Z1 Zeit beginnt zu blinken oder dr cken bis die gew nschte Zeit angezeigt ist dr cken um die Zeit zu akzeptieren und zum n chsten...

Page 11: ...Parameter zu gelangen 7 Gehen Sie auf diese Weise durch alle Parameter und geben Sie die gew nschten Werte ein Hinweis In der Abk hlzone kann nur der Zeitparameter ge ndert werden 8 Dr cken Sie um zu...

Page 12: ...ng 1 Weiterf hrende Informationen zur Verwendung der Option TC TC1 sind der erweiterten Betriebsanleitung zu entnehmen 5 Problembehebung a Ger t schaltet sich nicht ein Pr fen Sie das Netzkabel Pr fen...

Page 13: ...ie das Ger t nicht mit nassen H nden an Schlie en Sie das Ger t nur an ordnungsgem geerdete Steckdosen an um Stromschl ge zu vermeiden Obwohl die Systeme mit einem hochwertigen elektrischen berlastsch...

Page 14: ...0 BH 1000 le support d outil r glable ATH 1000 et la loupe lumineuse LM 1000 SOMMAIRE Page 1 Sp cificit s techniques 13 2 D finition des symboles 14 3 Branchement de l unit et mise en route rapide 15...

Page 15: ...C T C1 200o C T C2 200o C Zone 1 Param tres Figure 1 0 Z1 100o C 60s P05 Z2 150o C 45s TC INT Z3 200o C 30s ZC C Z4 250o C 30s 120s Indicateur de thermocouple Interne Externe TC1 Num ro de Profil Heu...

Page 16: ...yez sur ou sur jusqu ce que la temp rature voulue s affiche Appuyez sur pour r gler la temp rature et passer l tape suivante L heure de Z1 se met clignoter Appuyez sur ou jusqu ce que l heure voulue s...

Page 17: ...eur de votre choix pour les autres param tres Remarque dans la zone de refroidissement vous ne pouvez modifier que le param tre d heure 8 Appuyez sur pour passer au param tre suivant Il s agit de l op...

Page 18: ...informations compl mentaires sur cette application 5 D pannage a L unit ne se met pas sous tension V rifiez le cordon d alimentation V rifiez l alimentation du secteur b OH s affiche l cran L unit a d...

Page 19: ...z l appareil que sur les prises correctement reli es la terre pour viter le risque de choc lectrique Bien que les syst mes offrent une protection sup rieure contre les surcharges lectriques l op rateu...

Page 20: ...l portastrumento regolabile ATH 1000 e la lente di ingrandimento a luce LED LM 1000 SOMMARIO Pagina 1 Specifiche tecniche 19 2 Definizioni dei simboli 20 3 Collegamento dell unit e avvio rapido 21 4 I...

Page 21: ...T C2 200o C Impostazioni Zona 1 Figura 1 0 Z1 100o C 60s P05 Z2 150o C 45s TC INT Z3 200o C 30s ZC C Z4 250o C 30s 120s Indicatore termocoppia interna esterna TC1 Numero profilo Tempo ZC Indicatore di...

Page 22: ...ntenere premuto il tasto per 2 secondi La temperatura Z1 inizia a lampeggiare Premere oppure fino a quando non viene visualizzata la temperatura desiderata Premere per impostare la temperatura e proce...

Page 23: ...atura della zona 1 inizia a lampeggiare 5 Utilizzare i tasti e per modificare la temperatura e portarla sul valore desiderato Nota premendo il tasto o per 5 secondi il conteggio crescente o decrescent...

Page 24: ...con una termocoppia interna INT vedere la Figura2 v sopra le due termocoppie esterne possono essere utilizzate per controllare la temperatura 2 Collegare una termocoppia a TC1 o TC2 e all area da con...

Page 25: ...funzioni diverse da quelle descritte in questo manuale Usare in aree ben ventilate Non usare l apparecchiatura con le mani bagnate Al fine di garantire la protezione dal rischio di folgorazione colleg...

Page 26: ...1000 y la Lupa con luz LED LM 1000 CONTENIDO P gina 1 Especificaciones 25 2 Definiciones de s mbolos 26 3 Conexi n de la unidad y gu a de inicio r pido 27 4 Instrucciones de operaci n 27 5 Soluci n de...

Page 27: ...C T C2 200o C Configuraci n Zona 1 Figura 1 0 Z1 100o C 60s P05 Z2 150o C 45s TC INT Z3 200o C 30s ZC C Z4 250o C 30s 120s Indicador de termocupla Interna Externa TC1 N mero de perfil Duraci n de ZC I...

Page 28: ...ra Z1 comenzar a parpadear o hasta que aparezca la temperatura deseada para definir la temperatura y continuar con el paso siguiente La duraci n Z1 comenzar a parpadear o hasta que aparezca la duraci...

Page 29: ...gundos el valor ascender o descender de forma acelerada 6 Una vez definido el valor presione para pasar al par metro siguiente 7 Recorra los par metros e ingrese los valores durante el proceso Nota en...

Page 30: ...anterior 4 5 Informaci n para usuarios avanzados 1 Cuando se usa la opci n de TC TC1 consulte la Gu a para usuarios avanzados donde encontrar m s informaci n sobre la aplicaci n 5 Soluci n de problem...

Page 31: ...manos h medas Conecte el dispositivo nicamente a tomacorrientes que tengan la debida conexi n a tierra para evitar el riesgo de choque el ctrico Aunque los sistemas ofrecen una protecci n EOS sobrete...

Reviews:

Related manuals for PCT-1000