Oki OKIOFFICE 84 Quick Reference Download Page 5

Quick Reference

|

E-5

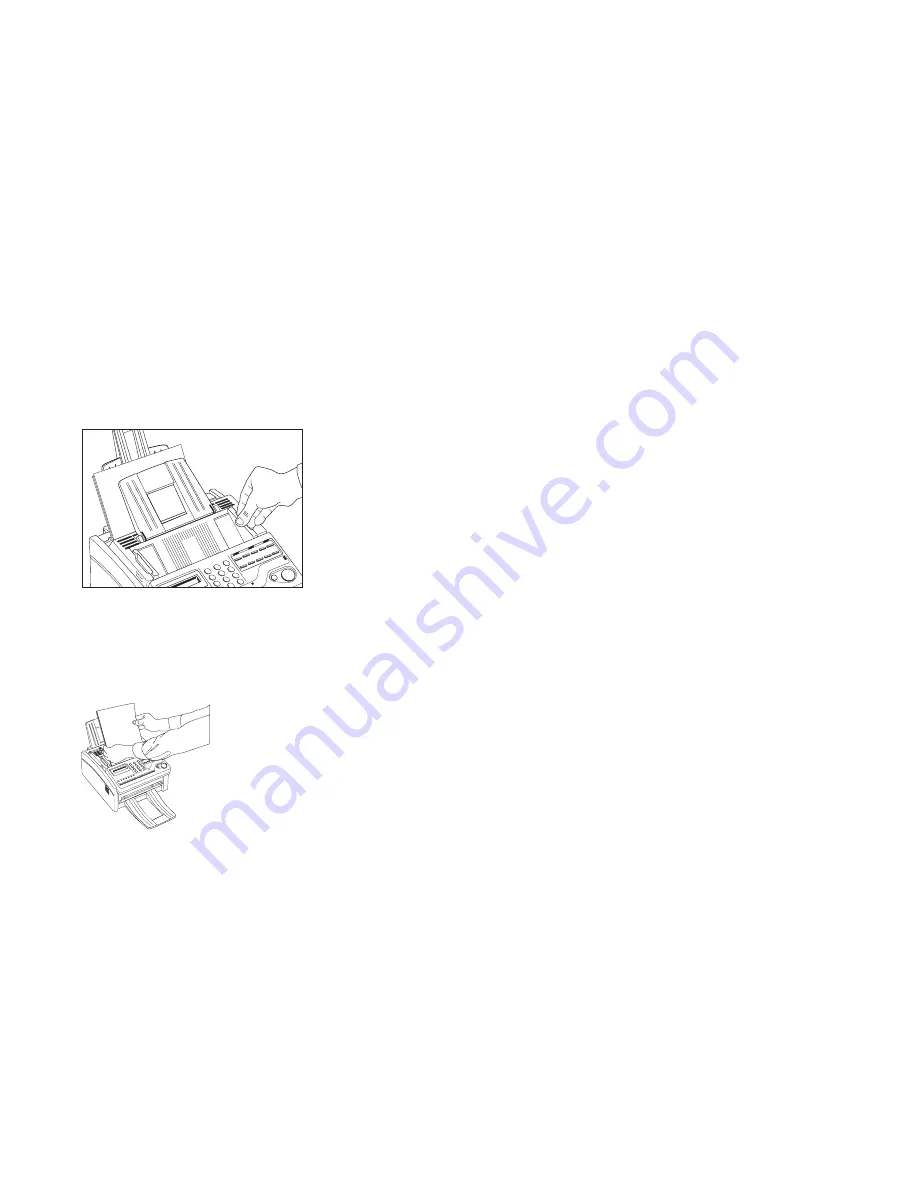
Loading the Document

Adjust document guides to the width of the document.

Stack documents neatly and insert face down. Readjust

the document guides for a snug fit.

OKIOFFICE grips the documents and pulls the bottom

page into the machine.

Using Manual Feed

Using the markings on the manual feeder slot as a
positioning guide, insert a single sheet of paper or envelope
face up in the slot until you feel the OKIOFFICE 84 grab
hold of it.

Changing Resolution

Change resolution by pressing 

§

§

§

§

§

YES. The resolution

(photo, extra fine, fine, or standard) is marked by an LED
display just above the 

§

§

§

§

§

YES key.

Changing Contrast

Change contrast by pressing 

©

NO. The contrast (light,

normal, or dark) is marked by an LED display just to the
right of the 

©

NO key.

Summary of Contents for OKIOFFICE 84

Page 1: ...6 Auto Speed Dial 6 Group Dial 7 Broadcasting 7 Redialing 8 Switching Between Memory Feeder Transmit Modes 8 Search Key Dialing 8 Delay Transmission 9 Sending a Delayed Fax from the Document Feeder 9...

Page 2: ...opyright 1999 by Okidata All rights reserved Written and produced by the Okidata Training Publications Department Please address any comments on this publication by mail to Training Publications Depar...

Page 3: ...Quick Reference E 3 Control Panel 1 Numeric Keypad 2 One Touch Keypad...

Page 4: ...press YES 7 Press Select Function to finish Fax I D 1 Press Select Function 2 Press 9 User Program 3 Press 4 on the numeric keypad 4 Press YES 5 Enter the full telephone number of your fax machine us...

Page 5: ...Using the markings on the manual feeder slot as a positioning guide insert a single sheet of paper or envelope face up in the slot until you feel the OKIOFFICE 84 grab hold of it Changing Resolution...

Page 6: ...t 8 Enter the alternate fax number if desired Refer to steps 4 and 5 9 Press Start to finish programming the One Touch key 10 To continue programming One Touch keys go back to step 3 When you are fini...

Page 7: ...arch key to find the desired location 6 Press YES to add the location to the group 7 Continue to add locations to the group as needed 8 When you are finished programming your group press NO 9 To progr...

Page 8: ...Press NO to switch between memory and feeder transmit modes 6 Press Select Function to register your selection Search Key Dialing Use the Search key to look through the alphabetical list of Location I...

Page 9: ...the date and time you have set before feeding the document and sending the fax Sending a Delayed Fax from Memory 1 Load your documents 2 Press Select Function 3 Press 1 Delayed TX 4 If the transmissi...

Page 10: ...OFFICE 84 scans the documents into memory and waits until the set date and time before sending the fax When scanning is completed your OKIOFFICE 84 is available for other transmission operations Cance...

Page 11: ...ll begin copying momentarily To make multiple copies enter the number of copies required using the numeric keypad 4 Press Copy again to start copying Using Manual Paper Feeder 1 Load your documents 2...

Page 12: ...markings on the manual feeder slot as a positioning guide insert a single sheet of paper or envelope face up in the slot until you feel the OKIOFFICE 84 grab hold of it 2 Issue the command to print t...

Page 13: ...A dialog box appears saying A Document has been placed into the input tray Would you like to scan it 3 Click Yes 4 A dialog box lets you control resolution regular or inverted image dimensions of sca...

Page 14: ...Overview E 14 OKIOFFICE 84 Using JetSuite Pro See your JetSuite Software User s Guide for more details 1 Select folder 2 Select file 3 Select operation...

Reviews: