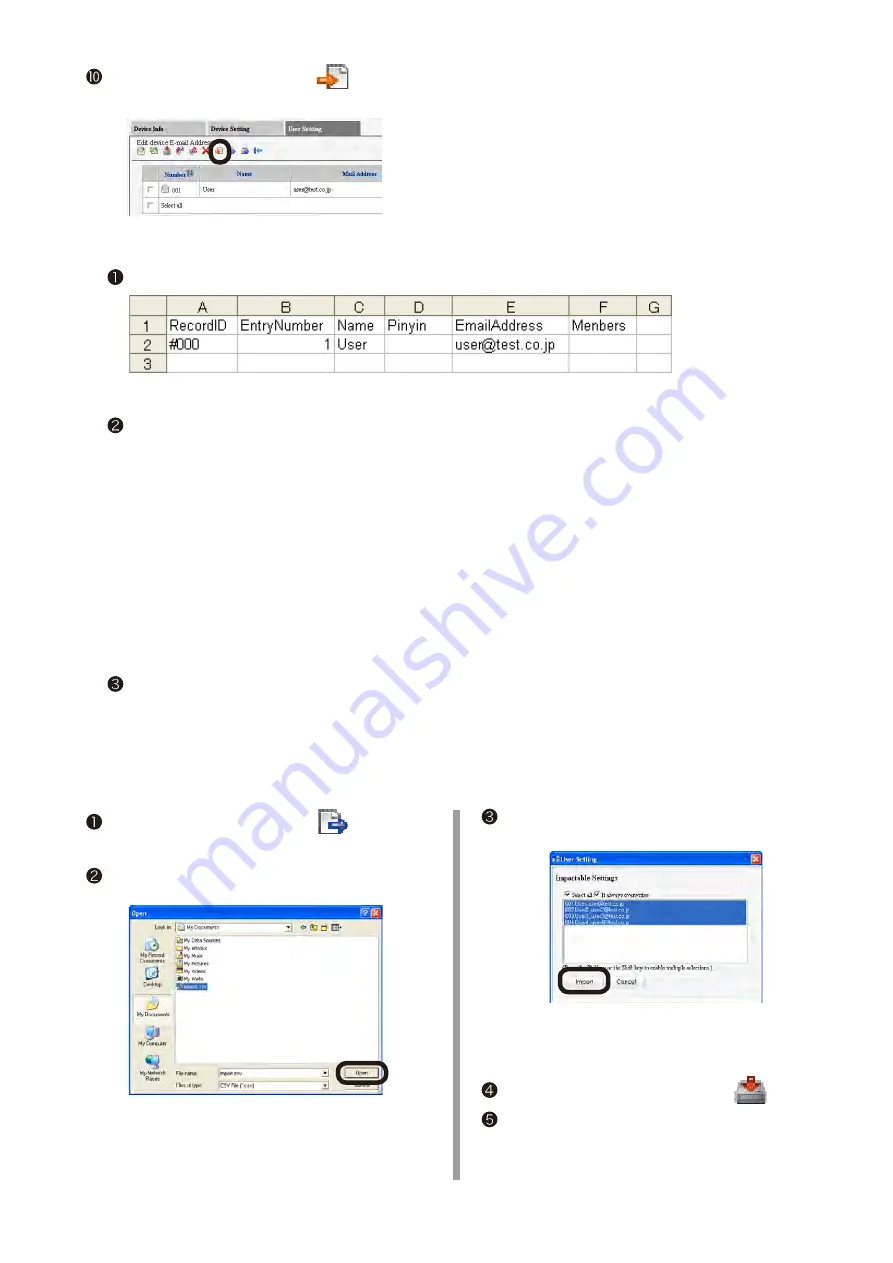
Click the [Export to File] icon
to write out
the email address book as a CSV file.
4-2 Add addresses to the CSV file
Open the created CSV file in Microsoft-Excel.
Click the [Import from File] icon
of the Email
address manager.
Select a CSV file to click [Open].
Select email addresses to be imported, and click
[Import].
Note!
If the number of characters exceeds the
limit, or the Excel is not closed, “File can
not be imported” is displayed.
Click the [Save To Device] icon.
Exit the Configuration Tool.
The registration of the email address
book is completed.
Note:
Do not change the item names, etc already entered when opening the CSV file.
Enter items you want to register in the CSV file.
A: Make sure to put “#” to the left the (RecordID) column, and add the number of items you want to
register, like #001, #002…
B: In the (EntryNumber) column, add the number of items you want to register, like 2, 3, …
C: In the (Name) column, add a destination name.
Note:
The destination name is up to 16 characters in Email Address Book, and 24characters in Address Book.
D: Nothing has to be entered in the (Pinyin) column.
E: In the (MailAddress) column, enter an email address (FAX number for Address Book).
Note:
If the first 0 of a phone number is deleted, specify the character in the display format.
F: Nothing has to be entered in the (Member) column.
After everything is entered, save the file as a CSV format and quit the Excel.
Note:
Up to 500 entries can be made in each of email address book and addess book in the MC860.
A file with more than 500 entries that cannot be imported as described in secton 4-3.
4-3 Import the CSV file to MC860.


