background image

2

1

3

4

5

6

7

TROUBLESHOOTING FOR THE HARDWARE

- 18 -

TROUBLESHOOTING FOR THE HARDWARE

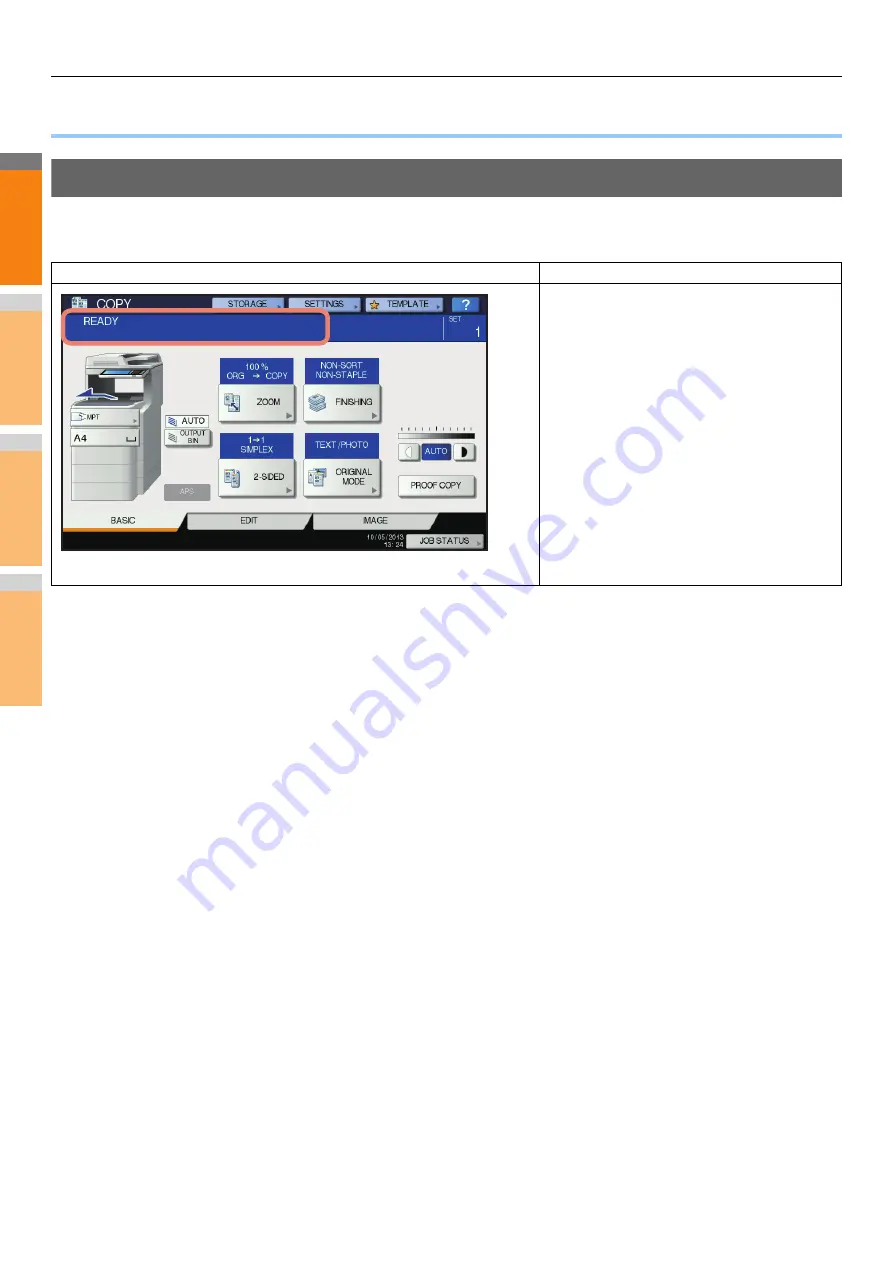
When This Screen Is Displayed

Various screens are displayed on the touch panel depending on the state of the equipment. This section describes how to solve 
problems with some of the screen examples.

Screen

Description / Remedy

A message appears on the upper part of the screen to 
notify users of a problem, etc. For the major examples, 
see the following pages. 


P.19 "Messages Displayed on the Touch Panel"

Summary of Contents for MB760dnfax

Page 1: ...User s Manual Troubleshooting Guide...

Page 2: ...24 Retrieval of printer configuration failed 24 Cannot change settings on the Device Settings tab 24 Network Connection Problems 24 Cannot print with the equipment network connection problems 24 Canno...

Page 3: ...8 Recommended Schedule for Replacing the Image Drum Cartridge 58 Replace the Toner Cartridge 59 Replace Only the Image Drum To continue to use the toner cartridge currently in use 60 Replace the Image...

Page 4: ...HE HARDWARE P 18 TROUBLESHOOTING FOR PRINTING P 22 TROUBLESHOOTING FOR COPYING P 27 TROUBLESHOOTING for FAX P 29 TROUBLESHOOTING FOR SCANNING P 32 TROUBLESHOOTING FOR e Filing P 33 TROUBLESHOOTING FOR...

Page 5: ...following table to remove the jammed paper When a paper jam occurs in Tray 1 Multi Purpose Tray MPT 1 Remove the cassette from Tray 1 2 Remove the jammed paper If you cannot see the jammed paper do n...

Page 6: ...the right side of the machine and pull the front cover open lever to open the front cover forward 7 Remove the jammed paper gently by pulling the edge of paper if the edge of jammed paper can be seen...

Page 7: ...front cover open lever to open the front cover forward Note Open the front cover gently If you open it rapidly the multi purpose tray may open 2 Pull out the duplex unit by holding the grips on its bo...

Page 8: ...ront cover gently If you open it rapidly the multi purpose tray may open 3 Open the top cover 4 Remove the print cartridge and place it on a flat surface 5 Cover the removed print cartridge with paper...

Page 9: ...ack side 10Pull out the jammed paper gently while tilting the release levers on the fuser unit forward if an edge of jammed paper cannot be seen If an edge of jammed paper still remains inside the uni...

Page 10: ...1 Hold the Document holder lever and lift the Document holder 2 Insert your finger into the recess on the right side of the machine and pull the front cover open lever to open the front cover forward...

Page 11: ...nd be sure to pull out the jammed paper forward gently 9 Hold the fuser unit handle and return the fuser unit into its original position 10Return the print cartridge into the machine carefully 11 Clos...

Page 12: ...he duplex unit 1 Open the rear cover by pulling the lock lever at the center of the back side of the machine toward you 2 Check for jammed paper inside the machine If jammed paper remains remove it 3...

Page 13: ...e error You must also complete steps 4 to 7 4 Hold both sides of the Multi Purpose Tray MPT and fold it down 5 Insert your finger into the recess on the right side of the machine and pull the front co...

Page 14: ...Inner Finisher Option There is a paper jam near the Inner Finisher 1 Hold the Document holder lever and lift the Document holder 2 Open the finisher cover 3 Remove the jammed paper 4 Close the finish...

Page 15: ...document with force 3 If you were able to remove the document proceed to step 3 2 Open the inner cover to pull out the jammed document 1 Open the inner cover 2 If you can see the edge of the jammed d...

Page 16: ...e Memo If an error occurs while copying the copying gets canceled When a Staple Jammed When Staple Jam Occurs in Inner Finisher Option 1 Hold the Document holder lever and lift the Document holder 2 O...

Page 17: ...to its original position 7 Place the cartridge 8 Close the finisher cover 9 Return the document holder to its original position When Staple Jam Occurs in Offline Stapler Option 1 Open the offline stap...

Page 18: ...yed on the touch panel depending on the state of the equipment This section describes how to solve problems with some of the screen examples Screen Description Remedy A message appears on the upper pa...

Page 19: ...nal following the guidance on the touch panel P 15 When a Document is Jammed The direction or the size of the original placed on the Reversing Automatic Document Feeder is incorrect Check the directio...

Page 20: ...lace the original while aligning the side guides of the Reversing Automatic Document Feeder to its width so that it will be placed straight Time for periodic maintenance The equipment requires inspect...

Page 21: ...store originals Will you print out stored originals Internal memory available ran out while scanning To print out the data for the originals stored scanned until the message appeared press YES on the...

Page 22: ...ing paper on the multi purpose tray MPT 1 Press the JOB STATUS which is blinking 2 Place paper of the size specified with the computer on the multi purpose tray MPT and press the START button Printing...

Page 23: ...the PDL Settings tab in Customization of the Device Settings tab before printing such documents Printer Driver Problems This section describes the troubleshooting for the printer drivers Cannot print...

Page 24: ...ettings cannot be changed Corrective Action Users who do not have the privilege to change the printer driver setting cannot change the options in the Device Settings tab Please log in with the Adminis...

Page 25: ...roblems P 24 Network Connection Problems P 38 Printing Problems Network Related Another possible cause is one related to a client If the print jobs sent from a specific client within a network fail th...

Page 26: ...rly Are copy jobs output properly Next Step Check the device status displayed in the Device page of TopAccess 2 See the Device page of TopAccess Are the options specified for the job supported by the...

Page 27: ...mage has stains The Reversing Automatic Document Feeder is not fully lowered Lower it fully to block outside light The original glass platen sheet scanning area and guide are stained Clean them The co...

Page 28: ...2 1 3 4 5 6 7 TROUBLESHOOTING FOR COPYING 28 Copied image has black streaks in the horizontal direction The scanning area or guides are stained Clean them Problem Description Cause Corrective Action...

Page 29: ...here is sufficient memory before making the call again 0050 Line busy Retry communications 0053 Security mismatch in relay or mail box transmission Confirm the remote party s security code system pass...

Page 30: ...correctly facing up When placing the original on the original glass specify the original size Black lines are shown in the image that was sent Is the scanning area of the Reversing Automatic Document...

Page 31: ...MFP ES7170dfn MFP MB760 MB770 MB770f MPS5502mb MPS5502mbf Size of Original North America LG LT ST Size of Original A B format A4 A5 B5 FOLIO Recording Paper Size North America 8 5 x 14 LG 8 5 x 11 LT...

Page 32: ...file is smaller than equal to the maximum data size receivable on the recipient s side For details on the network settings refer to the TopAccess Guide For details on e mailing the scanned image refe...

Page 33: ...n window until the processing on the sub window has been completed Numerous sub windows repeatedly appear Problem Description Numerous sub windows repeatedly appear and e Filing becomes uncontrollable...

Page 34: ...has been reached Delete unnecessary documents and create a new document You can create up to 400 documents in each box and folder Cannot insert Page Maximum number of pages has been reached Delete un...

Page 35: ...vity on the hub and or NIC of the equipment and the client machine Do the hardware components appear to be functioning properly Next Step Contact your dealer 5 Confirm whether the Ethernet cable is no...

Page 36: ...upports the IPX SPX protocol make sure that the most current version of Novell Client software is installed Next Step See the vendor s website for information about product updates and technical suppo...

Page 37: ...P settings correct Next Step The settings are not binding contact your dealer 4 Try to ping the equipment again Did the equipment respond to the ping End Next Step 5 Can you ping the equipment from an...

Page 38: ...name unique Next Step Set up the device name correctly 3 Is the workgroup name valid and correctly entered Next Step Set up the workgroup correctly 4 When IPv4 is supported Is the WINS server address...

Page 39: ...Can you print to the equipment End See the following section to fix the problem P 24 Cannot print with the equipment network connection problems No Check Yes No Corrective Action 1 Are the IPX SPX pr...

Page 40: ...ces and Printers folder to start the Add Printer Wizard and perform the installation again 3 When the screen for selecting a printer is displayed select Have Disk 4 Select Use Existing Driver to add a...

Page 41: ...ibly because the installation procedure was not completed Corrective action Delete the driver and either reinstall it from the software DVD ROM or download it from this equipment N W Fax Driver Genera...

Page 42: ...the SSL compression Please disable the SSL compression on the RADIUS server Handshake failure Unsupported encryption may be set on the server Make sure to use the supported encryption method Illegal p...

Page 43: ...iption I cannot log into the equipment using client software Corrective Action If you cannot log into the equipment using client software contact the administrator of the equipment Since the user name...

Page 44: ...ped printing P 57 Replace the Print Cartridge Printer Error 2 This icon indicates You need to remove paper from the face down up stacker of the equipment You need to remove paper from the receiving tr...

Page 45: ...paper in the tray Paper Empty in Tray 3 Please Add Paper Set the paper in the tray Paper Empty in Tray 4 Please Add Paper Set the paper in the tray Paper Misfeed in Job Separator Please Clear Paper Pa...

Page 46: ...trator 3 Insert the Key Counter and perform printing again 4 Clear the Schedule Print setting and perform printing again 4211 Printing data storing limitation error Printing with the data being stored...

Page 47: ...nsufficient memory Complete any running jobs first before performing the job in error If the error still persists turn the power OFF and then back ON and try again 1C12 Message reception error Turn th...

Page 48: ...sk the sender to resend the Email 3B20 Content Type error Ask the sender to resend the Email with attached files that are TIFF format 3B40 Email decode error Ask the sender to resend the Email 3C10 3C...

Page 49: ...login type error Ask your administrator whether the POP3 login type Auto POP3 APOP is set correctly 3F10 3F20 File I O error Ask the sender to resend the Email If the error still occurs contact your...

Page 50: ...trator 2C45 Failure in making meta data Make sure that the template setting is correct and do the scanning again If the error still persists turn the power OFF and then back ON and then try again 2C60...

Page 51: ...ts after reattempting turn the power OFF and then back ON Then make another effort 2D44 Creating a file was not allowed Creating an unencrypted file was not allowed Configure the encryption settings a...

Page 52: ...k ON Then try to scan again If the error still persists contact your service representative 2E43 Encryption error Failure to create a file If the error still persists after reattempting turn the power...

Page 53: ...ze color mode or resolution This size color mode or resolution is not supported by e Filing Please check the paper size color mode or resolution 2BB0 Job canceled The job was canceled 2BB1 Power failu...

Page 54: ...ox Confirm the mailbox size on the mail server Transmit again in text mode or with a lower resolution If the error still persists divide the document and transmit again 2553 Mailbox name not allowed C...

Page 55: ...2 1 3 4 2 Maintenance Replacing Consumables Maintenance Units P 56 Maintenance P 69 Moving or Transporting the Machine P 76...

Page 56: ...oner should be cleaned up with a wet towel Some parts inside the device become hot and can cause burns Do not touch areas labeled Caution High Temperature Keep toner and toner cartridge out of reach o...

Page 57: ...rung 3 Take out the new print cartridge from its bag and remove the desiccant attached to it 4 Place a new print cartridge into the printer 5 Turn the blue lever of the print cartridge fully in the di...

Page 58: ...GE SUPPLIES NEAR LIFE MESSAGE from the USER FUNCTIONS menu is set to OFF the message Black image drum near life will not appear To get the best performance from your machine please genuine Okidata con...

Page 59: ...ge to unlock 3 Lift the toner cartridge from the right in the direction of the arrow 4 Take out the new toner cartridge from its bag 5 Peel off the tape from the toner cartridge 6 Place the new toner...

Page 60: ...ly more than 1 500 lux Even under the normal interior light do not leave it for more than 5 minutes In order for the printer to exhibit its full performance please use genuine Oki Data consumables Ser...

Page 61: ...ances or guidelines Replace the Image Drum and Toner Cartridge Simultaneously Note The image drum the green tube is very delicate Handle it carefully Do not expose the image drum to direct sunlight or...

Page 62: ...the toner cover and desiccant 4 Take out the new toner cartridge from its bag 5 Peel off the tape from the toner cartridge 6 Insert the toner cartridge into the image drum in the direction of the arr...

Page 63: ...that it is time to prepare a new fuser and transfer You can continue printing until the message Replace Fuser appears then printing will stop The fuser unit and transfer roller is recommended to be r...

Page 64: ...fully Do not expose the print cartridge to direct sunlight or very bright interior light approximately more than 1 500 lux Even under the normal interior light do not leave it for more than 5 minutes...

Page 65: ...roller from its bag Note Never touch the sponge on the transfer roller 12Hold the plastic parts of the transfer roller with the gear positioned on the left and push down the posts on the right and lef...

Page 66: ...al position Replacing the Inner Finisher Cartridge 1 Press the POWER button until a pip sound is heard Shutdown is in progress appears for a while and then the power is turned OFF Note Do not turn off...

Page 67: ...ake the empty staple case out of the staple cartridge 6 Install a new staple case into the staple cartridge 7 Press down the transparent cover and pull out the seal 8 Install the new cartridge 9 Close...

Page 68: ...Consumables Maintenance Units 68 2 1 3 4 5 6 7 Replacing the Offline Stapler Cartridge 1 Open the offline stapler cover 2 Remove the empty cartridge 3 Attach the new cartridge 4 Close the offline stap...

Page 69: ...1 Clean the surface of the machine with a soft cloth moistened with water or a neutral detergent 2 Dry the surface of the machine with a soft dry cloth Cleaning the platen glass surface If the platen...

Page 70: ...stic parts or paint 1 Pull the RADF cover open lever to open the RADF cover 2 Clean the document transporting roller 1 Clean the roller with a soft damp cloth Memo Rotate the roller manually making su...

Page 71: ...oller Clean the paper feed roller and pad when you experience frequent paper jams When cleaning the tray 1 Pull out the cassette 2 Wipe the two paper feed rollers inside the machine with a wet cloth t...

Page 72: ...the tab of the paper feed roller cover 4 Open the paper set cover until it touches the machine 5 Wipe the two paper feed rollers with a wet cloth that has been wrung out well 6 Open the separation rol...

Page 73: ...ay without returning the tab to the correct position the paper set cover may be broken Be sure to return the tab to its original position 11 Close the multi purpose tray If the multi purpose tray cann...

Page 74: ...cartridge to direct sunlight or very bright interior light approximately more than 1 500 lux Even under the normal interior light do not leave it for more than 5 minutes 6 Cover the removed print car...

Page 75: ...e top cover smoothly if you close the front cover halfway Be careful not to let the front cover return to its open position 10Close the front cover Note The front cover cannot be closed if the top cov...

Page 76: ...d then return the anti tip feet to their original positions For more information refer to the Setup Guide Transporting the Machine Because the machine is precision equipment it may get damaged during...

Page 77: ...hen open the top cover 7 Attach the stopper release to the fuser unit Attach the orange stopper release in the direction of the arrow while pressing the blue lever of the fuser unit down in the direct...

Page 78: ...ray units proceed to step 10 The separation procedure is the exact opposite of installation For more information refer to the Setup Guide 12Protect the machine with cushioning material Note Use the or...

Page 79: ...2 1 3 4 3 Battery Disposal P 80 Appendix...

Page 80: ...posal 80 Battery Disposal This machine uses a lithium ion battery If the terminal of the battery short circuits explosion or fire may occur To waste the battery insulate the negative and positive pole...

Page 81: ...2 1 3 4 4 Index...

Page 82: ...error 2 44 staples empty 45 toner empty 44 IPP print 39 L LDAP authentication 37 LDAP search 37 Local Discovery 36 Locating the equipment 35 36 LPR print 25 38 M Maintenance 69 document holding rolle...

Page 83: ...May 2013 45611502EE Rev1...

Reviews: