12
9
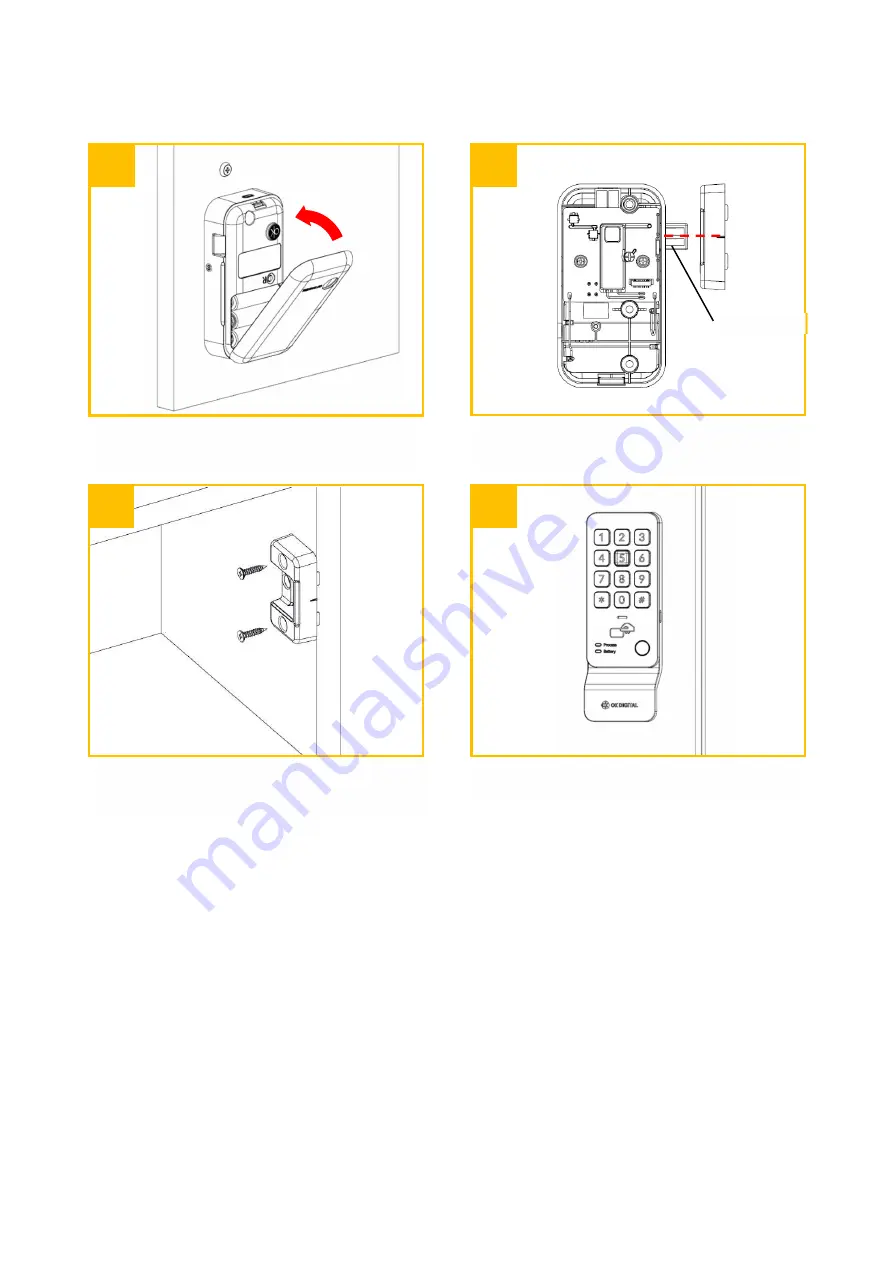
Position the strike on the door frame and tighten with two screws.
10
Test the lock after installation.
Press upper part of the battery cover until it clicks into place.
7
Align the strike with center of the dead-latch.
8
Dead latch
Page 1: ...LF20 Series Installation Guide...
Page 2: ...1 Supported door thickness 15mm 18mm 20 mm Please refer to the installation hole drawing and the user guide for proper installation Package included FRONT LF21 PL LF 23HL REAR LR21 Models...
Page 3: ...Bolts for 15 20mm doors Screws Washer for LF23 HL left hand door AA Batteries Not included Door Thickness Bolt size 15mm Flat Head Bolt M4 X 16mm 18mm 20mm Flat Head Bolt M4 X 20mm 25mm Flat Head Bol...
Page 4: ...f the door 2 Connect the front cable to the pin connector of the rear 3 Hold the front and rear units and tighten with two bolts Torque 3 of electric drill 4 Insert 3 AA batteries 5 Insert the upper h...
Page 5: ...4 8 Position the strike on the door frame and tighten with two screws 9 Test the lock after installation Align the strike with center of the dead latch 7 Dead latch...
Page 6: ...ect the front cable to the pin connector of the rear 3 Hold the front and rear units and tighten with two bolts Torque 3 of electric drill 4 Insert 3 AA batteries 5 Insert the lower hook of the batter...
Page 7: ...6 8 Position the strike on the door frame and tighten with two screws 9 Test the lock after installation Align the strike with center of the dead latch 7 Dead latch...
Page 8: ...the door 2 Connect the front cable to the pin connector of the rear 3 Hold the front and rear units and tighten with two bolts Torque 3 of electric drill 4 Insert 3 AA batteries 5 Insert the upper hoo...
Page 9: ...8 8 Position the strike on opposite door and tighten with two screws 9 Test the lock after installation Align the strike with center of the dead latch 7 Dead latch...
Page 10: ...e to the pin connector of the rear 3 Hold the front and rear units and tighten with two bolts Torque 3 of electric drill 4 Insert 3 AA batteries 5 Insert the upper hook of the battery cover Press lowe...
Page 11: ...10 9 Test the lock after installation 8 Position the strike on the door frame and tighten with two screws Align the strike with center of the dead latch 7 Dead latch...
Page 12: ...cable to the pin connector of the rear 4 Hold the front and rear units and tighten with a washer two bolts and a screw Torque 3 of electric drill 5 Insert 3 AA batteries 6 Insert the lower hook of the...
Page 13: ...strike on the door frame and tighten with two screws 10 Test the lock after installation Press upper part of the battery cover until it clicks into place 7 Align the strike with center of the dead la...
Page 14: ...le to the pin connector of the rear 3 Hold the front and rear units and tighten with two bolts Torque 3 of electric drill 4 Insert 3 AA batteries 5 Insert the upper hook of the battery cover Press the...
Page 15: ...14 8 Position the strike on opposite door and tighten with two screws 9 Test the lock after installation Align the strike with center of the dead latch 7 Dead latch...