background image

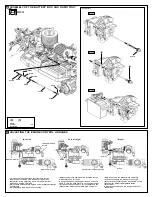
61

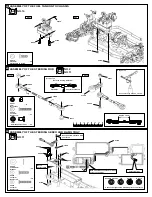
71

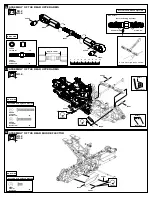
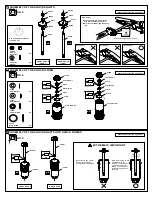
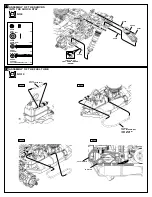
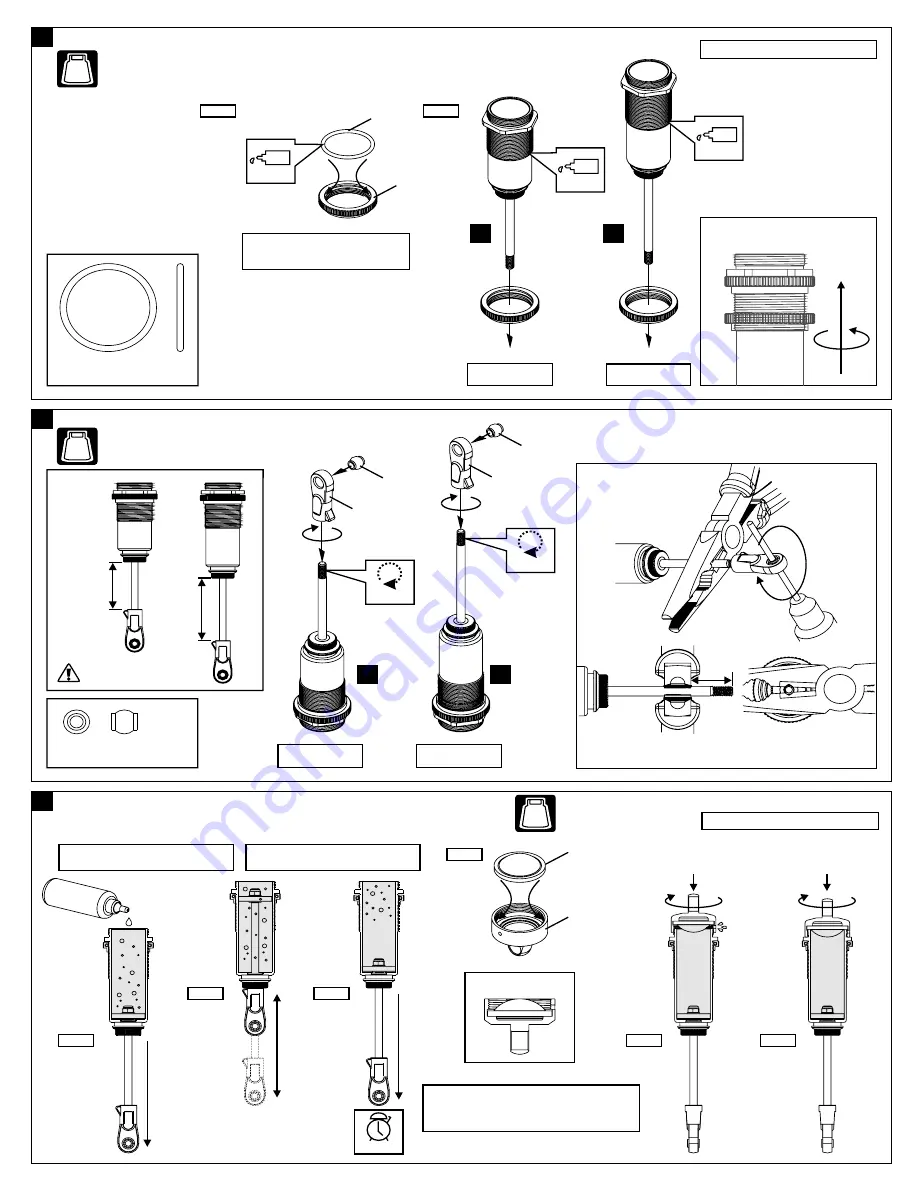
ASSEMBLY OF THE SHOCK ADJUST RING

ASSEMBLY OF THE SHOCK BALL END

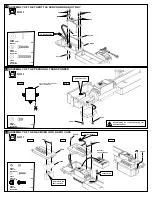
72

Assemble both left and right sides.

REAR SHOCK

FRONT SHOCK

Oil

41007
19x1.5 O-RING

Step 2

Step 1

Fit the o-ring into groove before
assembly.

Step detail

TOP

41007

41515

Oil

Oil

Step detail

Use tools to tighten as picture shown.

REAR SHOCK

FRONT SHOCK

.....x4

30403
6mm Ball

30403

30403

41350

41350

10mm

Step detail

4

0

m

m

2

9

m

m

Do Not

Over Tighten

Do Not

Over Tighten

Attention distance.

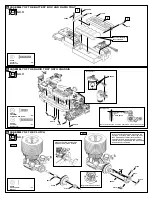
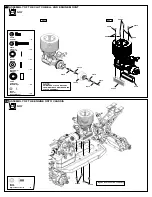
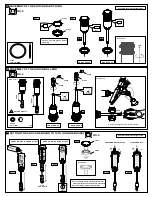
73

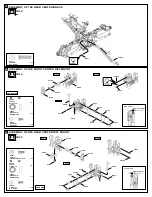
SETTING THE SHOCK REBOUND TO 100% (HIGH REBOUND)

HOC

 OI

S

K

L

Step detail

Step 1

Step 2

Step 5

Step 3

Step 4

41013

41329

FRONT (SHORT ) SHOCKS OIL #55

REAR (LONG ) SHOCKS OIL #40

3~5x

UP & DOWN

Step 6

TIGHTENED HALF WAY 50%

TIGHTENED 100%

  •Leave the filled shock vertically for several
    minutes with the shock shaft fully extended.

  •The remaining air bubbles will release.

Time

NO.9

BAG

NO.9

BAG

NO.9

BAG

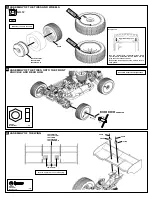
.....x4

x2

x2

x2

x2

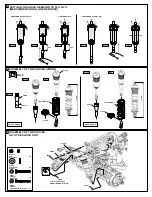
Assemble both left and right sides.

Summary of Contents for X3 Sabre

Page 1: ......

Page 2: ......

Page 3: ...nuts are properly tightened Always use fresh batteries for your transmitter and receiver before running the car If the radio does not have full control of the car with steering throttle and brake Do n...

Page 4: ...of after run in the engine to keep it from rusting Clear oil and dirt from chassis with a degreaser Squeeze fuel line and hold until engine stops With a rag cover exhaust outlet Do not run on public...

Page 5: ...t Screw Cement CA Screw Cement Transmitter Receiver Switch UM 3 Batteries For 8pcs Transmitter Servos 5 cell 6V Receiver Pack 21 Engine Glow Igniter S r Pa n p ay i t Spray Paint GEAR GREASE Gear Grea...

Page 6: ......

Page 7: ...2 5 2 5 41312 4 x 66mm Arm Shaft 41313 3 5 x 45 8 Rear Upright Shaft 1pc 1pc 4pcs 8pcs 2pcs 2pcs 2pcs 2pcs 2pcs 2pcs 2pcs 2pcs 2pcs 2pcs 4pcs 4pcs 2pcs 1pc 1pc 1pc 1pc 2pcs 2pcs 41314 Steering King P...

Page 8: ...Case F R 1pc 1pc 41344 Gear Case 1pc 41345 Front Lower Arms L R 1pc 41346 Suspension Eccentric Bushing 1pc 41347 Steering Knuckle Arm L R 1pc 41348 Front C Hub L R 1pc 41349 Body Post Center Brace 1p...

Page 9: ...1pc 4pcs 5pcs 3x12 3x10 3mm 41503 CNC 7075 Chassis Brace Front 41504 CNC 7075 Chassis Brace Rear 1pc 2pcs 3pcs 3x12 3x10 3mm 1pc 2pcs 2pcs 3x10 3mm 1pc 41406 CNC 7075 Suspension Holder FF 1pc 41407 CN...

Page 10: ......

Page 11: ...il Step 1 Step 2 Step detail Repeat tightening in this order 1 4 3 2 After assembly the differential should be 30 35mm measured from the ends of the installed ball bearings If differential is longer h...

Page 12: ...ings If differential is longer hold the bevel gear and retighten the 4 screws 31 2 mm Fill the diff oil just level with the top of the satellite gears Step detail Step detail 80 Use the Diff Oil 5000...

Page 13: ...70 2 5x5mm Hex Screw x1 94068 4x6mm Set Screw x1 5 ASSEMBLY OF THE FRONT PINION GEAR AND CVD SHAFT 41506 41302 CF 101 5mm For Center Front 41344 94075 5x8x0 3 Washer x1 NO 2 BAG NO 2 BAG NO 2 BAG S re...

Page 14: ...40024 40024 NO 1 BAG Tighten 41344 NO 2 BAG 7 40024 13x16x0 2mm Shim x2 94021 3x15mm Flat Head Hex Screw x2 94043 3x35mm Hex Screw x2 Adjust the backlash with the Shims Tighten 8 ASSEMBLY OF THE FRONT...

Page 15: ...Movement Initial setting Initial setting 55 mm After assembly the gear case should be 55mm measured from the ends of the installed front suspension block If differential is longer re tighten the 4 sc...

Page 16: ...E FRONT CVD INTO KNUCKLE ARMS 36055 94034 41307 41500 41306 41335 40526 x2 36055 2 5x16 8mm Pin x2 94034 4x4mm Set Screw x2 NO 2 BAG F 107 5mm For Front Assemble both right and left side S c r e w C m...

Page 17: ...as shown 41332 7x12mm Ball x2 94007 94008 94041 94007 3x20mm Hex Screw x2 94008 3x25mm Hex Screw x2 94041 3mm Nylon Nut x4 ASSEMBLY OF THE FRONT UPPER ARMS 41319 41319 41318 41351 41351 41317 94041 4...

Page 18: ...mm Hex Screw 19 ASSEMBLY OF THE STEERING TIE ROD 41331 7x8 5mm Ball x4 Make two steering rods for left and right hand sides Step detail Approx 26mm Step detail 36790 4x46mm Turnbuckle x2 41331 41350 3...

Page 19: ...94003 3x10mm Hex Screw x2 94022 3x18mm Flat Head Hex Screw 41335 2 5x12 8mm Pin x1 41306 41410 41349 41507 41335 CR 113mm For Center Rear 23 Step detail 94059 2 6x6x0 5mm Washer x1 37430 5x11x4mm Ball...

Page 20: ...crew x1 94075 5x8x0 3mm Washer x1 40024 40024 40024 13x16x0 2mm Shim x2 Adjust the backlash with the Shims ASSEMBLY OF THE REAR DIFFERENTIAL ONTO GEAR CASE ASSEMBLY OF THE REAR GEAR CASE COVER AND LOW...

Page 21: ...x2 94004 3x12mm Hex Screw x1 94042 4mm Nylon Nut x2 94004 3x12mm Hex Screw Tighten ASSEMBLY OF THE REAR SHOCK STAY ONTO REAR GEAR CASE 94004 94063 3x16mm Flat Head Hex Screw x1 94004 NO 2 BAG NO 4 Tig...

Page 22: ...1 3mm Nylon Nut x2 94006 3x18mm Hex Screw x2 94005 3x15mm Hex Screw NO 4 BAG NO 4 BAG 41346 41353 41312 41353 41346 41408 94021 94021 41340 41340 4x10mm Round Head Set Screw x2 94021 3x15mm Flat Head...

Page 23: ...41311 94006 30403 41350 94033 Step detail NO 4 BAG 34 ASSEMBLY OF THE REAR WHEEL HUBS NO 4 BAG Assemble both right and left side RIGHT SIDE x2 36055 2 5x16 8mm Pin x2 94034 4x4mm Set Screw x2 41335 2...

Page 24: ...to tighten as shown Approx 19mm 20 25 15 30 10 35 5 40 0 41350 36861 36850 41350 36850 RIGHT SIDE 94062 94006 3x18mm Hex Screw x2 3x22mm Hex Screw x2 RIGHT SIDE ASSEMBLY OF THE REAR UPPER ARMS NO 4 B...

Page 25: ...Approx 3 5mm 94044 2 5x8mm Hex Screw x2 39242 5x8x2 5mm Ball Bearing x1 94033 3x3mm Set Screw x1 ASSEMBLY OF THE REAR CENTER DIFF MOUNT 41327 41323 41356 41356 41356 39242 41325 38274 94044 Step deta...

Page 26: ...Hex Screw x10 Rear 41364 NO 6 BAG NO 16 41401 41357 94017 94017 94017 94027 4x16mm Flat Head Hex Screw x2 94003 3x10mm Flat Head Hex Screw x2 x2 94041 3mm Nylon Nut 44 ASSEMBLY OF THE FRONT GEAR CASE...

Page 27: ...CASE ONTO CHASSIS GEAR GREASE Apply a small amount of grease Step detail 94026 4X12mm Flat Head Hex Screw x4 Step 1 Step 2 Step 3 94003 3x10mm Hex Screw x1 94002 3x8mm Hex Screw x2 94001 3x5mm Hex Scr...

Page 28: ...2 x1 94041 3mm Nylon Nut x1 Use the screw provided with your servo 94040 3x8X0 5mm Washer x4 Sanwa Airtronics JR Futaba HiTech Choose the right servo horn adapter for your servo 48 NO 10 BAG ASSEMBLY...

Page 29: ...er x4 Personal transponder Not included Step 1 If participating in a competition bring your own transponder 94001 3X5mm Hex Screw x2 Step 2 ASSEMBLY OF THE RECEIVER INTO RADIO CASE 94033 3x3mm Set Scr...

Page 30: ...3 pins of the flywheel Use a phillips screw driver or needle nosed plier and bend the small end of the clutch springs behind the pilot shaft 41510 then press down Engine rotation direction 94005 3x15...

Page 31: ...1 Step 1 Step 2 94069 3x5mm Spring Washer x4 34110 5x10x4mm Ballbearings x2 58 ASSEMBLY OF THE ENGINE ONTO CHASSIS NO 7 BAG 41339 4x8mm Engine Mount Screw x4 Tighten the 41339 screw temporary 94075 10...

Page 32: ...e a piece of notebook paper between the gears and tighten the engine mount screws If the gear mesh is not correct the spur gear will be damaged 10079 97505 95700 SPRING AND GASKET 3mm Paper for Gear M...

Page 33: ...mm Set Screw x2 x1 94066 4x10mm Flat Head Screw Step 1 Step detail Step 4 Step 3 S e cr w n Ceme t 94066 94034 41050 94034 30687 61 ASSEMBLY OF THE MUFFLER ONTO THE ENGINE NO 7 BAG NO 13 10120 97500 r...

Page 34: ...ONTO ENGINE NO 8 BAG ASSEMBLY OF THE AIR FILTER 94002 3x8mm Hex Screw NO 8 BAG Step detail Step detail Step 1 Step detail Step 2 Apply filter oil to the foam before use x1 94002 41360 41502 41502 3069...

Page 35: ...5 94033 3x3mm Set Screw x2 NO 11 BAG Use the screw provided with your servo Sanwa Airtronics JR Futaba HiTech Choose the right servo horn adapter for your servo Step detail 10 Degree 50 Degree 41333 4...

Page 36: ...e pivot mounting position on the servo horn in case the Carburetor is not opening fully or if it is opening excessively Or if available on the Transmitter adjust the Throttle high end point Adjust 415...

Page 37: ...etail Step detail Use tools to tighten as shown 94059 2 6x6x0 5 Washer x4 40060 40060 94059 41011 30602 40055 41011 x2 40060 2 6mm Nylon Nut Do Not Over Tighten Hold the shock rod at it s thread with...

Page 38: ...3 30403 41350 41350 10mm Step detail 40mm 29mm Do Not Over Tighten Do Not Over Tighten Attention distance 73 SETTING THE SHOCK REBOUND TO 100 HIGH REBOUND HOC OI S K L Step detail Step 1 Step 2 Step 5...

Page 39: ...E SHOCKS SPRING Step 1 Step 2 Step 3 Cut 7mm 40058 41017 SHORT 41008 41008 41016 LONG Step 1 Step 2 REAR SHOCK FRONT SHOCK 40058 131mm 110mm 76 ASSEMBLY OF THE SHOCKS INTO THE SHOCK STAY 94040 3x8x0 5...

Page 40: ...x1 77 ASSEMBLY OF THE SHOCKS INTO THE SHOCK STAY NO 9 BAG Rotate Direction This screw has LEFT HAND THREAD SILVER 40559 94007 41346 94040 94041 Step 2 78 ASSEMBLY OF THE FUEL TUBE NO 10 BAG Step 1 St...

Page 41: ...ensure the rim and tire are fully glued Step detail Agglutination place NO 12 BAG 40550 Wheel Nut x4 80 ASSEMBLY OF THE TIRES ONTO THE FRONT KNUCKLE AND REAR HUB Assemble both left and right sides 405...

Page 42: ...hown 3mm MAKING HOLES AND CUTTING ON THE BODY SHELL Step 1 Step 2 Wash the inside of the body shell with mild detergent and then rinse and dry thoroughly WASH THE INSIDE OF THE BODY SHELL 4mm Body Rea...

Page 43: ...king tape Paint the body with polycarbonate spray paints When you have finished painting peel off the external protective films When the paint is dry remove the window mask PAINTING BODY SHELL MOUNTIN...

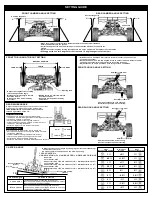
Page 44: ...weight transfer during acceleration increases on power traction quicker off power steering into corners slight tendency to push on power at corner exit increases steering response better on tighter mo...

Page 45: ...O O T S S IL IC O N 9 9 5 4 1 3 5 9 T H R O T T L E S T E E R IN G L E V E R S E T X 3 1 3 9 5 4 0 0 6 0 S H O C K P IS T O N L O C K N U T 2 5 m m 4 P C 4 9 5 4 1 3 6 0 A IR F IL T E R F O A M S E T...

Page 46: ......

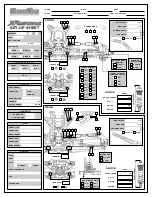
Page 47: ...E HEIGHT CAMBER ANGLE mm TOE ANGLE SWAY BAR mm FRONT SPINDLE CARRIERS CASTER 22 24 20 1 2 3 1 2 1 2 3 2 1 4 5 RIDE HEIGHT CAMBER ANGLE mm SWAY BAR mm INSERT NR INSERT NR WHEELBASE SHIMS 2mm 2 5mm 0mm...

Page 48: ......

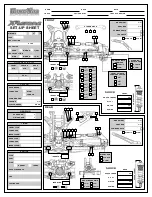
Page 49: ...E HEIGHT CAMBER ANGLE mm TOE ANGLE SWAY BAR mm FRONT SPINDLE CARRIERS CASTER 22 24 20 1 2 3 1 2 1 2 3 2 1 4 5 RIDE HEIGHT CAMBER ANGLE mm SWAY BAR mm INSERT NR INSERT NR WHEELBASE SHIMS 2mm 2 5mm 0mm...

Page 50: ......

Page 51: ...he appropriate answers a Yes No Is kit box damaged b Yes No Factory Seal sticker was secure c Yes No I am the original owner d Yes No I have contacted the dealer first 10 Describe your issue fully and...

Page 52: ......

Page 53: ...provide many hours of enjoyment The registration card should be filled out and mailed to OFNA Racing within 10 days of purchase date IMPORTANT Please print or type filling in the information listed be...

Page 54: ......

Reviews: