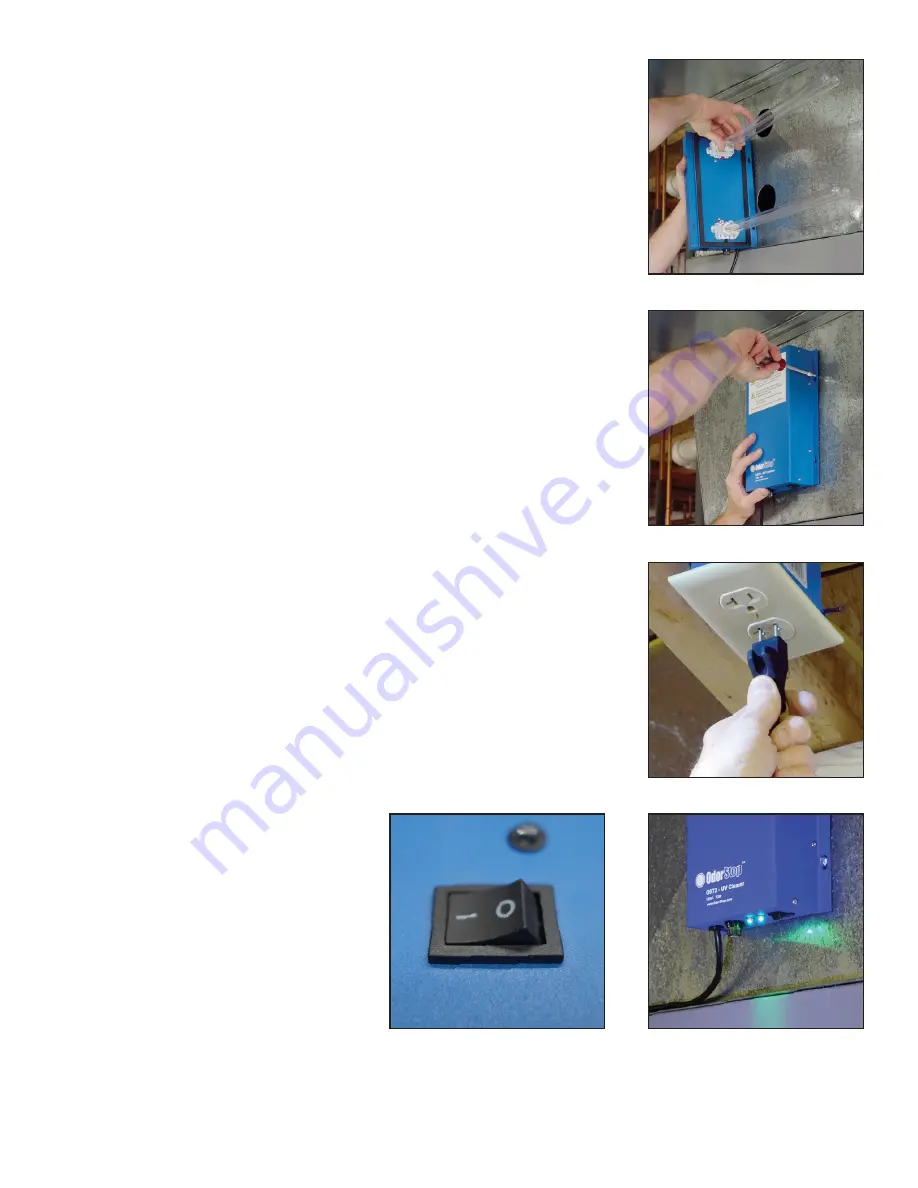
5. Install the bulb in the unit by sliding the bulb in from the outside until
the bulb snaps into place. Insert the unit into the metal duct work. If
you touch the bulb with your hands, use a cloth to wipe any fingerprints
from the bulb(s).
6. Attach the unit to duct work with the supplied 4 sheet metal screws
using a ¼” nut driver. Make sure to tighten screws evenly. The unit has
a factory installed gasket that ensures a tight seal between the unit and
the duct work. Be sure the unit is flat against the duct work on all sides.
CAUTION: DO NOT OVERTIGHTEN SCREWS.
7. Plug the unit into a grounded 120 volt power outlet.
8. Turn unit on and verify that the
LED indicator light(s) located near
the on/off switch is/are illuminated.
The switch is in the on position
when the solid line on the switch
is pressed down. If the green LED
light(s) are not illuminated, see
troubleshooting section.
4


