


Scan the QR to download
ODEV Blockly
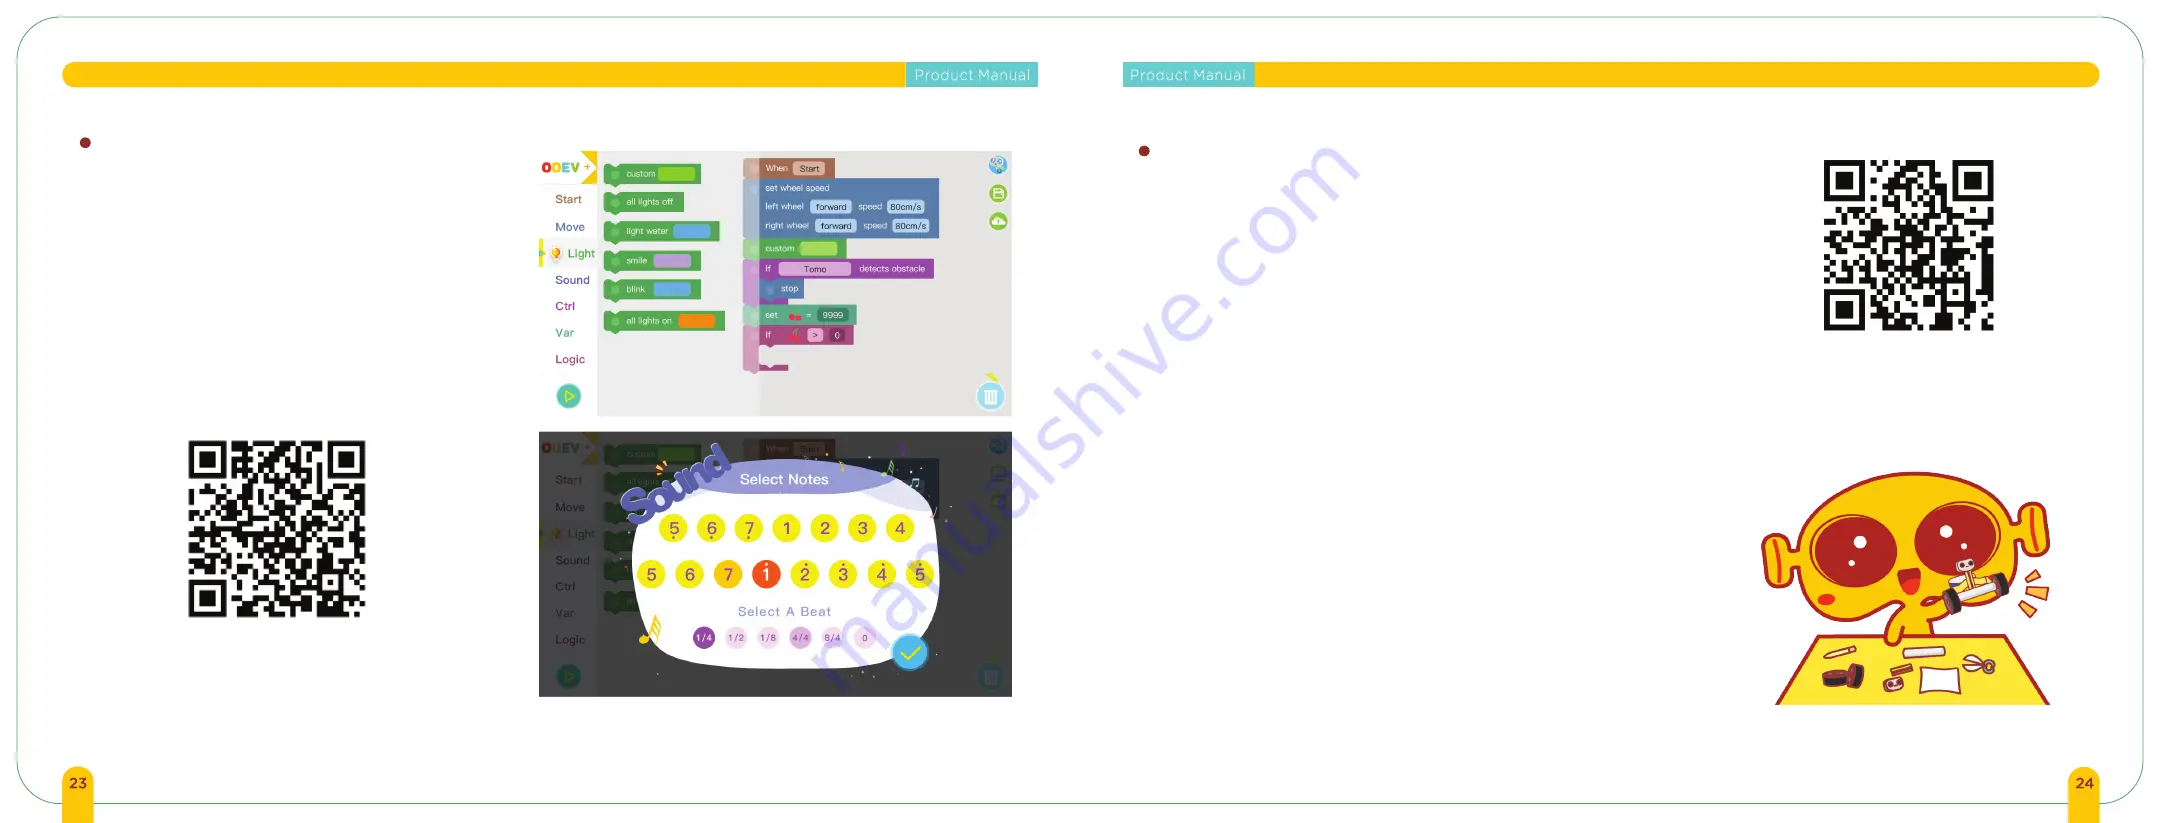
APP: ODEV Blockly
FAQ
ODEV Blockly is an intermediate-advanced app using graphical
programming as a tool to control Tomo. Children can create a small
program by dragging and stacking all kinds of programming
module blocks which will provide a directional path for Tomo. ODEV
Blockly can enable children to learn programming and explore the
full use of Tomo’ s directional and LED features. Please scan QR
code to download the ODEV Blockly app in Apple App Store and
Google Play.
Q: Why doesn't the robot respond after pressing the ON button?
1. Check to see if the batteries were installed correctly.
2. Press and hold the ON button for 3 seconds to turn on the robot (you should hear a beep
sound when the robot is on or off).
3. Make sure your phone or tablet has been connected to the robot via Bluetooth.
Q: Why does the robot move in the opposite direction from the control direction?
1. Exchange the motor wire connectors to resolve this issue.
Q: Why is the Dicycle unbalanced or unresponsive?
1. The power of battery may be low and needs to be replaced.
2. Make sure the motor wires are not touching the wheels. (you can use a tape to secure the
wires.)
3. The operating mode on the ODEV Explorer app that is selected is wrong. Please make
sure to choose Dicycle and connect it via bluetooth each time you open the app.
4. After successfully connecting Dicycle via Bluetooth, you must toggle Tomo upright for the
auto balance feature to begin.
Q: My smartphone/tablet is unable to connect to Tomo. What can I do?
1. Make sure the Bluetooth is enabled on your smartphone or tablet and keep it to a close
proximity to Tomo.
2. Try restarting the app, and restart Tomo.
Q: Why is the screw coming loose?
1. Due to the movement of Tomo, the screw may become loose during movement. It is
crucial to ensure that all the screws are fastened tightly.
Q: Why is the tracking sensor not working properly?
1. Do not use the tracking sensor under high exposure light.
2. The tracking sensor is installed above or below the recommended height.
3. Please check whether the wiring is connected correctly.
4. Please try to keep the tracking map flat.
APP
FAQ
For more info about ODEV
products, please scan the QR
code to visit our website.
www.odevbot.com
Note: you can only use music/sound mode with Tricycle.


