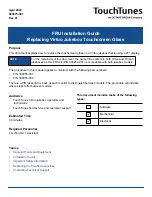
background image

2

Replacing Virtuo Jukebox Touchscreen Glass
Required Tools and Equipment

Required Tools and Equipment

To perform the steps in this installation, the following tools and equipment are required:

Cross-head screwdrivers, #1 and #2

Precision flat blade screwdriver or similar tool

Protective gloves for handling the glass (in case of broken glass)

Vacuum cleaner (in case of broken glass or debris)

Anti-static wrist strap

Torque-limiting screw and nut driver and metric 7 mm socket. Do not use a standard ratchet, which can lead 

to over-torquing. 

A regular nut driver (with 7mm socket) can be used, as long as you avoid over-torquing when 

tightening the nuts and screws.

Included in the Kit

Ensure that you have received all required parts before proceeding with this installation.

Important Safety Information 

Replacing the Touchscreen Glass

1 Press the 

MNGR

 button on the I/O Board to open the Operator interface main menu.

2 On the Virtuo screen, press the 

REBOOT

 button.

Part

Quantity

Part Number (P/N)

MON, REPL TS GLASS, SENTONS, 27"

1

300956-001

SUB, CTRL, TOUCH, SENTONS 27"

1

300958-004

MAN, (this document)

1

900975-001

WARNING: 

When performing this procedure or any other maintenance on your jukebox, the 

jukebox 

must

 be powered off and its electrical power disconnected.

IMPORTANT: 

A properly-grounded anti-static wrist band should be worn at all times during the 

procedure presented in this document.

CAUTION:

 The touch screen glass weighs approximately 25 lbs. Enlist the help of an assistant 

when installing the replacement glass.

CAUTION:

 Use care when handling the glass being replaced, as it can contain sharp and 

broken pieces. Use care when handling the replacement glass to prevent debris, markings and 
fingerprints from contacting the interior surface of the glass and the face of the monitor.

Summary of Contents for 300955-001

Page 1: ...it Important Safety Information Replacing the Touchscreen Glass Contacting Technical Support NOTE For the remainder of this document the name Virtuo refers to both Virtuo and Virtuo II jukeboxes as th...

Page 2: ...rmation Replacing the Touchscreen Glass 1 Press the MNGR button on the I O Board to open the Operator interface main menu 2 On the Virtuo screen press the REBOOT button Part Quantity Part Number P N M...

Page 3: ...the AC power cable from the wall socket 5 Disconnect all of the connectors from the bottom of the display this includes power serial and DVI Remove connections from bottom of the touchscreen monitor...

Page 4: ...later in this procedure 8 The touchscreen is secured to the inside of the door with 10 nuts fastened to studs on the rear of the unit and is removed by lifting it away from the exterior of the Virtuo...

Page 5: ...it 9 Loosen the screws on the brand bar Do NOT remove them This is to ensure that you can safely remove the monitor glass assembly without damaging it 10 With one hand positioned on the bottom rear of...

Page 6: ...itor face down on a flat surface that is preferably covered with a soft cloth or other padding that will prevent damage to the glass and monitor 12 Remove the 4 screws that hold the back cover of the...

Page 7: ...ng the Touchscreen Glass 13 For monitor model 300955 002 remove the 2 screws that hold the small metal cover in place at the top of the monitor Set the cover and screws aside to be re installed later...

Page 8: ...ep 2 additional cables must be unplugged the backlight ctrl cable highlighted in red in the following figure and the LVDS video cable highlighted in green in the following figure For the backlight ctr...

Page 9: ...ther side of the monitor and glass Remove monitor screws 300955 001 monitor model shown For the 300955 001 model once these four screws highlighted in yellow in the following figure have been removed...

Page 10: ...igure so that the ribbon cable can be detached from the monitor control board Set this tape aside as you will be re using it in a moment Remove Kapton tape IMPORTANT From this point on and until the b...

Page 11: ...Virtuo Jukebox Touchscreen Glass Replacing the Touchscreen Glass 18 Using a thin flat tool carefully lift up the small black tab on the ribbon connector and then push off the tape connection Remove ta...

Page 12: ...Remove ribbon 20 Disconnect the remaining cables on the control board 21 Remove the 5 screws that hold the control board to the monitor highlighted in red in the following figure and set them aside to...

Page 13: ...creen glass assembly on a clean flat surface Make sure that the glass does not get scratched Lay the touchscreen glass assembly on clean cloth material to avoid the risk of scratching the glass Replac...

Page 14: ...een Glass 26 For the model 300955 002 insert the monitor into position on the touchscreen glass lifting the ribbon to keep it from getting stuck between the glass and the monitor Fasten the screws on...

Page 15: ...in 300955 001 model bracket and LCD panel 27 For the monitor model 300955 001 reconnect the LVDS and backlight ctrl cables For the backlight ctrl cable replace the aluminum tape that you set aside ear...

Page 16: ...the Touchscreen Glass 28 Take the replacement control board included in this FRU kit out of its packaging and fasten it to the monitor using the 5 screws you removed earlier Fasten control board scre...

Page 17: ...r being careful to leave a small amount of slack at both ends to avoid putting stress on the ribbon 32 Replace the monitor s back cover and fasten it using the 4 screws you removed earlier See figure...

Page 18: ...eled with P N 300955 002 place the small metal cover at the top of the monitor so that it protects the ribbon Fasten the cover in place This step does not apply to monitor model 300955 001 Place and f...

Page 19: ...tuo Jukebox Touchscreen Glass Replacing the Touchscreen Glass 36 Loosen the brand bar screws slightly to ensure the touchscreen glass gasket does not get damaged when performing the next step Loosen b...

Page 20: ...two nuts for mounting the camera following the numbered sequence shown in the figure Sequence of nuts to remove 300955 001 monitor model shown The numbered sequence follows an X pattern 39 Place the c...

Page 21: ...camera s position If the camera is pointing at too high or too low an angle adjust the angle using the adjustment screw Turn the screw a half turn at a time checking the Preview screen between each ha...

Page 22: ...uchscreen Glass Contacting Technical Support Contacting Technical Support If you need help or have questions about this guide call the TouchTunes Tech Line at 888 338 5853 To help us assist you more e...

Reviews: