background image


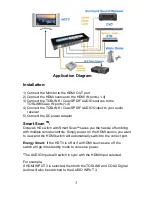
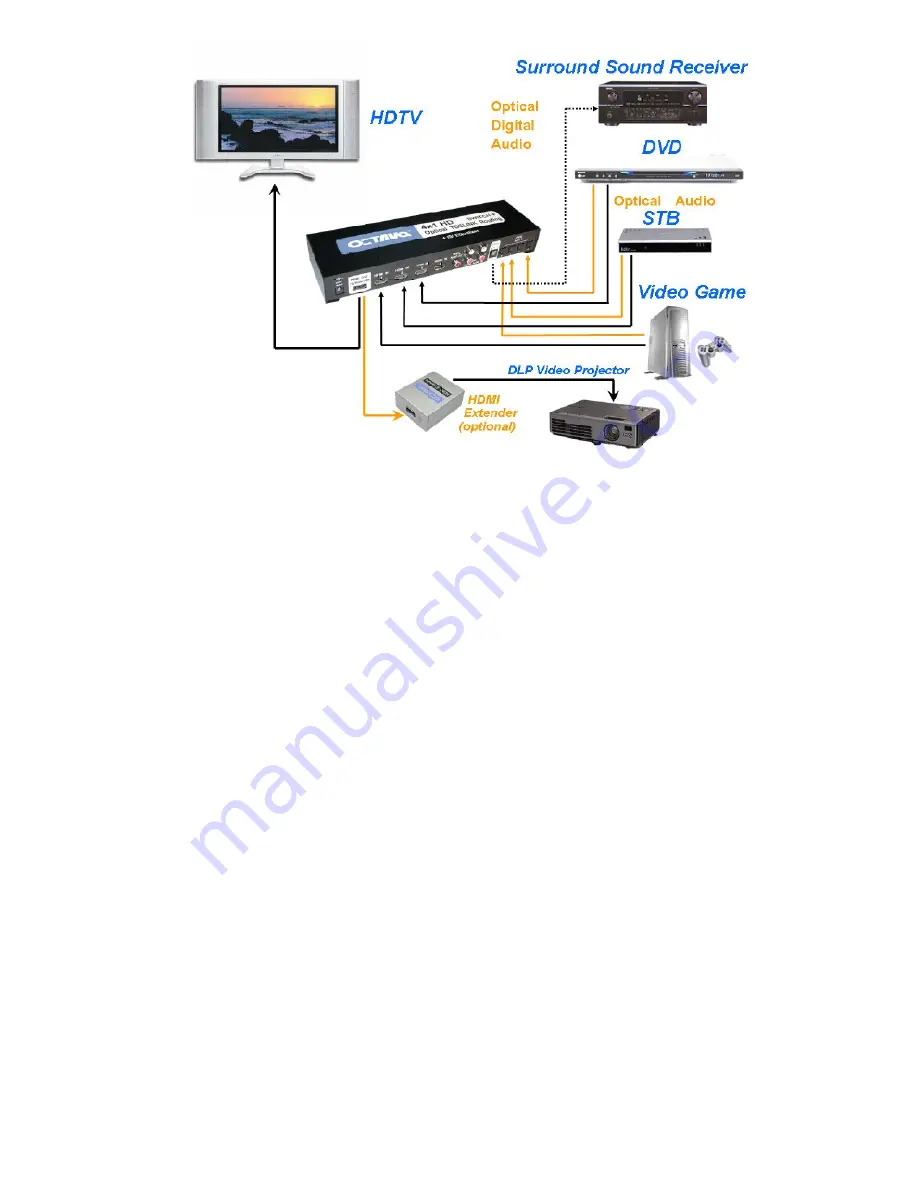
Application Diagram 


Installation: 

 
1) Connect the Monitor to the HDMI OUT port 
2) Connect the HDMI sources to the HDMI IN ports (1-4) 
3) Connect the TOSLINK / Coax SPDIF AUDIO sources to the 

TOSLINK/Coax IN ports (1-4) 

4) Connect the TOSLINK / Coax SPDIF AUDIO Output to your audio 

receiver 

5) Connect the DC power adapter 


Smart Scan

 TM

:


Octav

a’s HD switch with Smart Scan

TM

 saves you the hassle of fumbling 

with multiple remote controls. Simply power on the HDMI source you want 
to view and the HDMI switch will automatically switch to the correct port.     
 

Energy Smart:

 If the HDTV is off or if all HDMI sources are off, the 

switch will go into standby mode to conserve power.


"The AUDIO Inputs will switch in sync with the HDMI Input selected. 
 
For example,   
If HDMI INPUT 3 is selected, then both the TOSLINK and COAX Digital 
Audio will also be switched to the AUDIO INPUT 3.


Summary of Contents for Smart Scan

Page 1: ...1 Installation Guide ...

Page 2: ...2 Contents Application Diagram 3 Installation 3 Smart ScanTM 3 Configuring Smart ScanTM 4 Description 4 Features 4 Remote Control Guide 5 Warranty 7 Disclaimers 7 Specifications 8 ...

Page 3: ...Octava s HD switch with Smart ScanTM saves you the hassle of fumbling with multiple remote controls Simply power on the HDMI source you want to view and the HDMI switch will automatically switch to the correct port Energy Smart If the HDTV is off or if all HDMI sources are off the switch will go into standby mode to conserve power The AUDIO Inputs will switch in sync with the HDMI Input selected F...

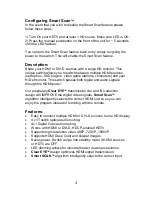
Page 4: ...ses both digital and audio signals through the HDMI ports Our proprietary Clear EYETM transmission line and ISI reduction design will IMPROVE the digital video signals Smart ScanTM algorithm intelligently selects the correct HDMI source so you can enjoy the program instead of fumbling with the remote Features Easy to connect multiple HDMI or DVI D sources to one HD display 4 x1 Toslink optical aud...

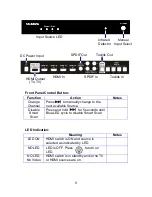
Page 5: ...ng numbered source Turns ON OFF the LED light Turns ON HDMI switch Put HDMI switch to Standby mode Other Not used Octava s Remote control uses discrete code so can be easily integrated with most Universal Remote Controls such as Logitech s Harmony Pressing ON OFF Turns On Off the HDMI switch Pressing 1 5 Selects the corresponding numbered source Pressing LED Turns on off the Blue LED light ...

Page 6: ...ds until Blue LED cycle to disable Smart Scan Meaning Notes LED ON HDMI switch is ON and source is selected as indicated by LED NO LED LED is OFF Press to turn on LED NO LED No Video HDMI switch is in standby and or no TV or HDMI sources are on Input Source LED Infrared Detector Manual Input Select DC Power Input HDMI Output To TV HDMI In Toslink In SPDIF In SPDIF Out Toslink Out ...

Page 7: ...ITS SUPPLIER S LIABILITY FOR ANY CLAIM WHATSOEVER EXCEED THE COST OF THE PRODUCTS GIVING RISE TO THE CLAIM WHETHER BASED IN CONTRACT WARRANTY INDEMNITY OR TORT INCLUDING WITHOUT LIMITATION NEGLIGENCE AND STRICT LIABILITY OR OTHERWISE IN NO EVENT SHALL OCTAVA INC OR ITS SUPPLIERS BE LIABLE FOR ANY SPECIAL INCIDENTAL CONSEQUENTIAL OR OTHER INDIRECT DAMAGES INCLUDING WITHOUT LIMITATION LOSS OF REVENU...

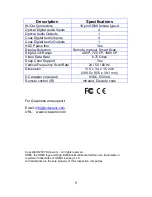
Page 8: ...75 Gbps Deep Color Support Yes Vertical Frequency Scan Rate 24 50 60 Hz Dimension 11 5 x 3 4 x 1 5 inch 290 5 x 85 5 x 38 1 mm DC adapter included 9VDC 500mA Remote control IR Infrared Discrete code For Questions and support Email info octavainc com URL www octavainc com Copyright 2007 Octava Inc All rights reserved HDMI the HDMI logo and High Definition Multimedia Interface are trademarks or regi...

Reviews: