B.
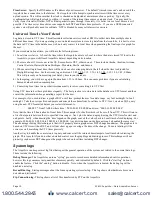
Press the Select button once to select the TCP/IP Config menu options, first of which is DHCP:
[TCP/IP Config]
DHCP on/off
C.
Press the Menu button once to see the TCP/IP IP Address menu:
[TCP/IP Config]
IP Address
D.
Press the Select button again to select the IP Address menu:
[IP Address]
192.168.40.50
E.
At this point, the cursor on the display will be blinking on the first number in the IP address on the second
line.
F.
To change the number, press the Menu button and the display will cycle through the digits 0-9 as well as
“.”. Once the correct digit is displayed, press the Select button to advance to the next digit and repeat the
process until all the digits are correct.
G
. Once the IP address on the AcquiLite matches the assigned IP address, press the Select button once more to
return to the main TCP/IP menu.
Step 3 -
Set the Netmask, Gateway, and DNS server(s) addresses as noted in the chart "Network Address Worksheet" using
the same technique as shown above. The only change is that after Step B, press the Menu button multiple times to see the
Netmask, Gateway, and DNS setup menus, then push the Select button to set the options.
Note: If DHCP configuration is selected, the IP, Netmask, Gateway, and DNS server addresses will be obtained
automatically. Simply select the “Enable DHCP” from the first TCP/IP configuration menu.
Step 4 -
After the address information has been set, you must reboot the AcquiLite. Select the "(Previous Menu)" option
after step B above. The menu will then state that the AcquiLite must be rebooted to take effect. Press the Select button to
allow the AcquiLite to reboot.
Once the AcquiLite has rebooted, the new IP address will be displayed on the console. If DHCP addressing was specified,
the server assigned address will be displayed.
Note: if DHCP is unable to obtain an IP address, the AcquiLite will use the fallback address of 192.168.0.100.
Laptop/Computer Setup
Step 1
- You must have a computer to access and configure the AcquiLite. This computer must have an Ethernet connection
(on the LAN or by direct connection) and must have a web browser installed such as Internet Explorer or Firefox.
Note: If your building already has an existing LAN to which the AcquiLite is attached, you can use an existing computer on
that LAN. Check with your network administrator for details. If this option is available, use a LAN-connected computer and
skip to the “AcquiLite administration overview” section below.
The remainder of this section will assume the installer has brought a laptop to the site, and will connect the laptop to the
Page 8
A7810 AcquiLite – Data Acquisition Server
www.calcert.com
1.800.544.2843
0
5
10
15
20
25
30


